tracks, blocks & the timeline
1. Tracks
Similar to Digital Audio Workstations (DAWs), Caedence allows you to organize information into Tracks. There are functions that all Track Types have in common, as well as specialized functions specific to certain Track Types.
Track Type Details
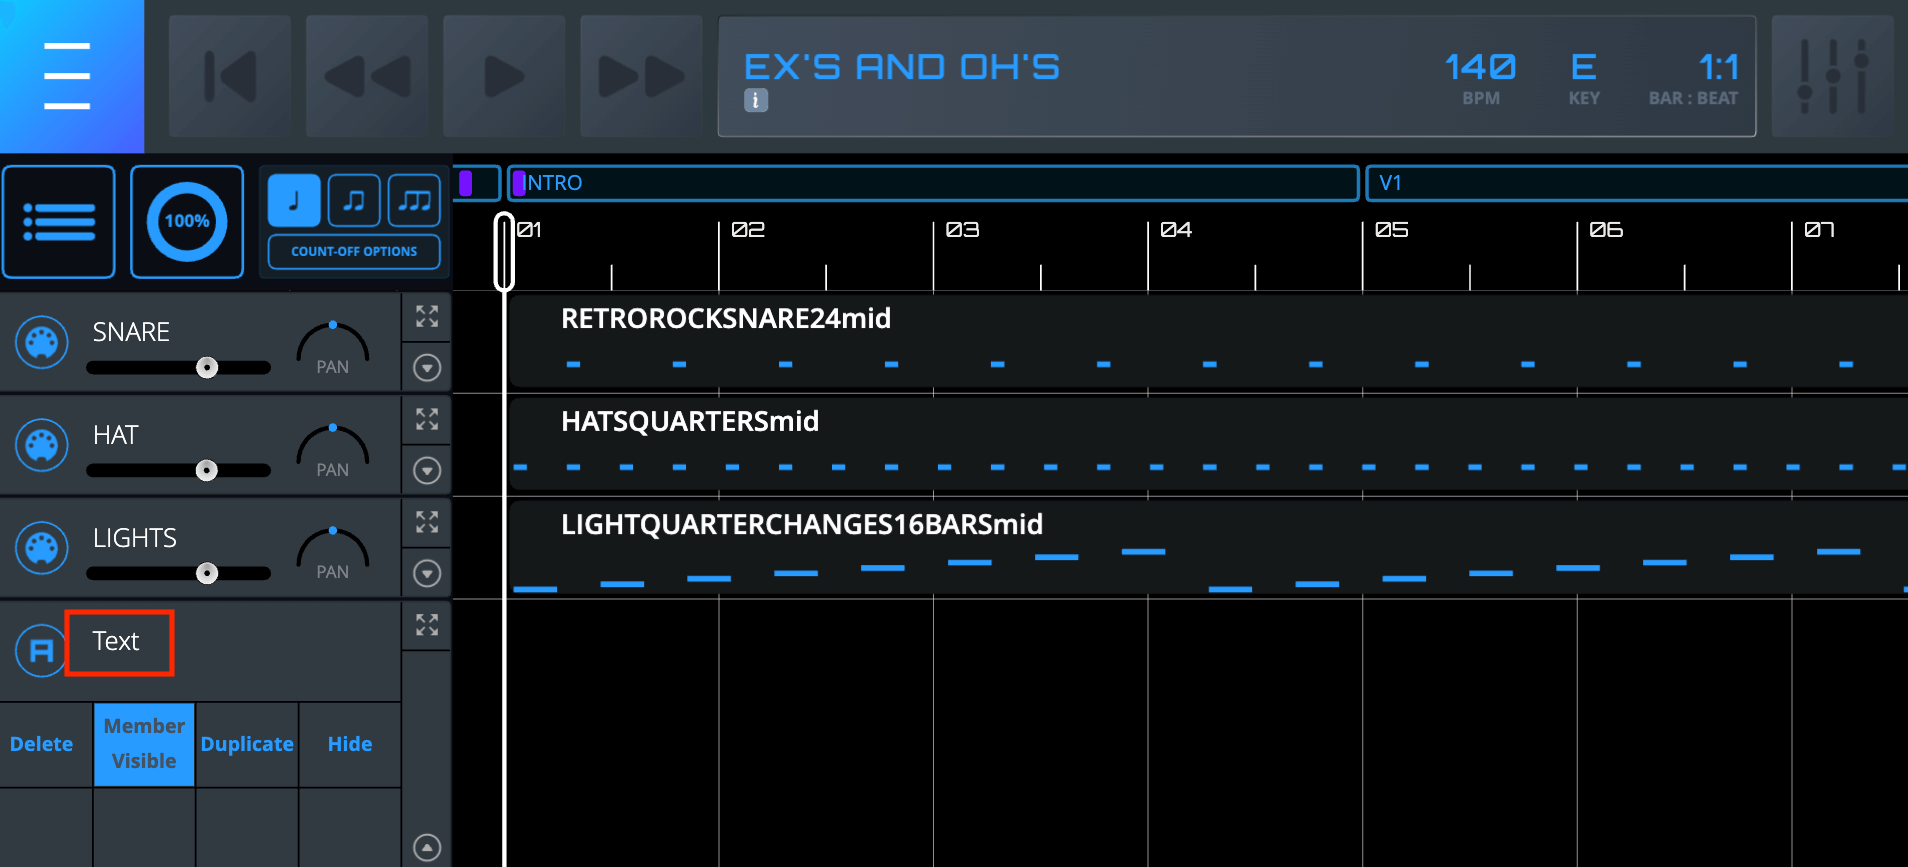
- Text Track
- Accepts Files? – No
- Has Full-Screen View? – No
- Transposes? – No
- Has Trimmable Blocks? – Yes
- Has Special Functions? – No
- Chord Track
- Accepts Files? – No
- Has Full-Screen View? – Yes
- Transposes? – Yes
- Has Trimmable Blocks? – Yes
- Has Special Functions? – Yes
- Lyrics Track
- Accepts Files? – No
- Has Full-Screen View? – Yes
- Transposes? – No
- Has Trimmable Blocks? – Yes
- Has Special Functions? – Yes
- PDF Track
- Accepts Files? – Yes
- Has Full-Screen View? – Yes
- Transposes? – No
- Has Trimmable Blocks? – Yes
- Has Special Functions? – Yes
- Audio Track
- Accepts Files? – Yes
- Has Full-Screen View? – No
- Transposes? – No
- Has Trimmable Blocks? – No
- Has Special Functions? – Yes
- MIDI Track
- Accepts Files? – Yes
- Has Full-Screen View? – Yes
- Transposes? – Yes (if unlocked)
- Has Trimmable Blocks? – No
- Has Special Functions? – Yes
- Image Track
- Accepts Files? – Yes
- Has Full-Screen View? – Yes
- Transposes? – No
- Has Trimmable Blocks? – Yes
- Has Special Functions? – Yes
- Video Track
- Accepts Files? – Yes
- Has Full-Screen View? – Yes
- Transposes? – No
- Has Trimmable Blocks? – Yes
- Has Special Functions? – Yes
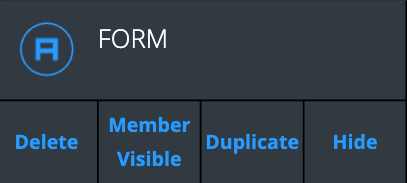
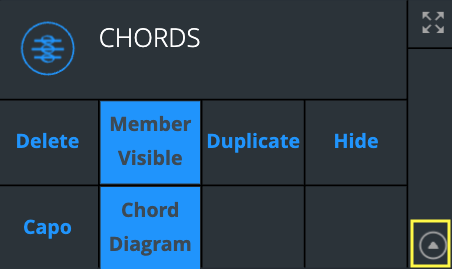
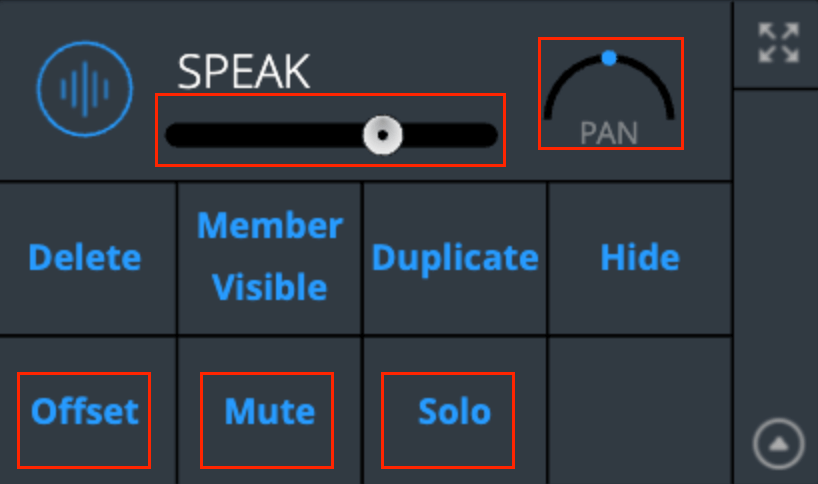
Common Track functions are in the top row of the Track Control Tray and include:
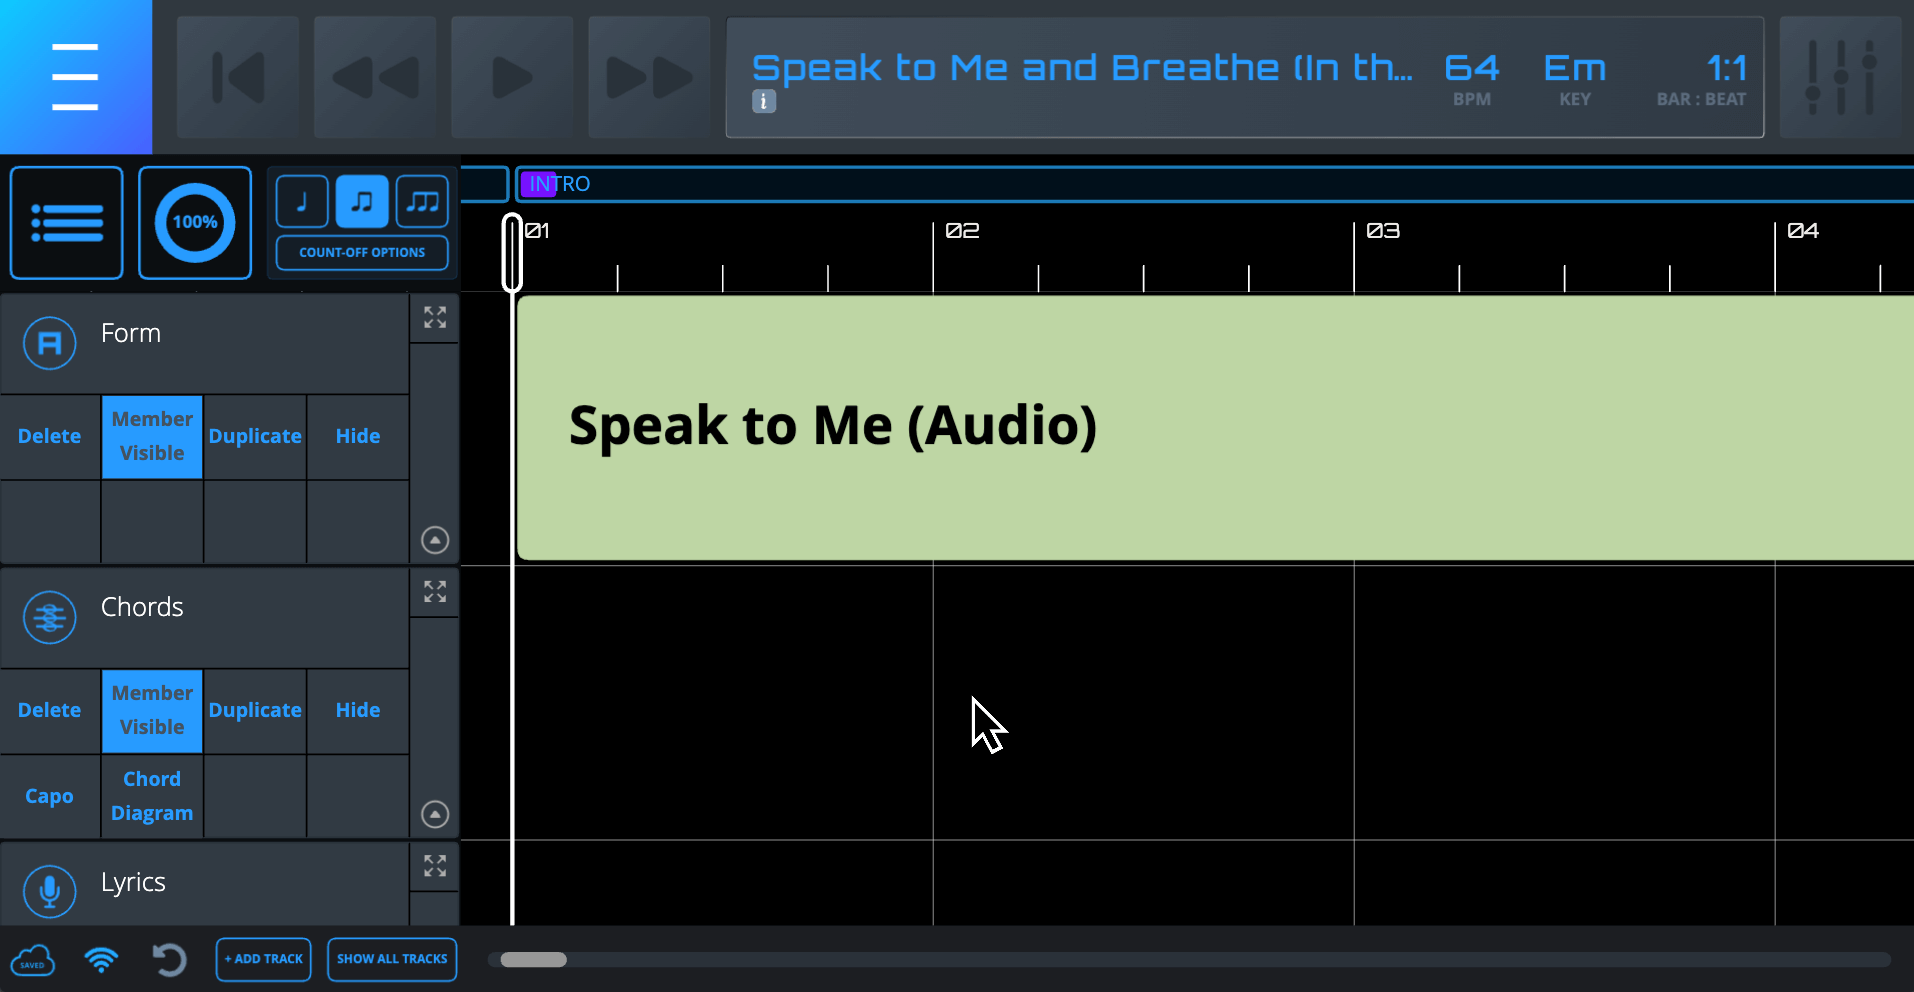
- Delete – Deletes a Track (Song Owners only). Note – All Blocks on a Track must be deleted before that Track can be deleted.
- Member Visible – Hides or reveals a Track to Band Members (Song Owners only). Note – Band Members with Permission for a Track will still be able to see that Track even if the Song Owner has not made it visible to all Band Members.
- Duplicate – Creates an exact copy of the Track (Song Owners only)
- Hide – Hides a Track for a specific user based on their preferences. All Band Members can customize which Tracks are hidden. These view preferences are saved automatically per user and persist across different devices until the user makes a subsequent change.
In addition to hiding Tracks, all Band Members can choose:
Track Height – Clicking the Track Height Toggle Button toggles between regular and short track heights. These preferences are saved automatically per user and persist across different devices until the user makes a subsequent change.
Full-Screen – Clicking the Track Full-Screen Button sets a full-screen view for that Track. Chords, Lyrics, PDF, Image, MIDI, and Video Tracks have full-screen displays.
More Details About Full-Screen View
- All Band Members can choose which Track is in full-screen on their view. These preferences are saved automatically per user and per Song – and persist across different devices until the user makes a subsequent change.
- As implied, only one Track can be in full-screen at a given time.
- On desktops/laptops, use the “Escape” key during Playback to exit full-screen and return to the scrolling Main Interface. In touch environments (iPads and other tablets), use a three-finger touch to return to the Main Interface.
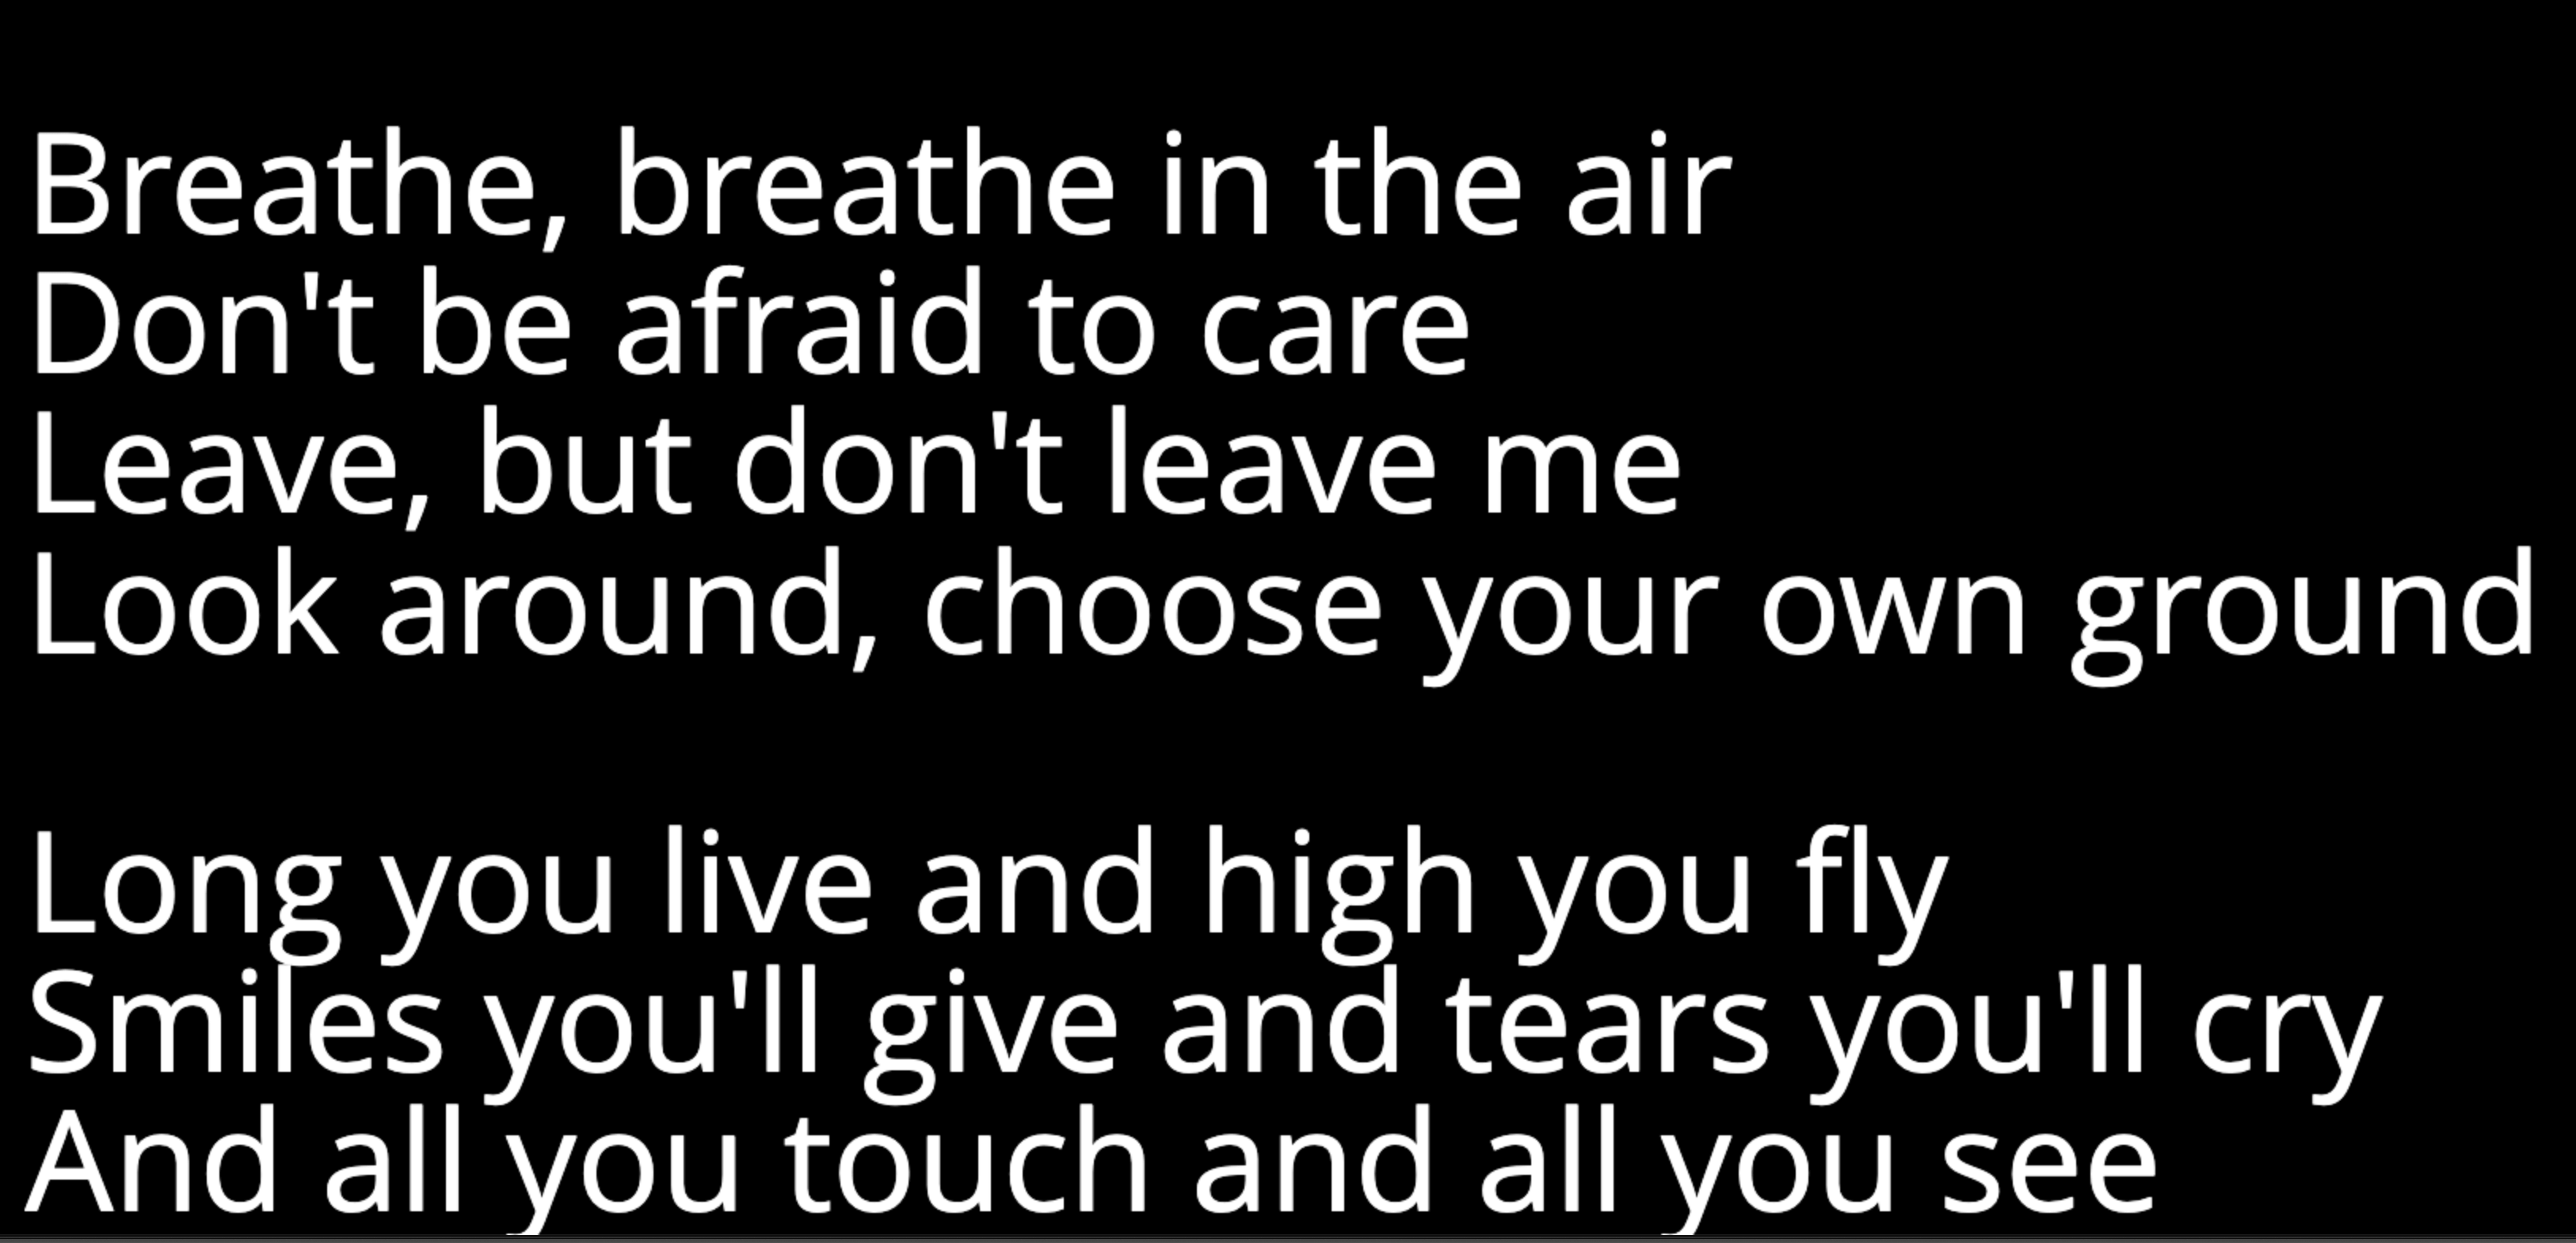
- Except for PDF Tracks, as soon as eligible tracks are toggled to full-screen, they immediately enter full-screen view. If there is no content Block underneath the Playhead when an Image, Lyric, or Video Track is put into full-screen, the screen will display as black until the Playhead moves over a Block with content. This is normal.
- Once you toggle a Track to full-screen view, that view is saved for that Song.
Naming a Track
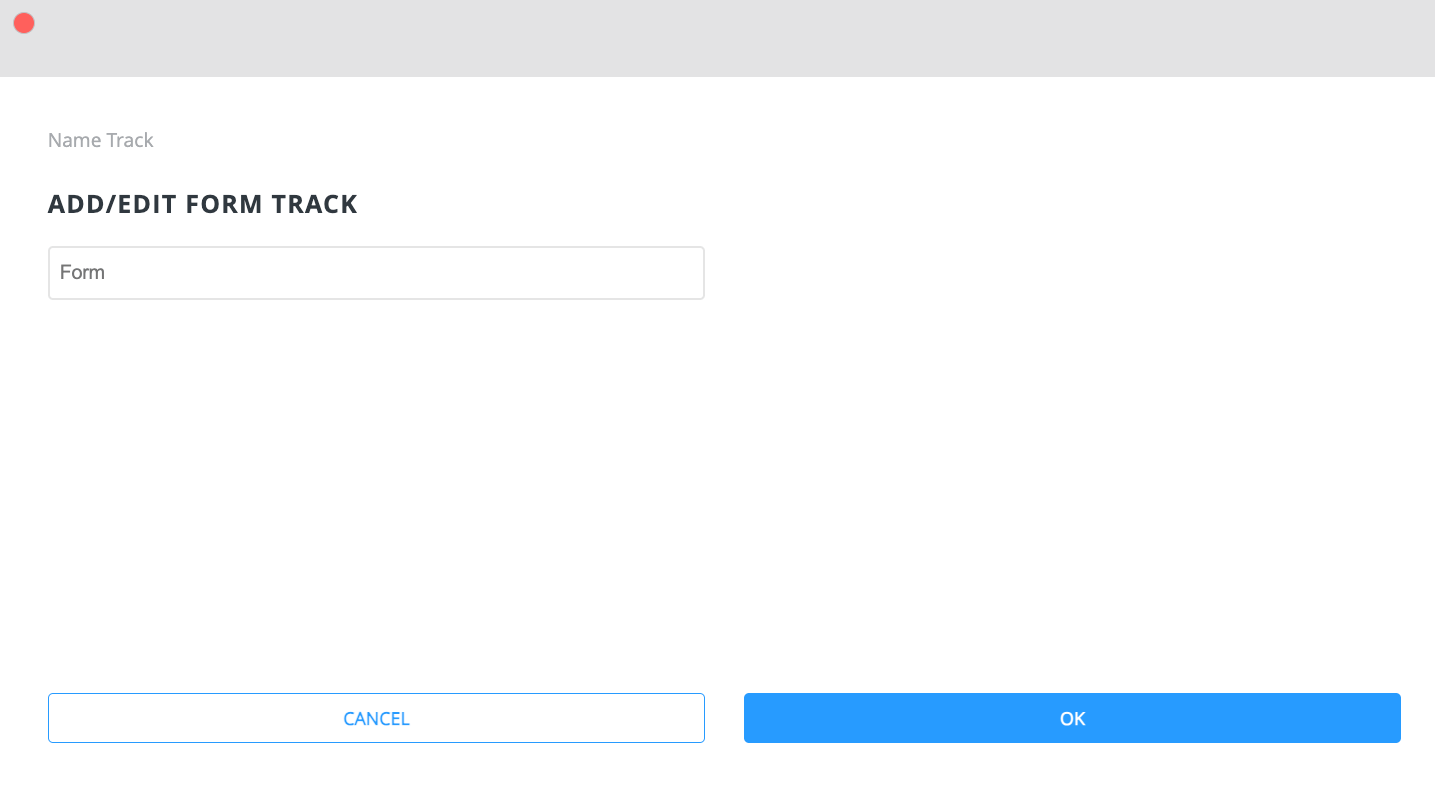
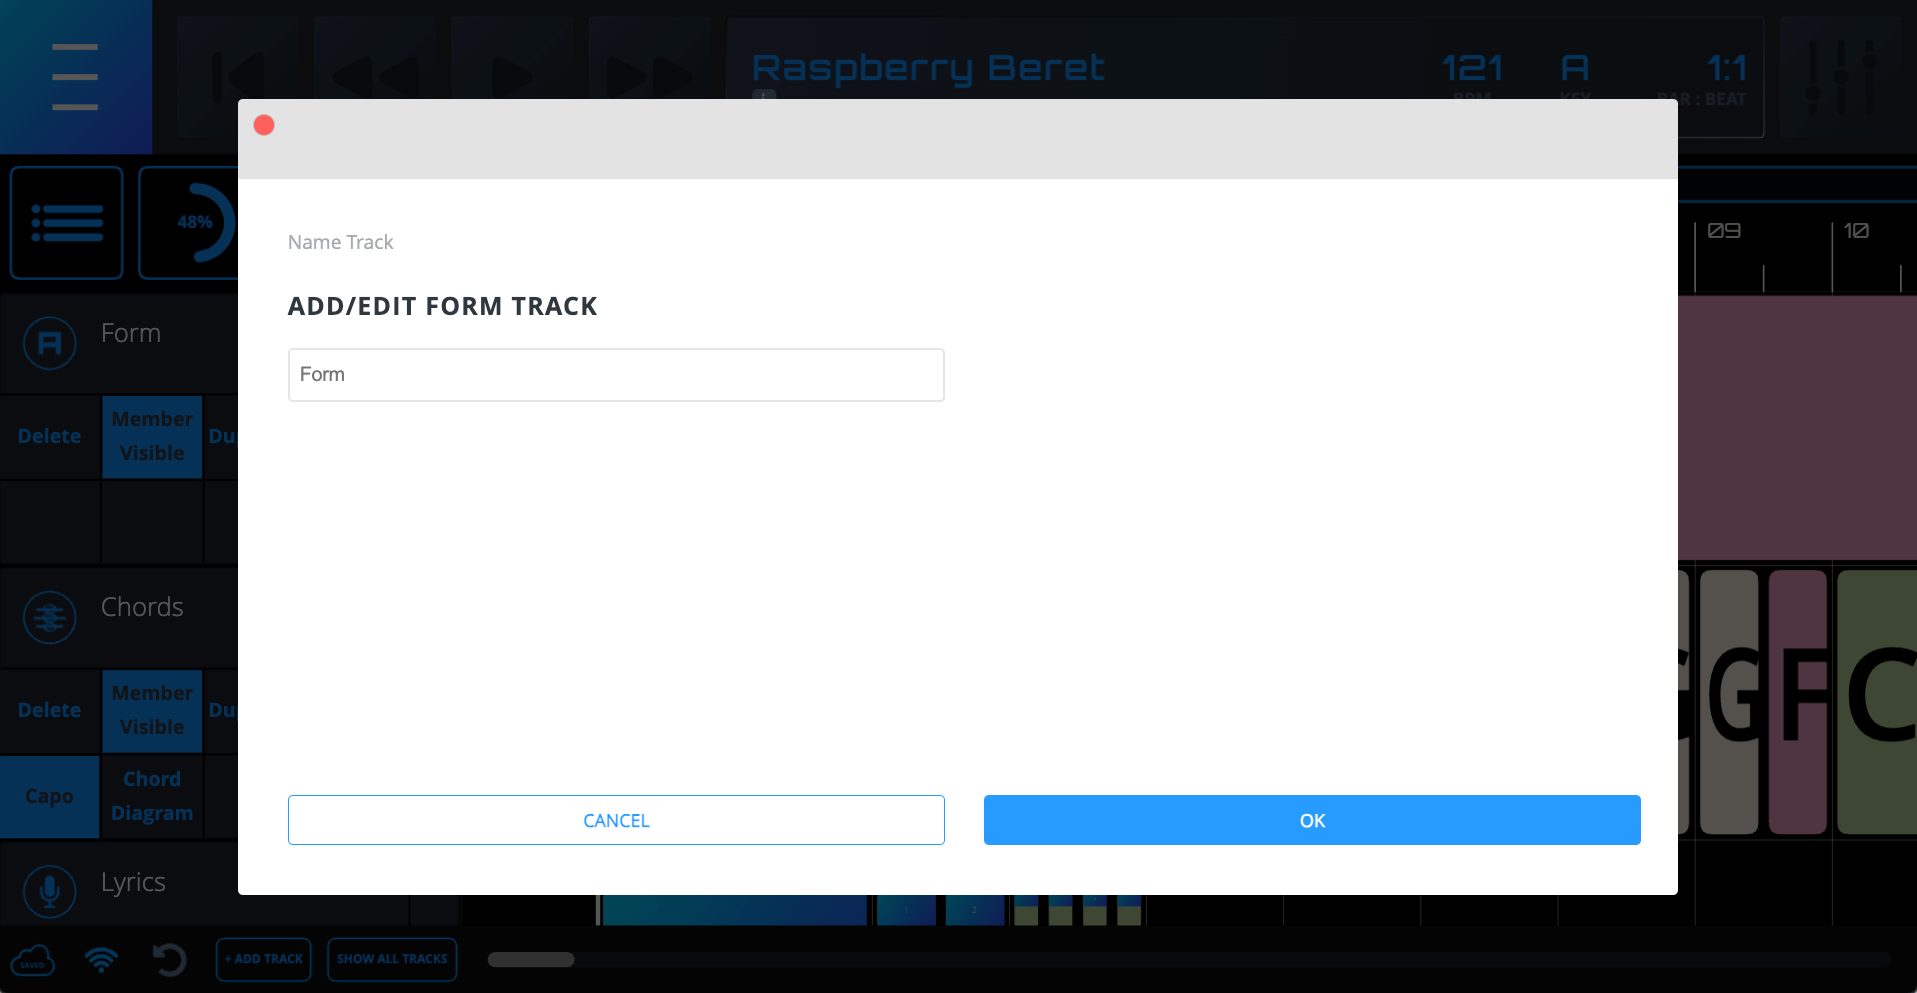
Clicking on the Track Name opens a dialog where the Song Owner and Band Members with correct Permission can edit it. Note – Editing a Track Name is only possible when it is set to regular height.
Track Reordering (Song Owners only)
To reorder tracks:
- Set the Track you want to move to short height
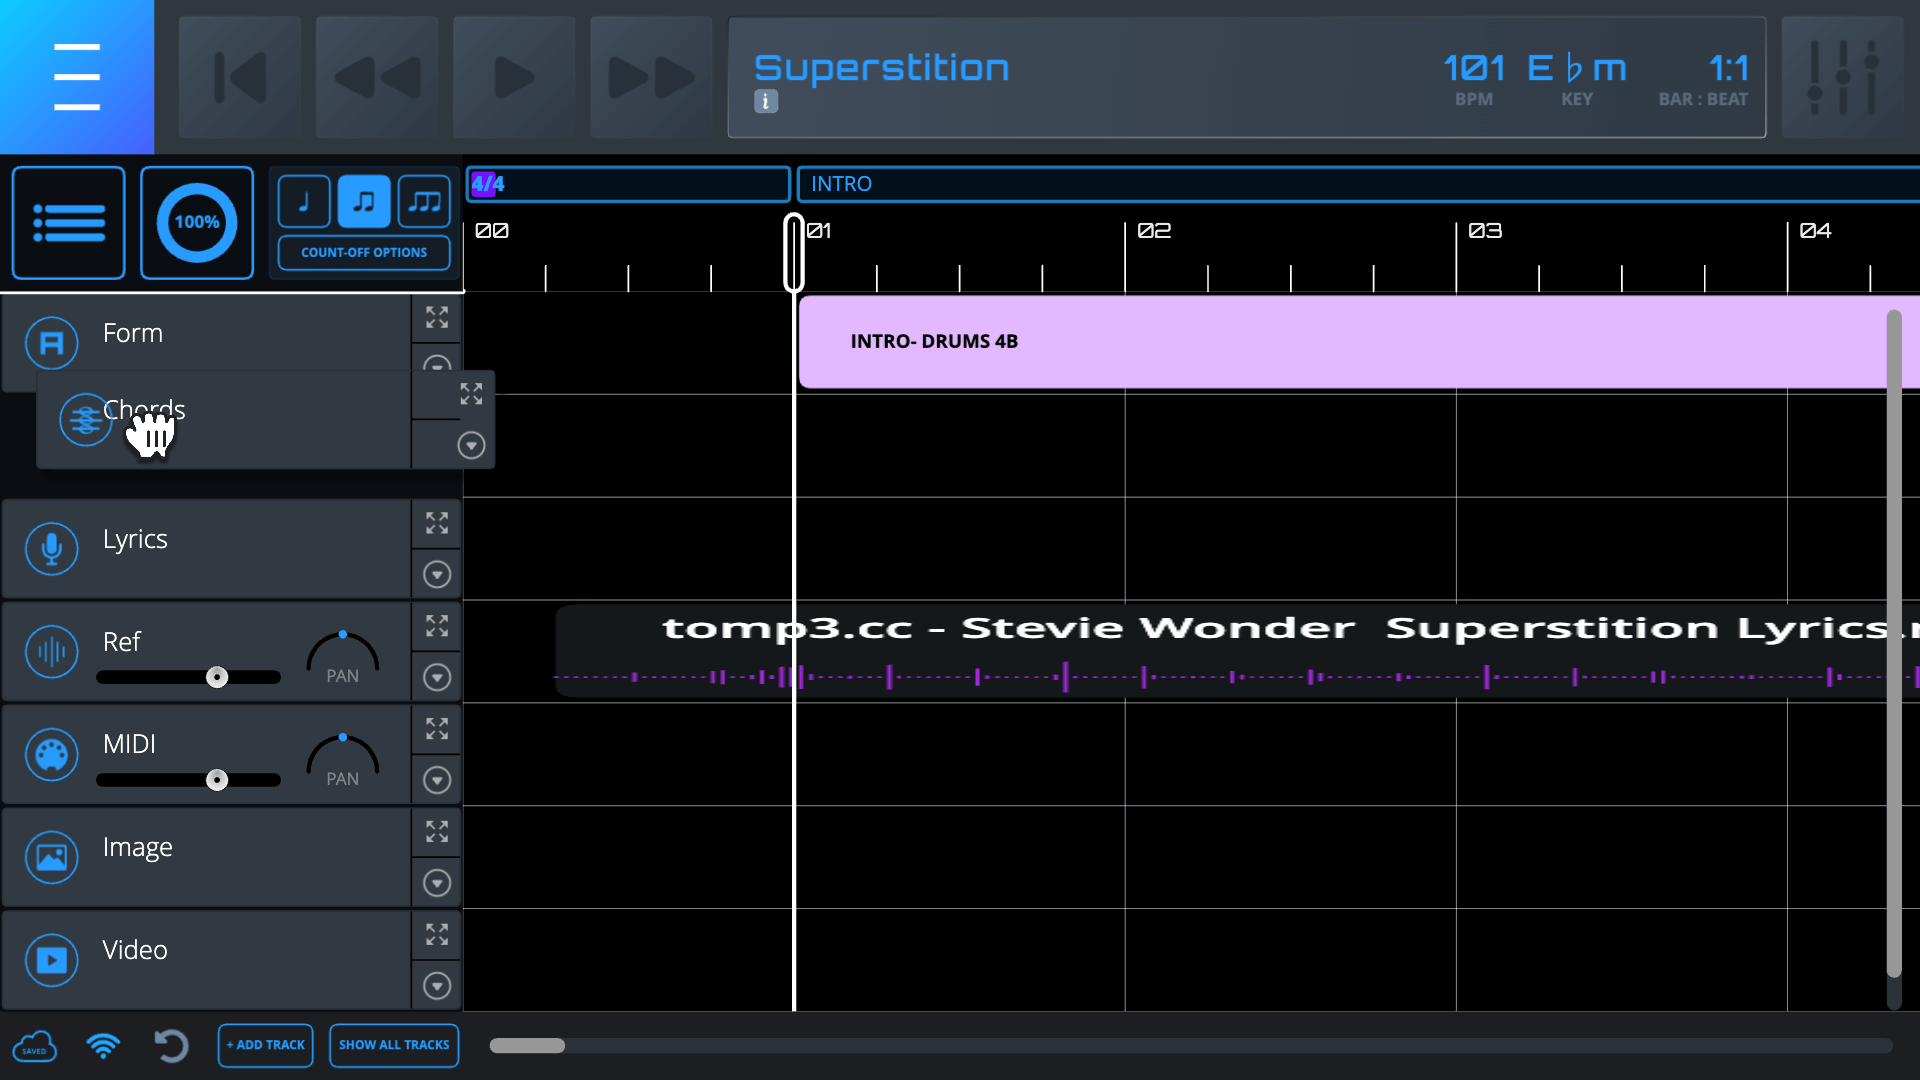
- Click and hold on the Track name and drag it up or down
Note – You can move a Track only when its height is set to short. Also, when you begin to drag a Track up or down, all other Tracks will be set to short height and become visible (if hidden) to make it easier to see where you are placing a Track.
Track Types – A Deeper Look
The Track Types are quite clear as to what content to put in which track. Here is a deeper look at all of the Track Types, their unique uses, and other helpful information.
Text Track – Use the Text Track to give general information to your Band Members. Common uses for the Text Track include:
1. Naming the section of the Song
2. Instruments/elements in/out of that section
3. Dynamics notes
4. Any and all other information you want to share
5. Song Owners and Band Members with Permission can move AND trim (horizontally stretch and shrink) Blocks in a Text Track – as well as edit their content and color.
Chord Track: Use the Chord Track to chart out the chords of songs. Here are some other things to keep in mind:
1. Chord names and diagrams change in response to transposition (key signature changes).
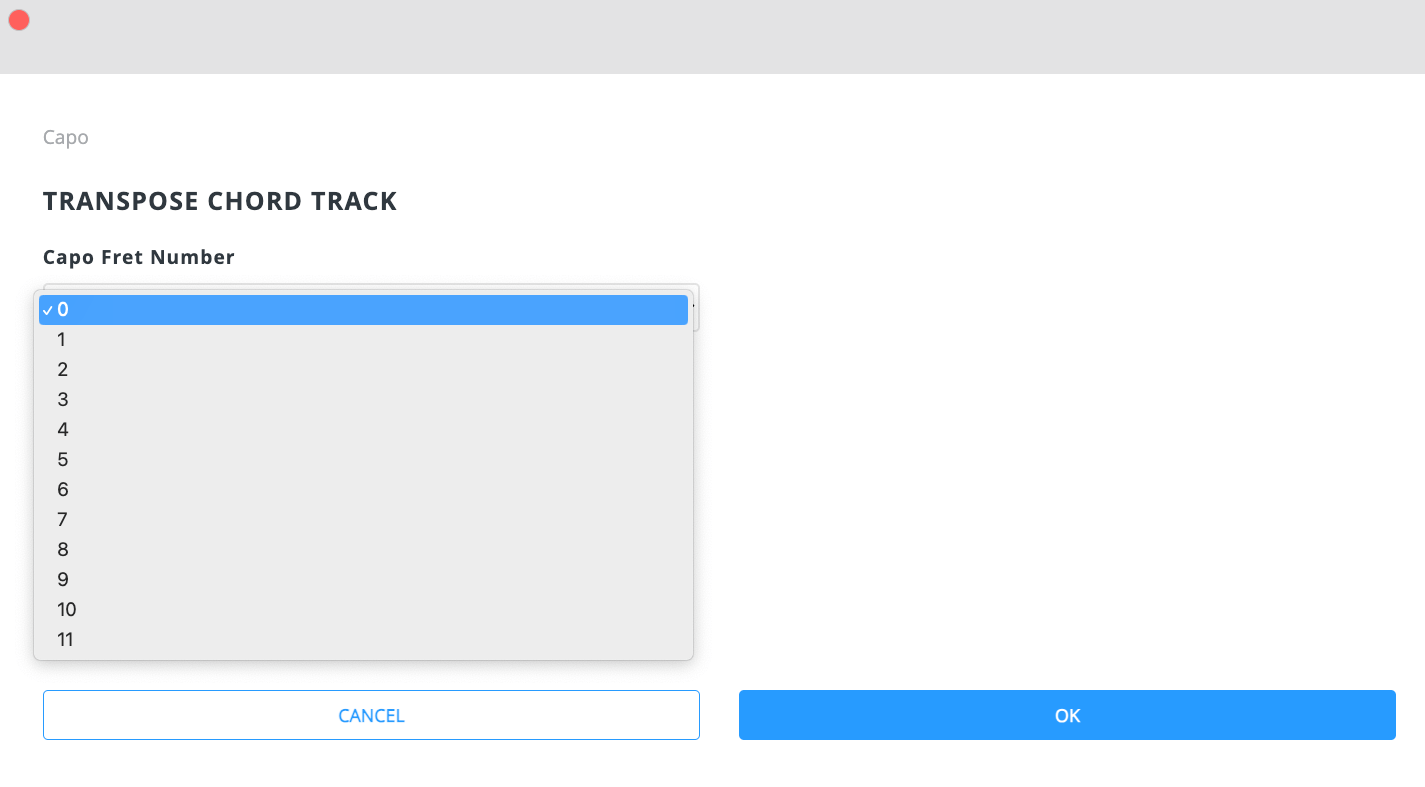
In addition to (or instead of) the Song transpose function, Chord Tracks can be individually transposed with the “Capo” feature. Each user can set their own Capo option. Click the Capo button and choose the number of half steps from the dropdown menu and click “OK”.
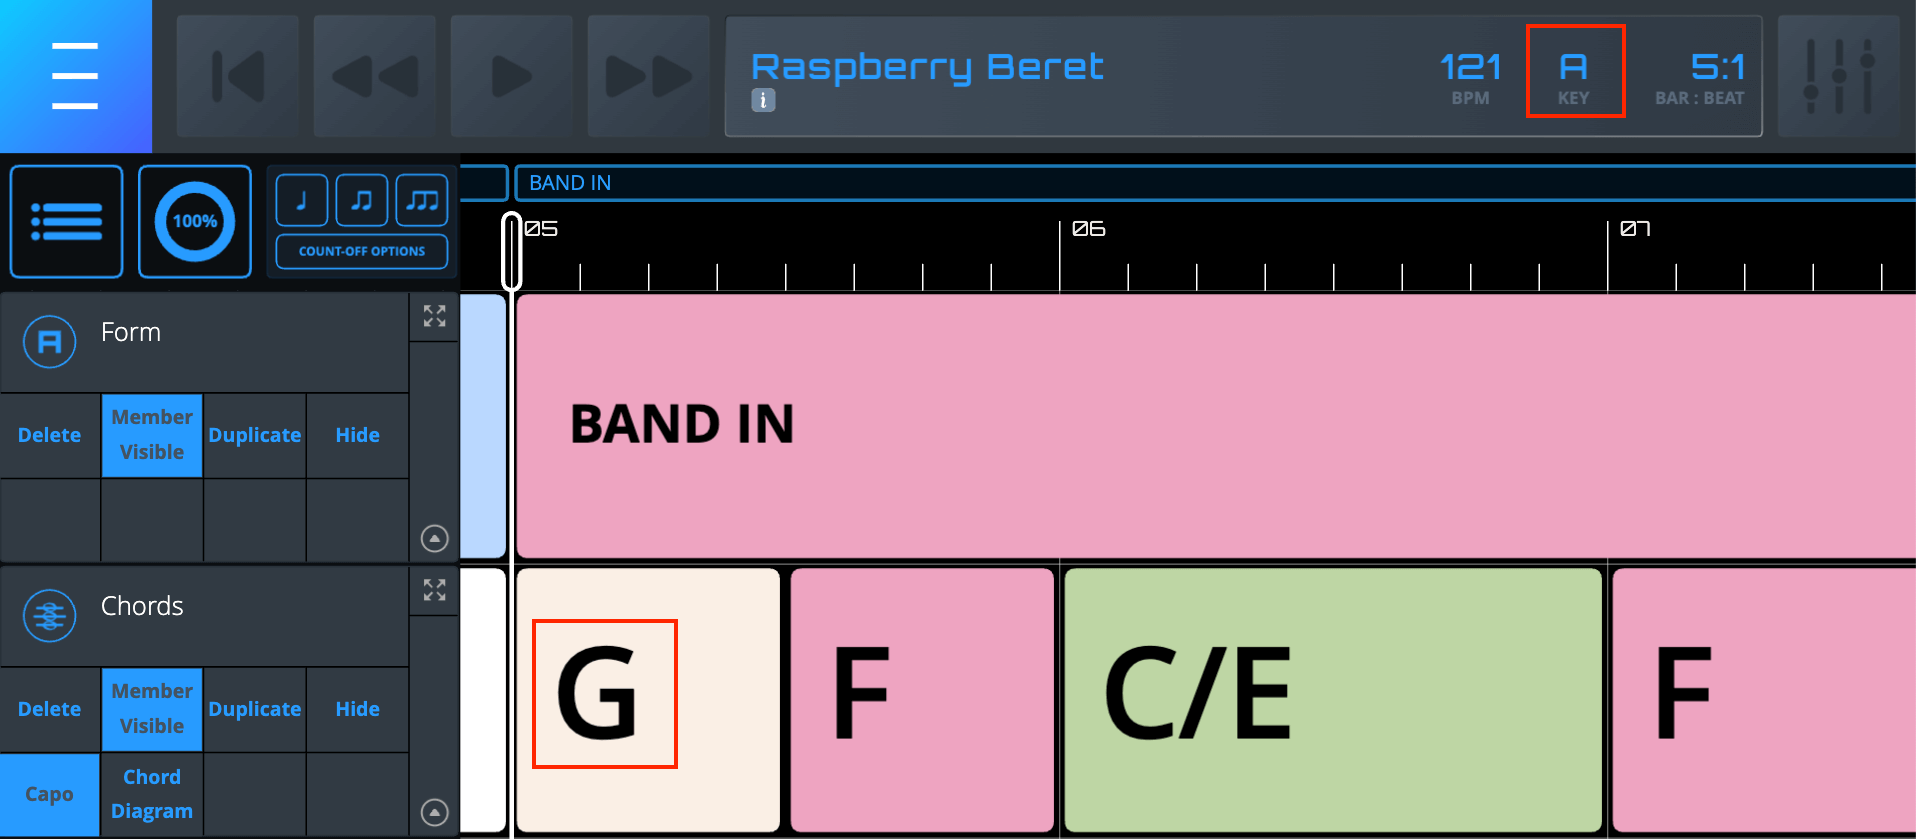
2. After the Capo has been applied, the chords and diagrams will change. Also, the Capo button will appear blue if there is any Capo value other than “0” (zero). In the example below, the song is in A Major, but the Capo has been set to fret 2, causing the chords to be transposed down a full step.
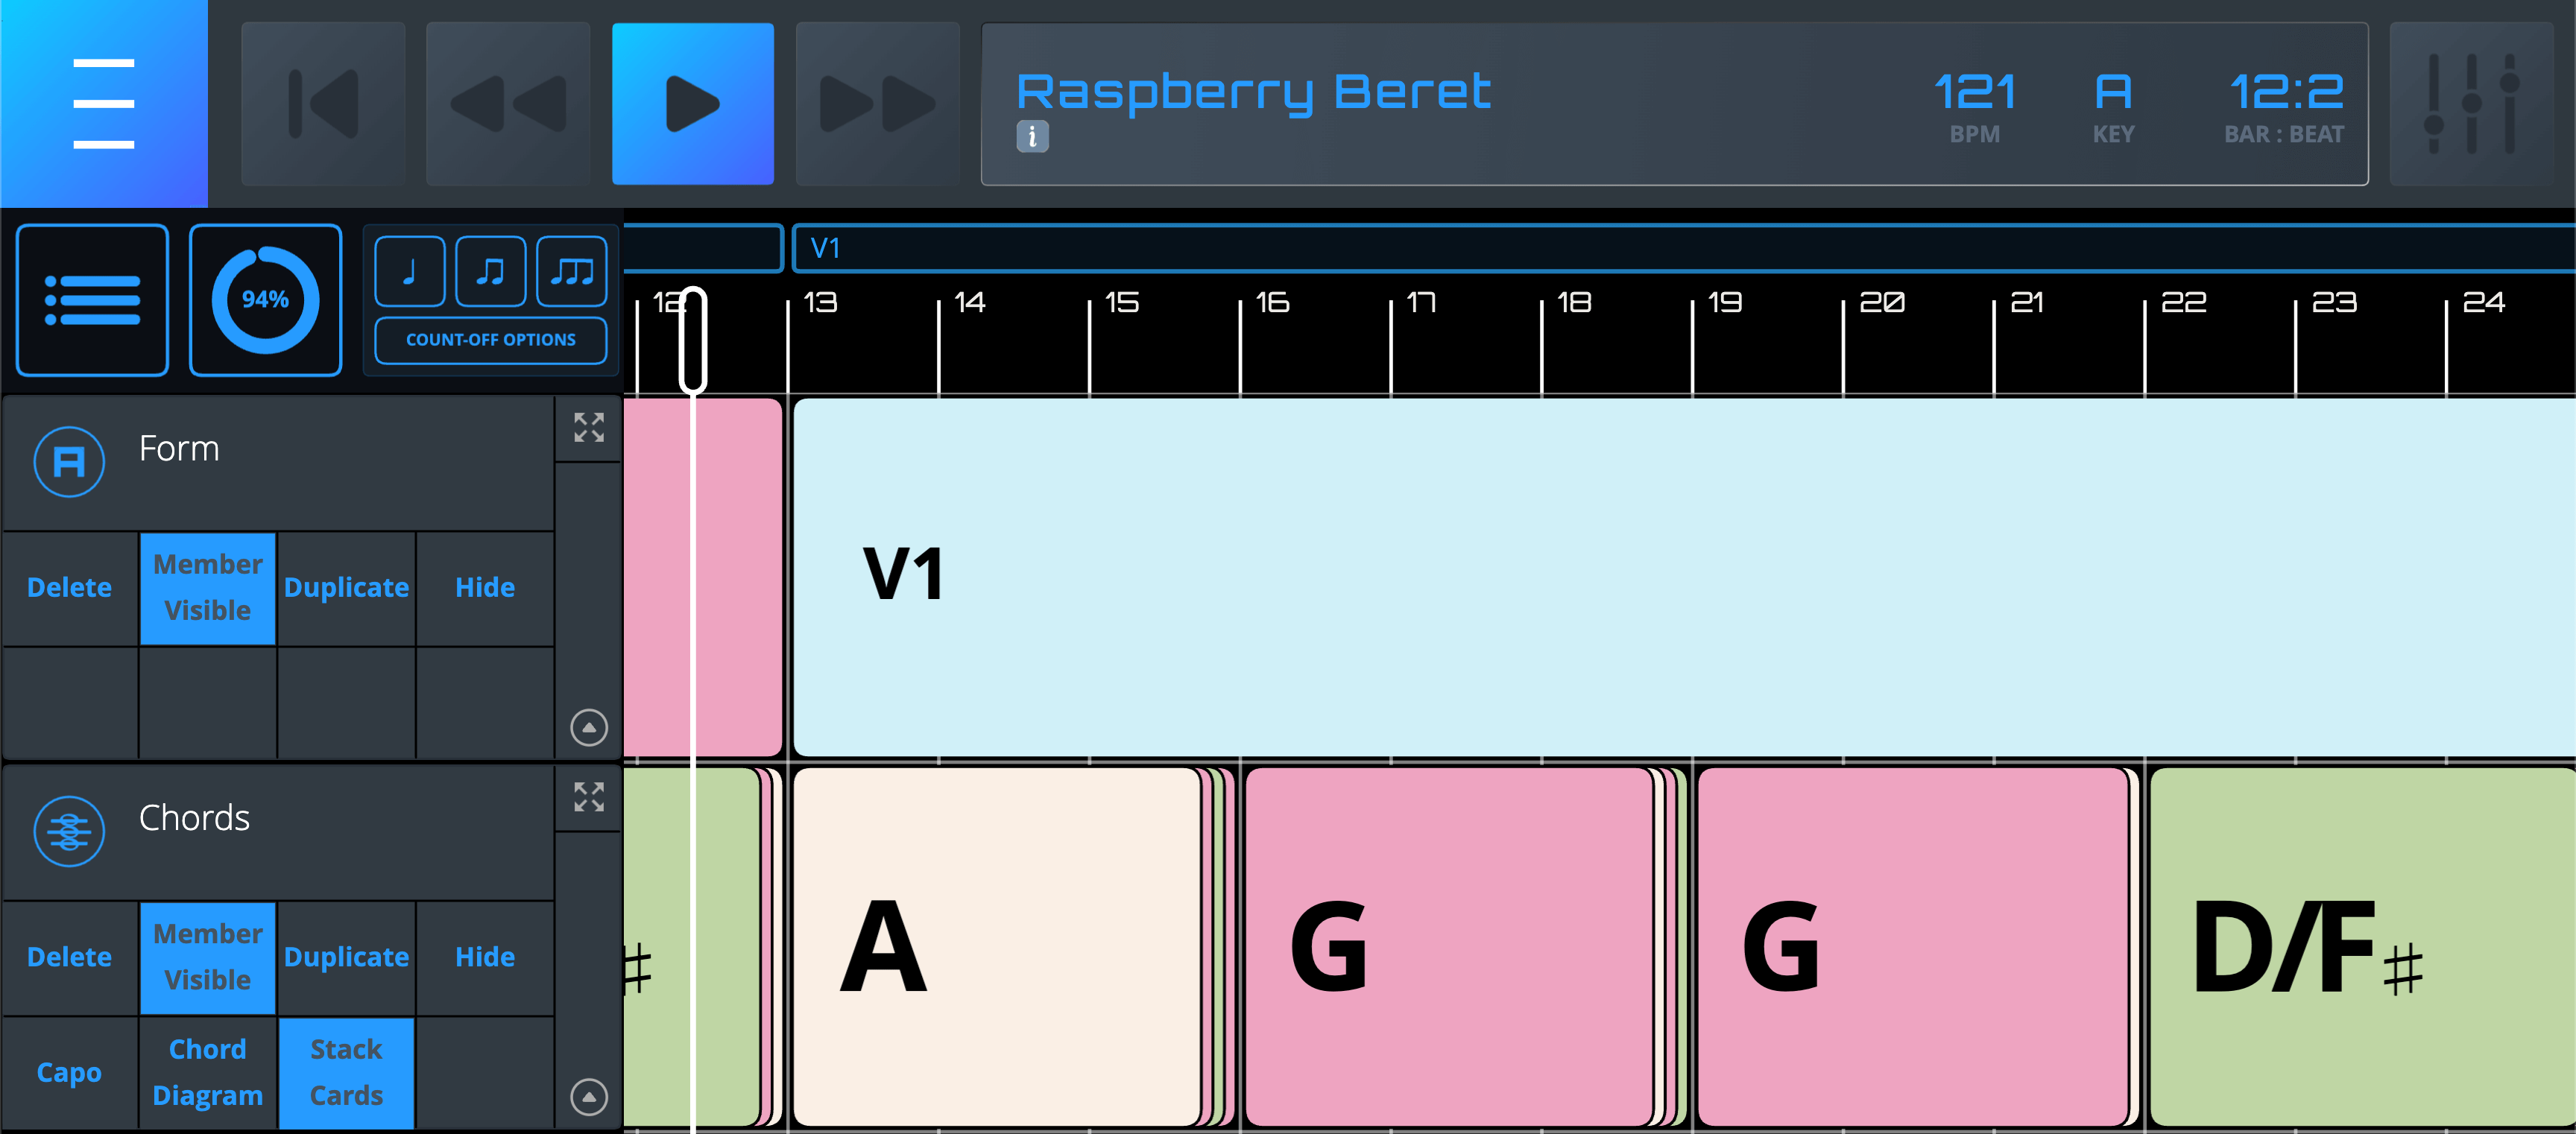
3. Stack Cards – By clicking the Stack Cards button, each Band Member can decide to display chord blocks as cards in a “stacked” fashion – or see chord blocks according to their true length. Either option can be useful depending on device size, zoom level, chord block length, song familiarity, and other factors.
Note – Card stacking only takes effect during playback. During edit (non-playback) mode, chord blocks will look and behave as if the Stack Cards option is not selected. In addition to being user-specific, the Stack Cards option also per-song.
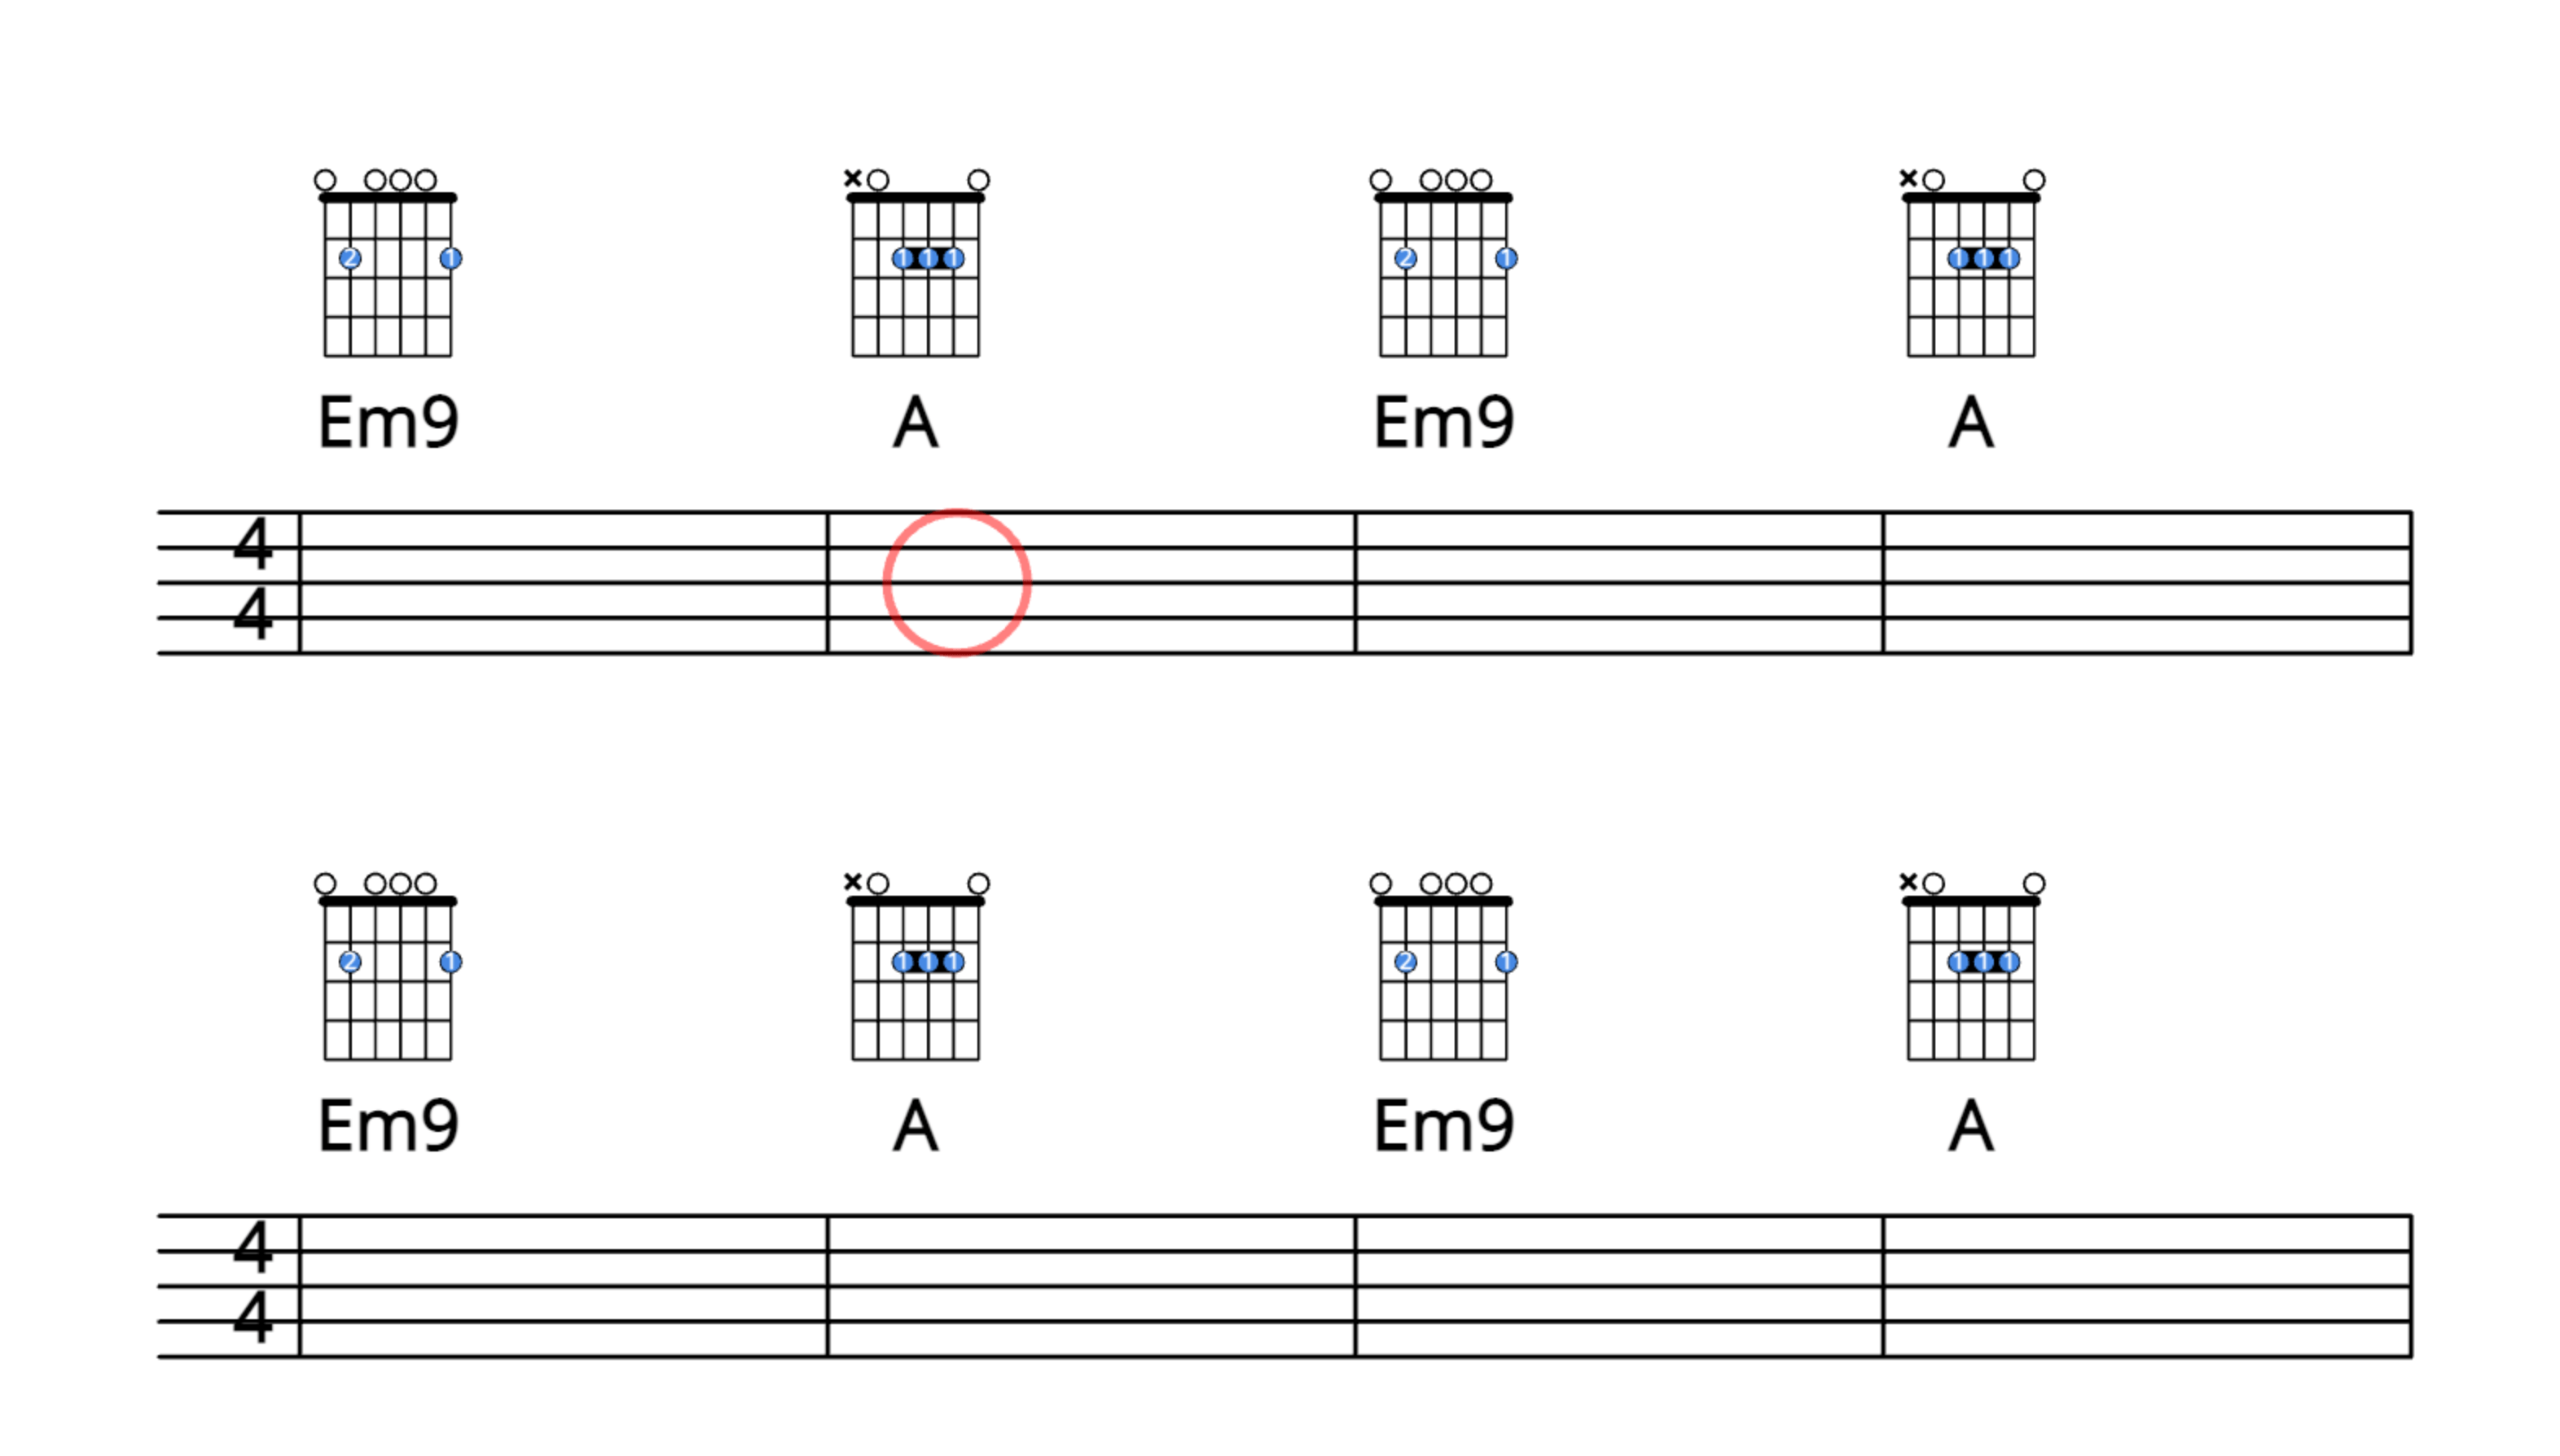
4. Chord Diagram Type – After clicking the Chord Diagram button, the Diagram Type button to the right will show a diagram type. Currently, the different chord diagram types are guitar, ukulele, baritone ukulele, and piano. Clicking on the Diagram Type button repeatedly will cycle through the different diagram types. Note – Piano chord diagrams only appear in full screen chord view.
Other Chord Track Considerations
1. Each Band Member can decide to display different chord diagram types – or no diagram at all – by clicking the Chord Diagram and Diagram Type buttons. These diagrams may not be 100% accurate, and chord voicings may vary. The diagrams are for general guidance only. As with many other view settings, Chord Diagram settings are saved per User and per Song.
2. Most slash chords and many extended voicings are supported.
3. You can enter one chord per Block – or several chords within a single Block.
4. Song Owners and Band Members with Chord Track Permission can edit Block content and color, as well as create, delete, move, and trim (horizontally stretch and shrink) Blocks in Chord Tracks.
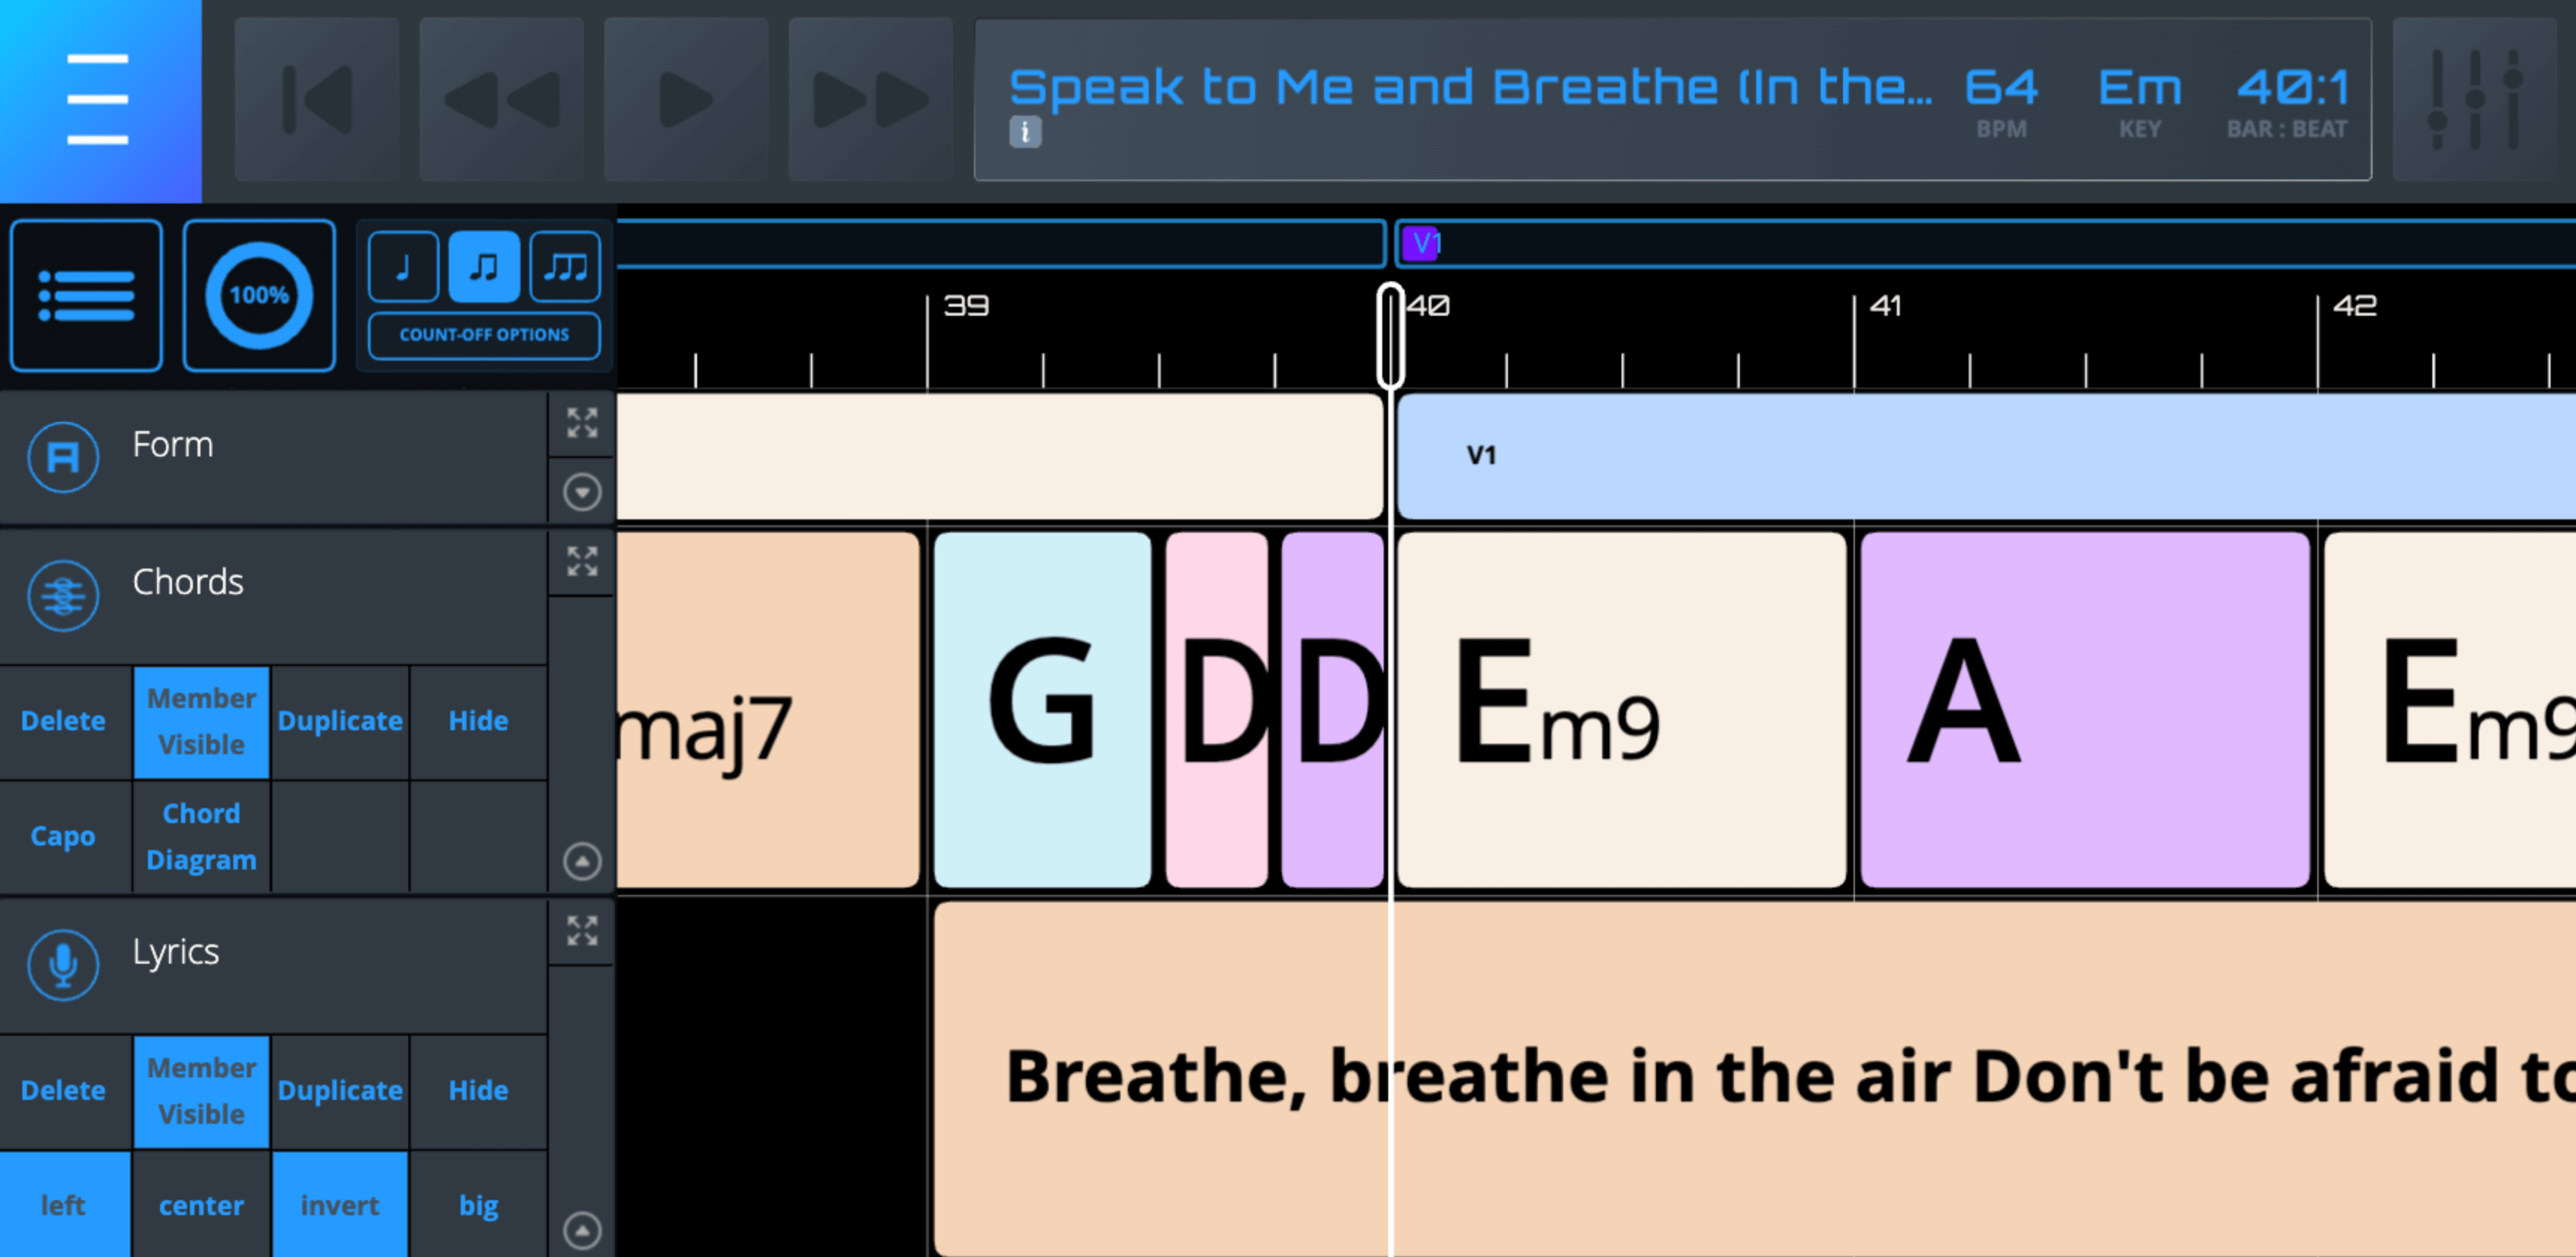
5. The full-screen view of a Chord Track is a scrolling “lead sheet” with an moving red circle complete with chords and chord diagrams – along with lyrics and Timeline Markers (if any).
6. Song Owners and Band Members with Permission can move AND trim (horizontally stretch and shrink) Blocks in a Chord Track – as well as edit their content and color.
Lyrics Track – Use the Lyrics Track to add lyrics to Songs. Here are other things to keep in mind:
- The Timeline alignment and visibility of specific lyrics in the Main Interface will vary depending on zoom level, display size, and the accuracy/placement of words within Blocks.
2. The full-screen view of a Lyrics Track is a vertically scrolling “karaoke” or “teleprompter” style display. Note – The rhythmic phrasing of the lyrics in full-screen view is NOT indicated with changing colors, a “bouncing ball”, or other features typical of many karaoke systems. Also, the speed of scrolling varies according to the lyrics Block length. Longer Blocks will scroll slowly, and shorter Blocks will scroll quickly.
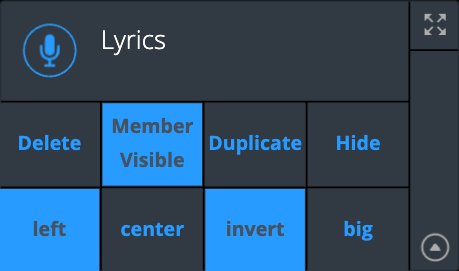
3. There are several ways to change how full-screen lyrics display by hitting buttons on the bottom row of the Track Control Tray.
- Left – Left-aligns text
- Center – Center-aligns text
- Invert – Makes text white on a black background
- Big – Increases text size
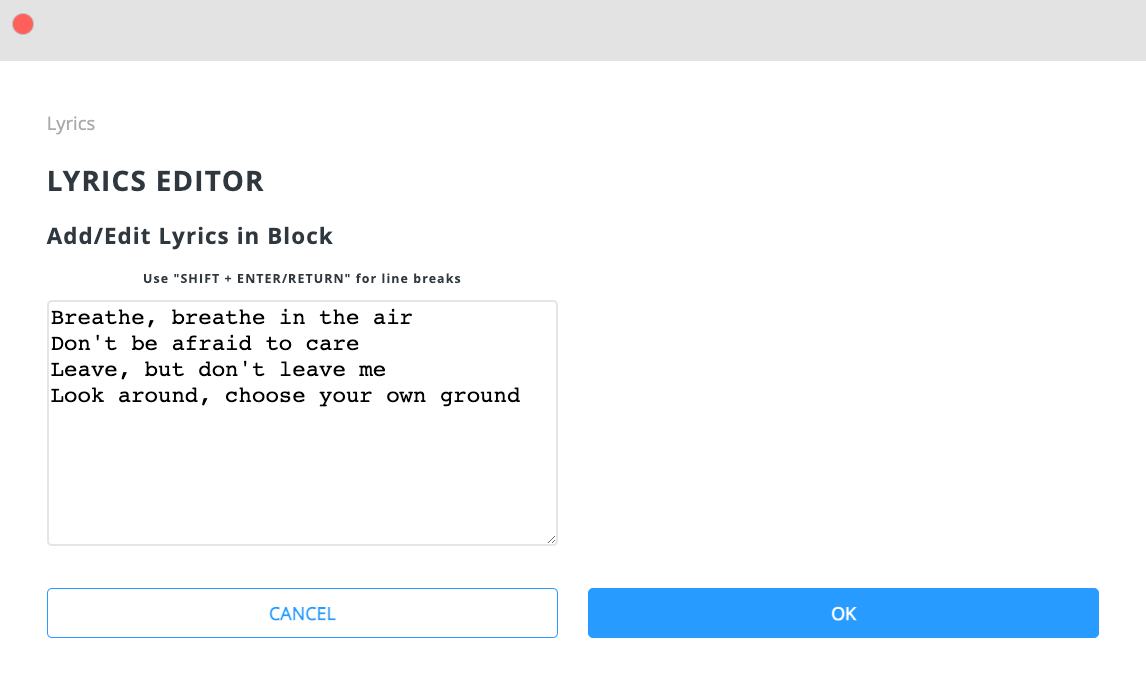
4. Currently, the only formatting allowed within the Lyrics Editor is capitalization and inserting line breaks. Future versions of Caedence may include a more complete document style editor with familiar features like underlining, bolding, highlighting, colored text, etc.
5. Song Owners and Band Members with Permission can move AND trim (horizontally stretch and shrink) Blocks in a Lyrics Track – as well as edit their content and Block color.
PDF Track: Use PDF Tracks to add PDF files to Songs. Here are other things to keep in mind:
1. There are currently two full-screen display options for PDF tracks: Fit Height and Fit Width. Use these options to optimize your view for your device and other preferences.
Audio Track: Use Audio Tracks to add audio files to Songs. Here are other things to keep in mind:
1. Acceptable audio file formats include .wav, .mp3, and .flac. Please note – In order to keep Audio Minutes usage low, we recommend using high-quality MP3s.
2. In order to keep Audio Minutes usage low, also be mindful of where exactly audio is featured in a Song. For instance, if there is a single horn strike, it is better to bounce a shorter (smaller) audio file rather than a longer file with mostly audio silence. See the two examples below. The first is a good example of wisely importing audio, as the audio information lasts for the duration of the file. The second one is a bad example as there is a lot of “digital silence” in the file. When there is a lot of digital silence in a file, you essentially are using a lot of data storage for no actual sound.
3. Using the same audio file many times does not “count against” Audio Minutes. For example, if you use a 15-second audio file 12 times in a Song, the Audio Minutes usage would only be 15 seconds – not 3 minutes.
4. Audio Volume, Pan, Offset, Mute, and Solo can be edited from the Main Interface by Song Owners or Band Members with Mix Permission. Band Members without Mix Permission can only mix during individual practice- and those edits are not saved.
5. Audio Volume, Pan, Offset, Mute, and Solo can also be edited from the Mixer by Song Owners or Band Members with Mix Permission. Band Members without Mix Permission can only mix during individual practice- and those edits are not saved.
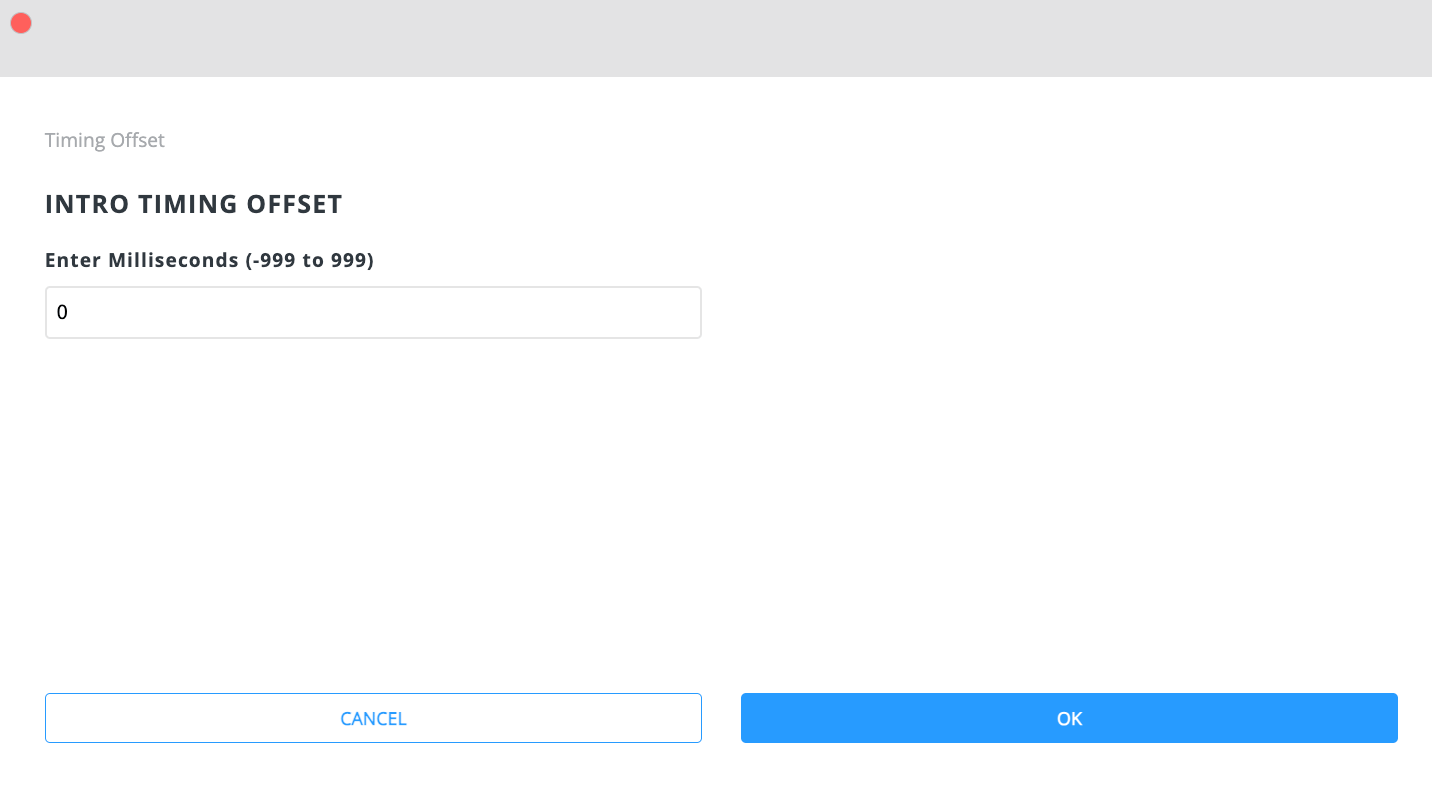
6. Offset – If necessary, use Offset to “nudge” Audio Tracks (files) forward or backward in time to help them “lock in” with the tempo. Click the Offset button and enter the number of milliseconds (-999 to 999) in the dialog that comes up. Negative values cause audio to play back sooner. Positive values cause audio to play back later. If there is an Offset value other than “0” (zero), the Offset button will be blue. Note – Offset only affects audio Playback (the sound) – NOT the visual position of Audio Blocks in the Main Interface.
7. The browser can send 4 stereo (or 8 mono) channels of audio via an audio interface
8. Blocks in Audio Tracks can be moved, copied, cut, pasted, duplicated, and deleted by Song Owners or Band Members with Audio Edit Permission. However, the Blocks CANNOT be trimmed. You will notice that there are no trim handles on Audio Blocks. Only Song Owners and Band Members with Permission can upload files.
9. The browser can send 4 stereo (or 8 mono) channels of audio via an audio interface.
10. Currently Audio Tracks DO NOT change according to tempo changes and/or transposition.
MIDI Track: Use MIDI Tracks to bring MIDI files into Songs. Here are other things to keep in mind:
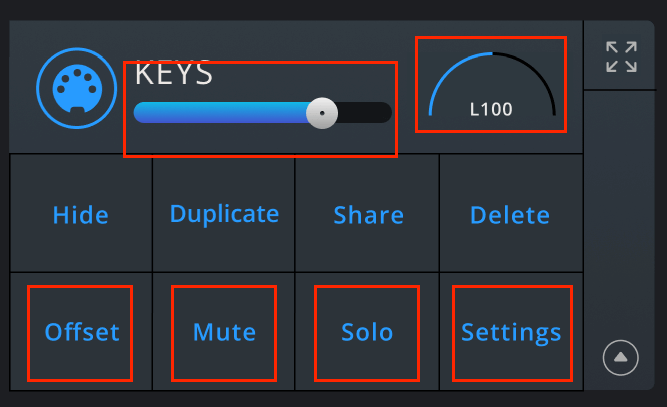
- MIDI Volume, Pan, Offset, Mute, Solo, and Settings can be edited from the Main Interface by Song Owners or Band Members with Mix Permission.
2. MIDI Volume, Pan, Offset, Mute, Solo, and Settings can be also edited from the Mixer by Song Owners or Band Members with Mix Permission.
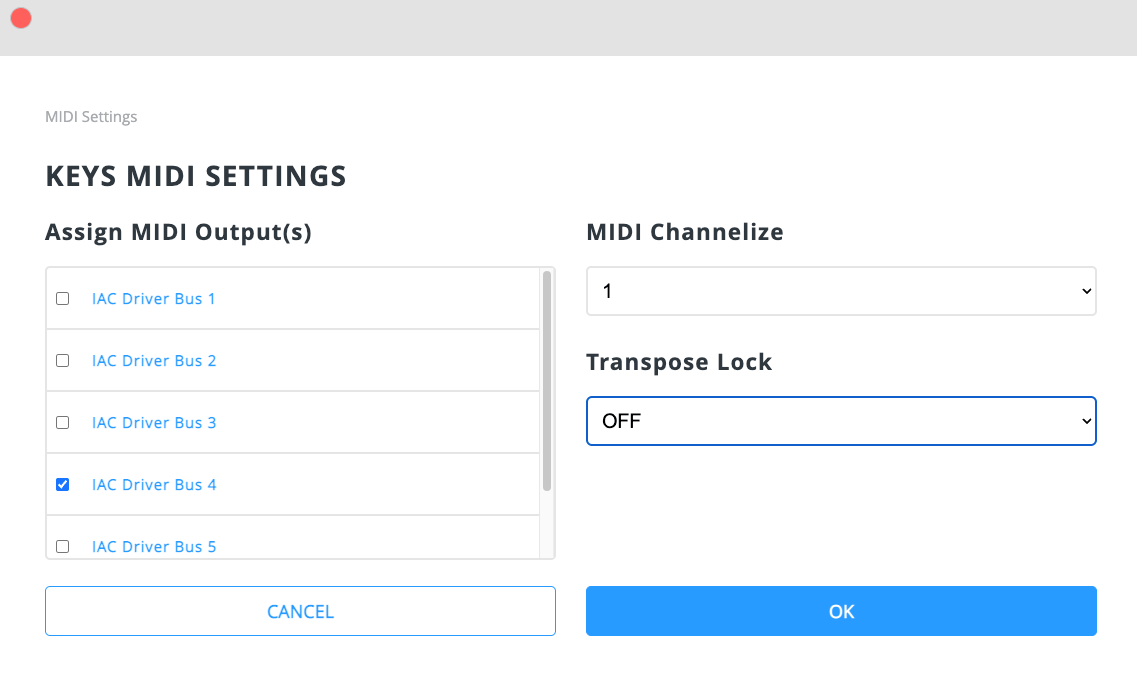
3. MIDI Settings include MIDI Output(s), MIDI Channel, and Transpose Lock.
4. Set the Transpose Lock “On” if you want to prevent that particular MIDI track from responding to a transposition. For example, set the Transpose Lock to “On” if the MIDI Track is controlling things like lights, drums, or any other non-pitch related events. Set the Transpose Lock “Off” if you want that MIDI Track to respond to transposition. For example, set the Transpose Lock to “Off” if the MIDI Track controls any pitch related events.
5. If necessary, use Offset to “nudge” MIDI Tracks (files) forward or backward in time to help them “lock in” with the tempo. Click the Offset button and enter the number of milliseconds (-999 to 999) in the dialog that comes up. Negative values cause MIDI to play back sooner. Positive values cause MIDI to play back later. If there is an Offset value other than “0” (zero), the Offset button will be blue.
Note – Offset only affects MIDI Playback (the sound/execution) – NOT the position of MIDI Blocks in the Main Interface.
6. Blocks in MIDI Tracks can be moved, copied, cut, pasted, duplicated, and deleted by Song Owners or Band Members with MIDI Edit Permission. However, the Blocks CANNOT be trimmed. You will notice that there are no trim handles on MIDI Blocks. Only Song Owners and Band Members with Permission can upload files.
Image Track: Use Image Tracks to add images to Songs. Here are other things to keep in mind:
1. Accepted file types include .png, .jpg, and .gif. Note – GIFs do not animate.
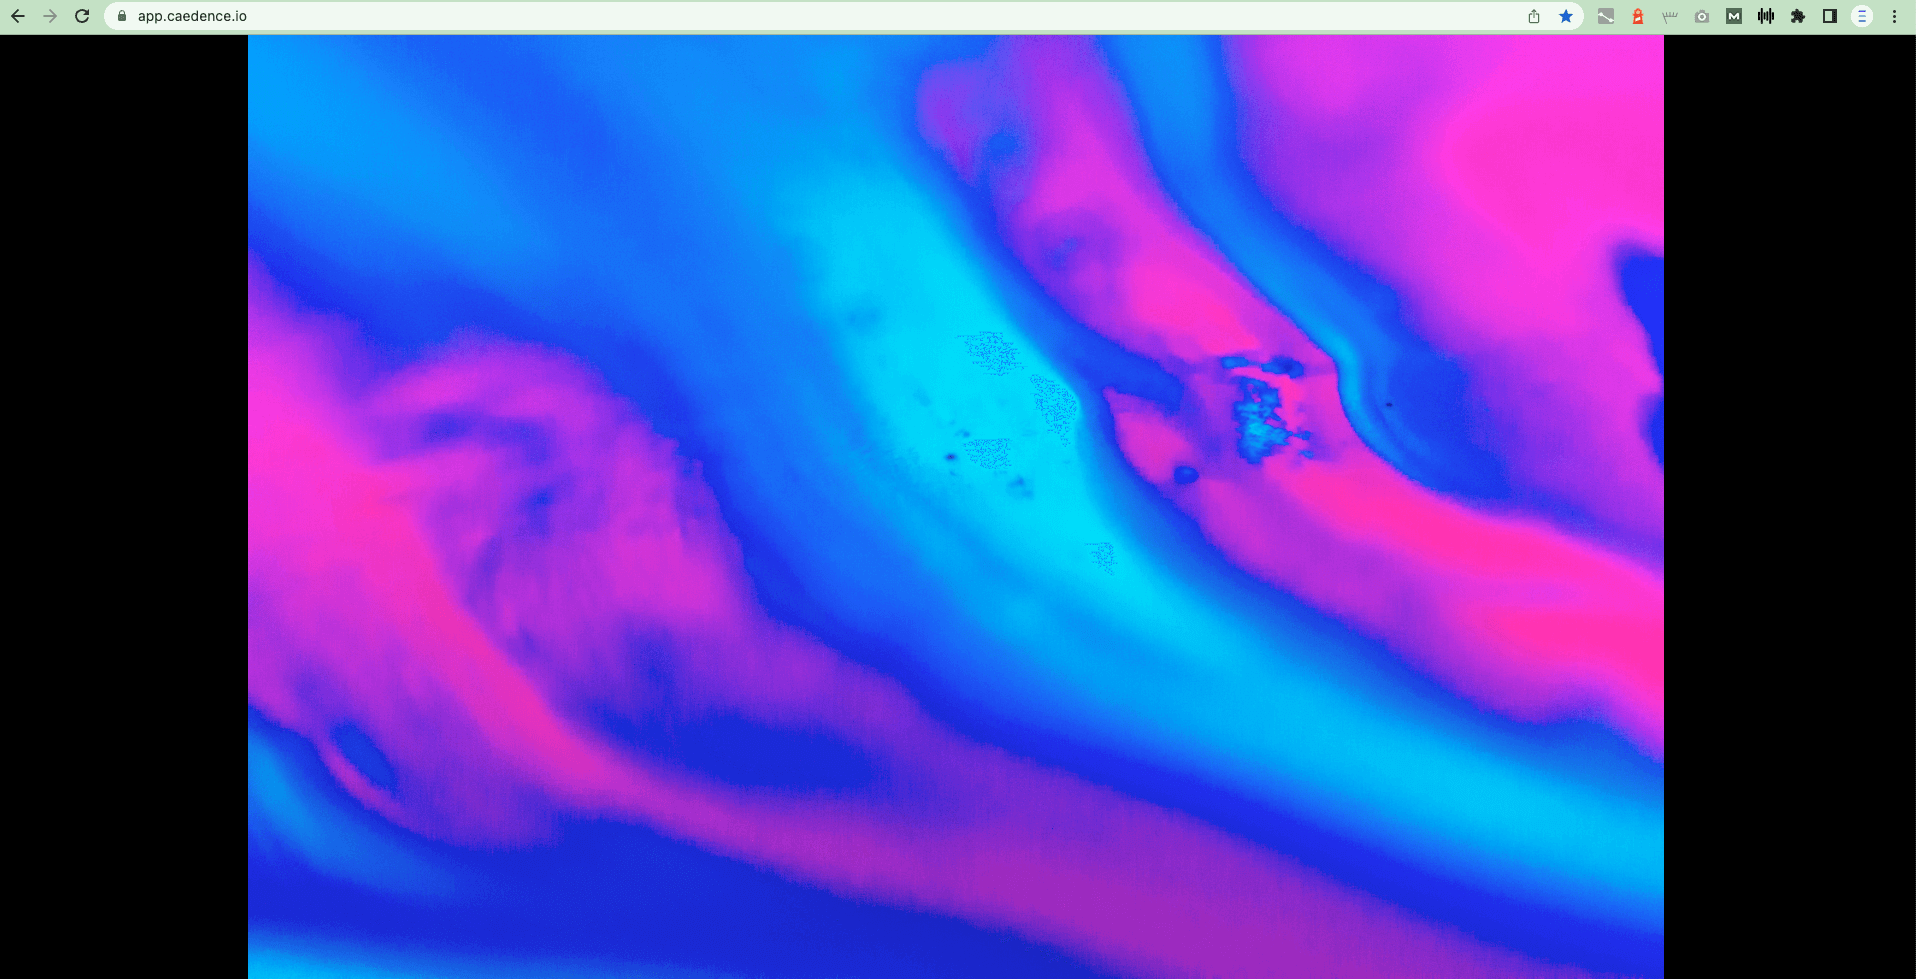
2. In full-screen view, you can choose to display Image Tracks either with “Cover” or “Fit” options. “Cover” fills the entire screen and may crop some parts of the image depending on the screen size and/or aspect ratio. “Fit” will not crop the image, but there may be black bars on the left and right sides of the screen depending on the screen size and/or aspect ratio.
3. Similar to Audio and MIDI Tracks, if necessary, use Offset to “nudge” Image Tracks (files) forward or backward in time to help them “lock in” with the tempo. Click the Offset button and enter the number of milliseconds (-999 to 999) in the dialog that comes up. Negative values cause images to play back sooner. Positive values cause images to play back later. If there is an Offset value other than “0” (zero), the Offset button will be blue. Note – Offset will only affect Image Track Playback timing in full-screen – NOT the visual position of Image Blocks in the Main Interface.
4. Song Owners and Band Members with Permission can move AND trim (horizontally stretch and shrink) Blocks in an Image Track – as well as edit their color. Only Song Owners and Band Members with Permission can upload files.
Video Track: Use Video Tracks to add videos to Songs. Here are some other things to keep in mind:
1. Accepted file types include .mp4.
2. Similar to Image Tracks, in full-screen view, Video Tracks can display either with “Fit” or “Cover”.
3. Similar to Image Tracks, if necessary, use Offset to “nudge” Video Tracks (files) forward or backward in time to help them “lock in” with the tempo. Click the Offset button and enter the number of milliseconds (-999 to 999) in the dialog that comes up. Negative values cause videos to play back sooner. Positive values cause videos to play back later. If there is an Offset value other than “0” (zero), the Offset button will be blue. Note – Offset will only affect Video Track Playback in full-screen – NOT the visual position of Video Blocks in the Main Interface.
4. Song Owners and Band Members with Permission can move AND trim (horizontally stretch and shrink) Blocks in a Video Track – as well as edit their color. Only Song Owners and Band Members with Permission can upload files.
Adding a New Track
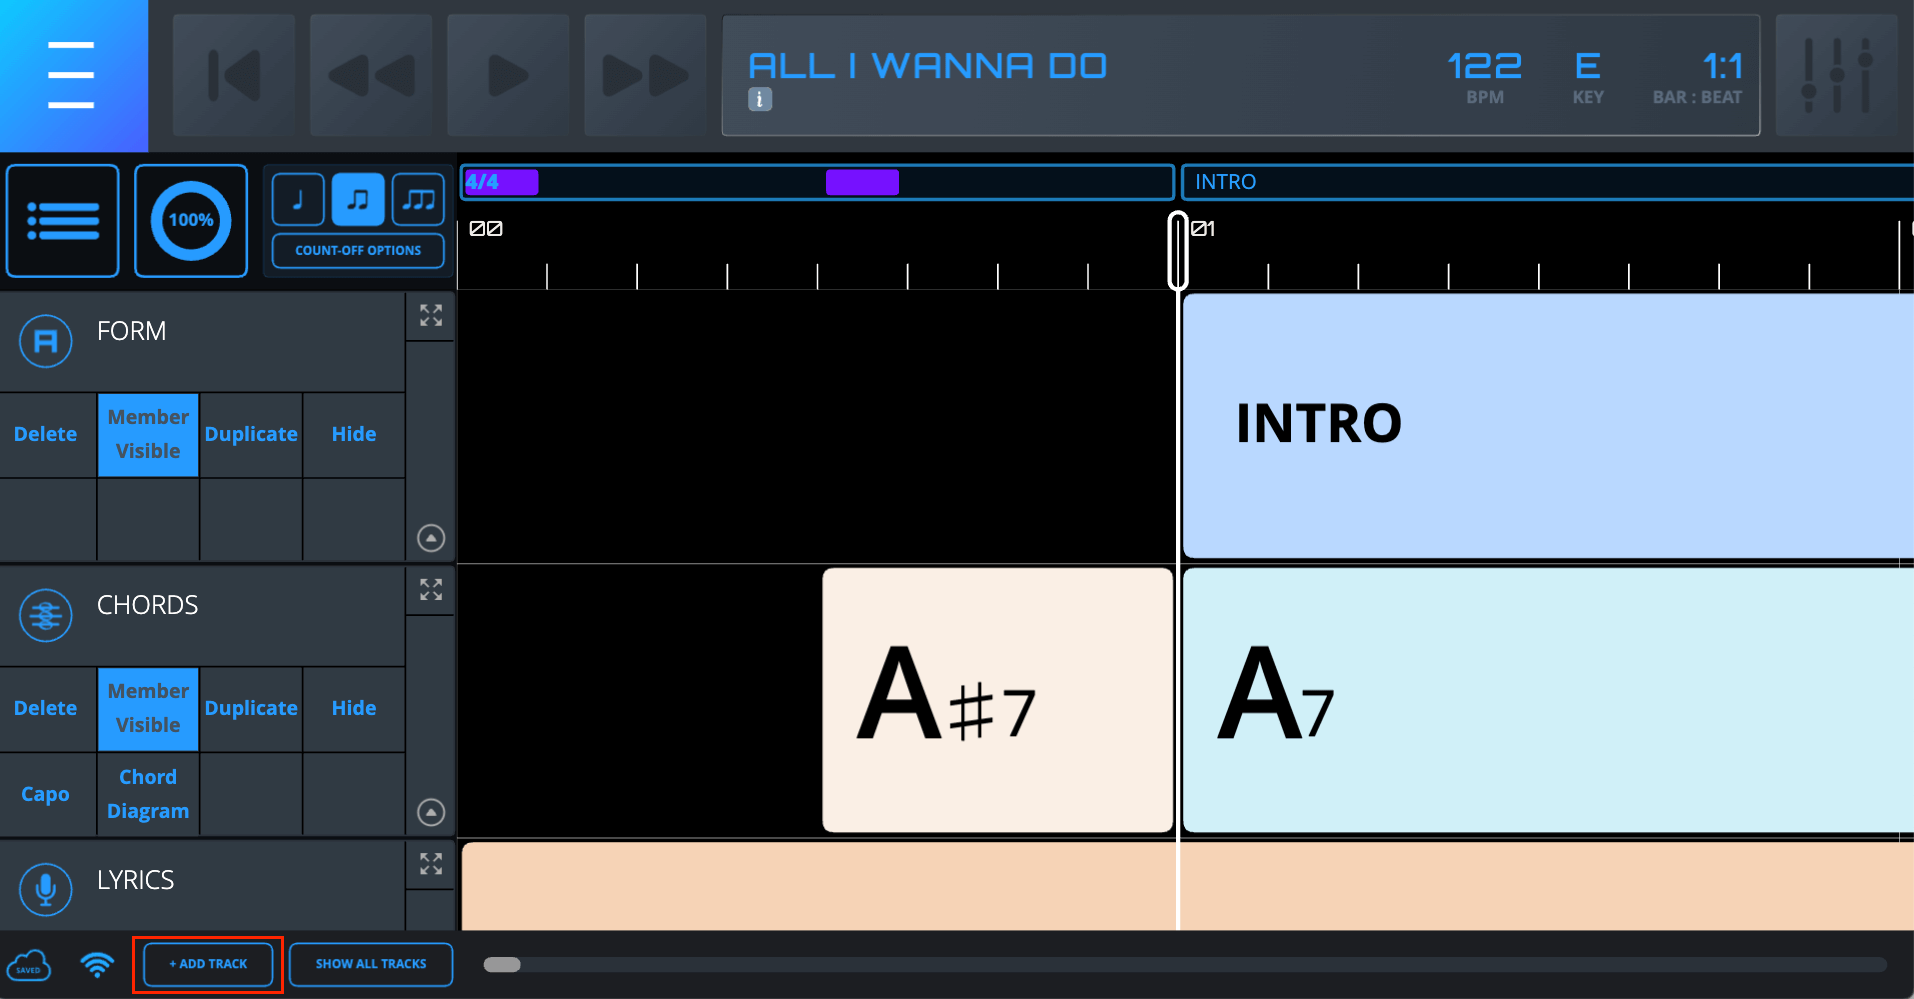
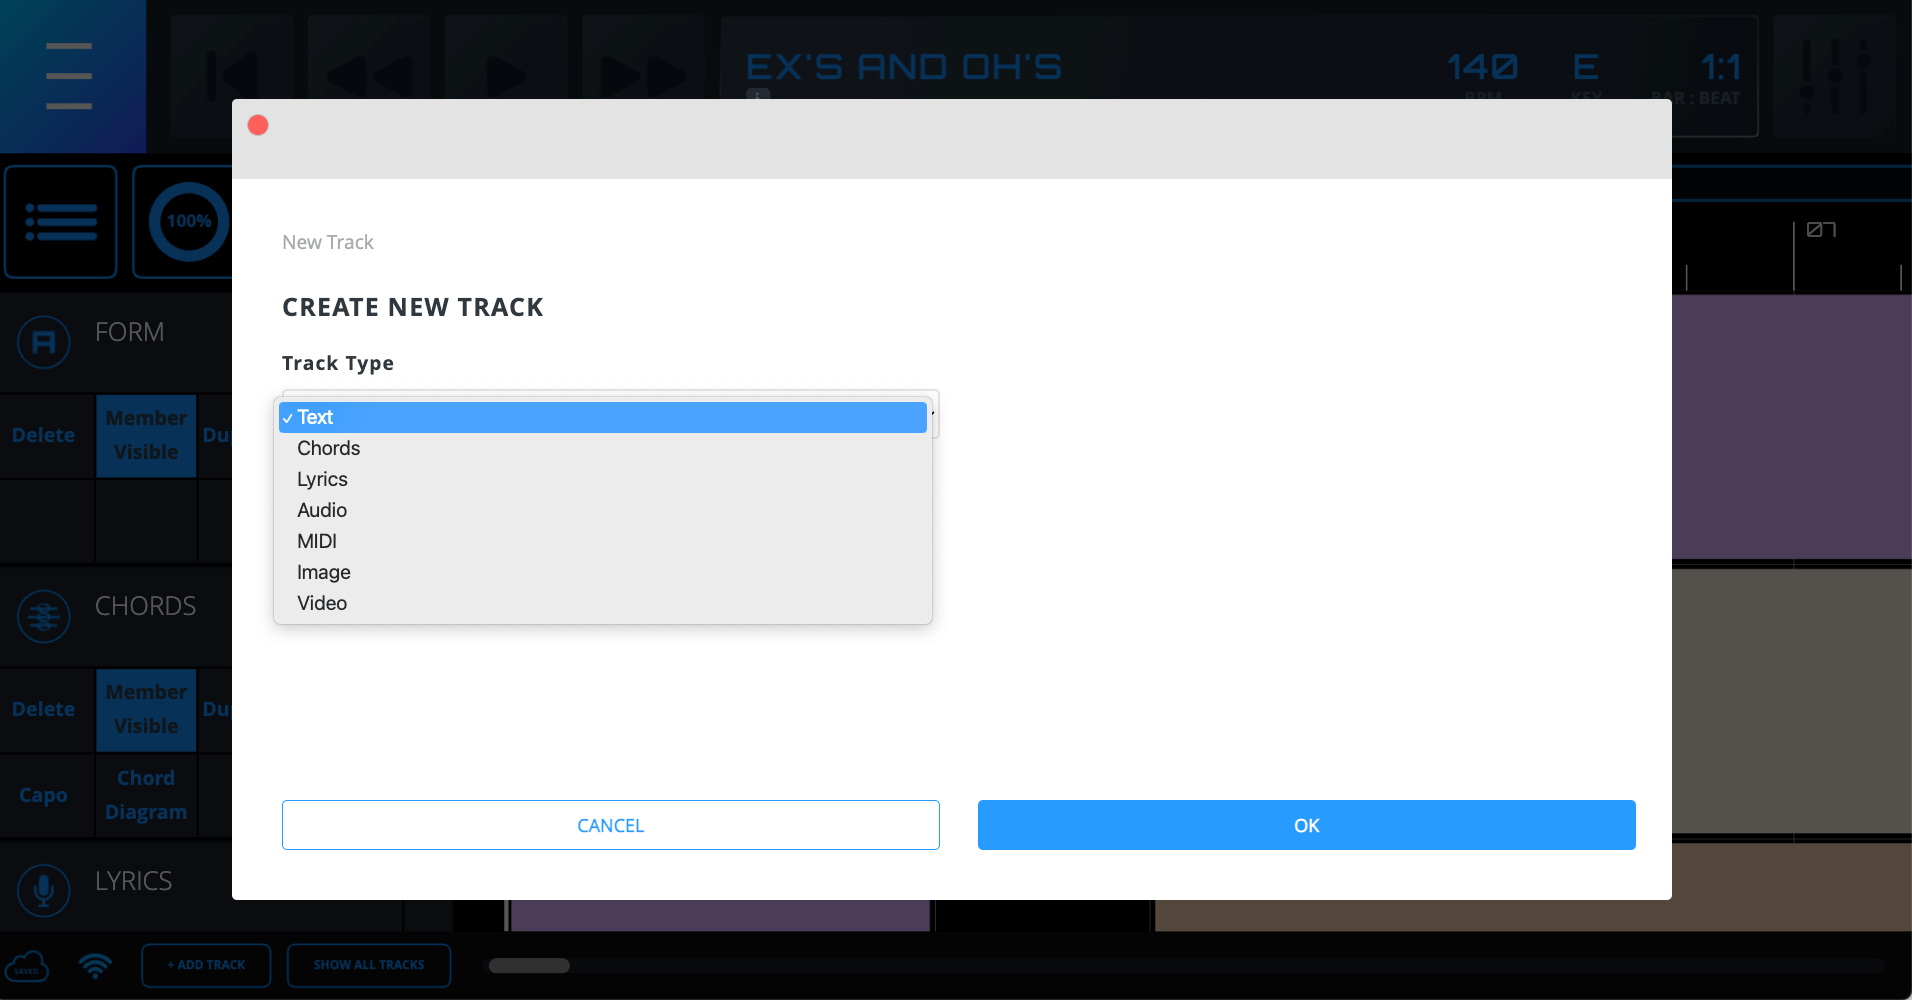
- Click “+ Add Track” in the bottom left of the Main Interface and choose a Track Type from the dropdown menu. Note – Only Song Owners can add new Tracks. Newly added Tracks will appear at the bottom of the Track order. Tracks can be reordered when their height is set to short.
2. Name the newly created Track by clicking on the default Track name. Note – Tracks can only be re-named when they are set to regular height.
3. Create a Block (see below) in the Track and start entering/uploading content!
2. Blocks
Blocks are containers for different kinds of content. Blocks in a certain Track Type inherit the Track’s file upload and trim capabilities. Refer to the Track Type Details section above for more information.
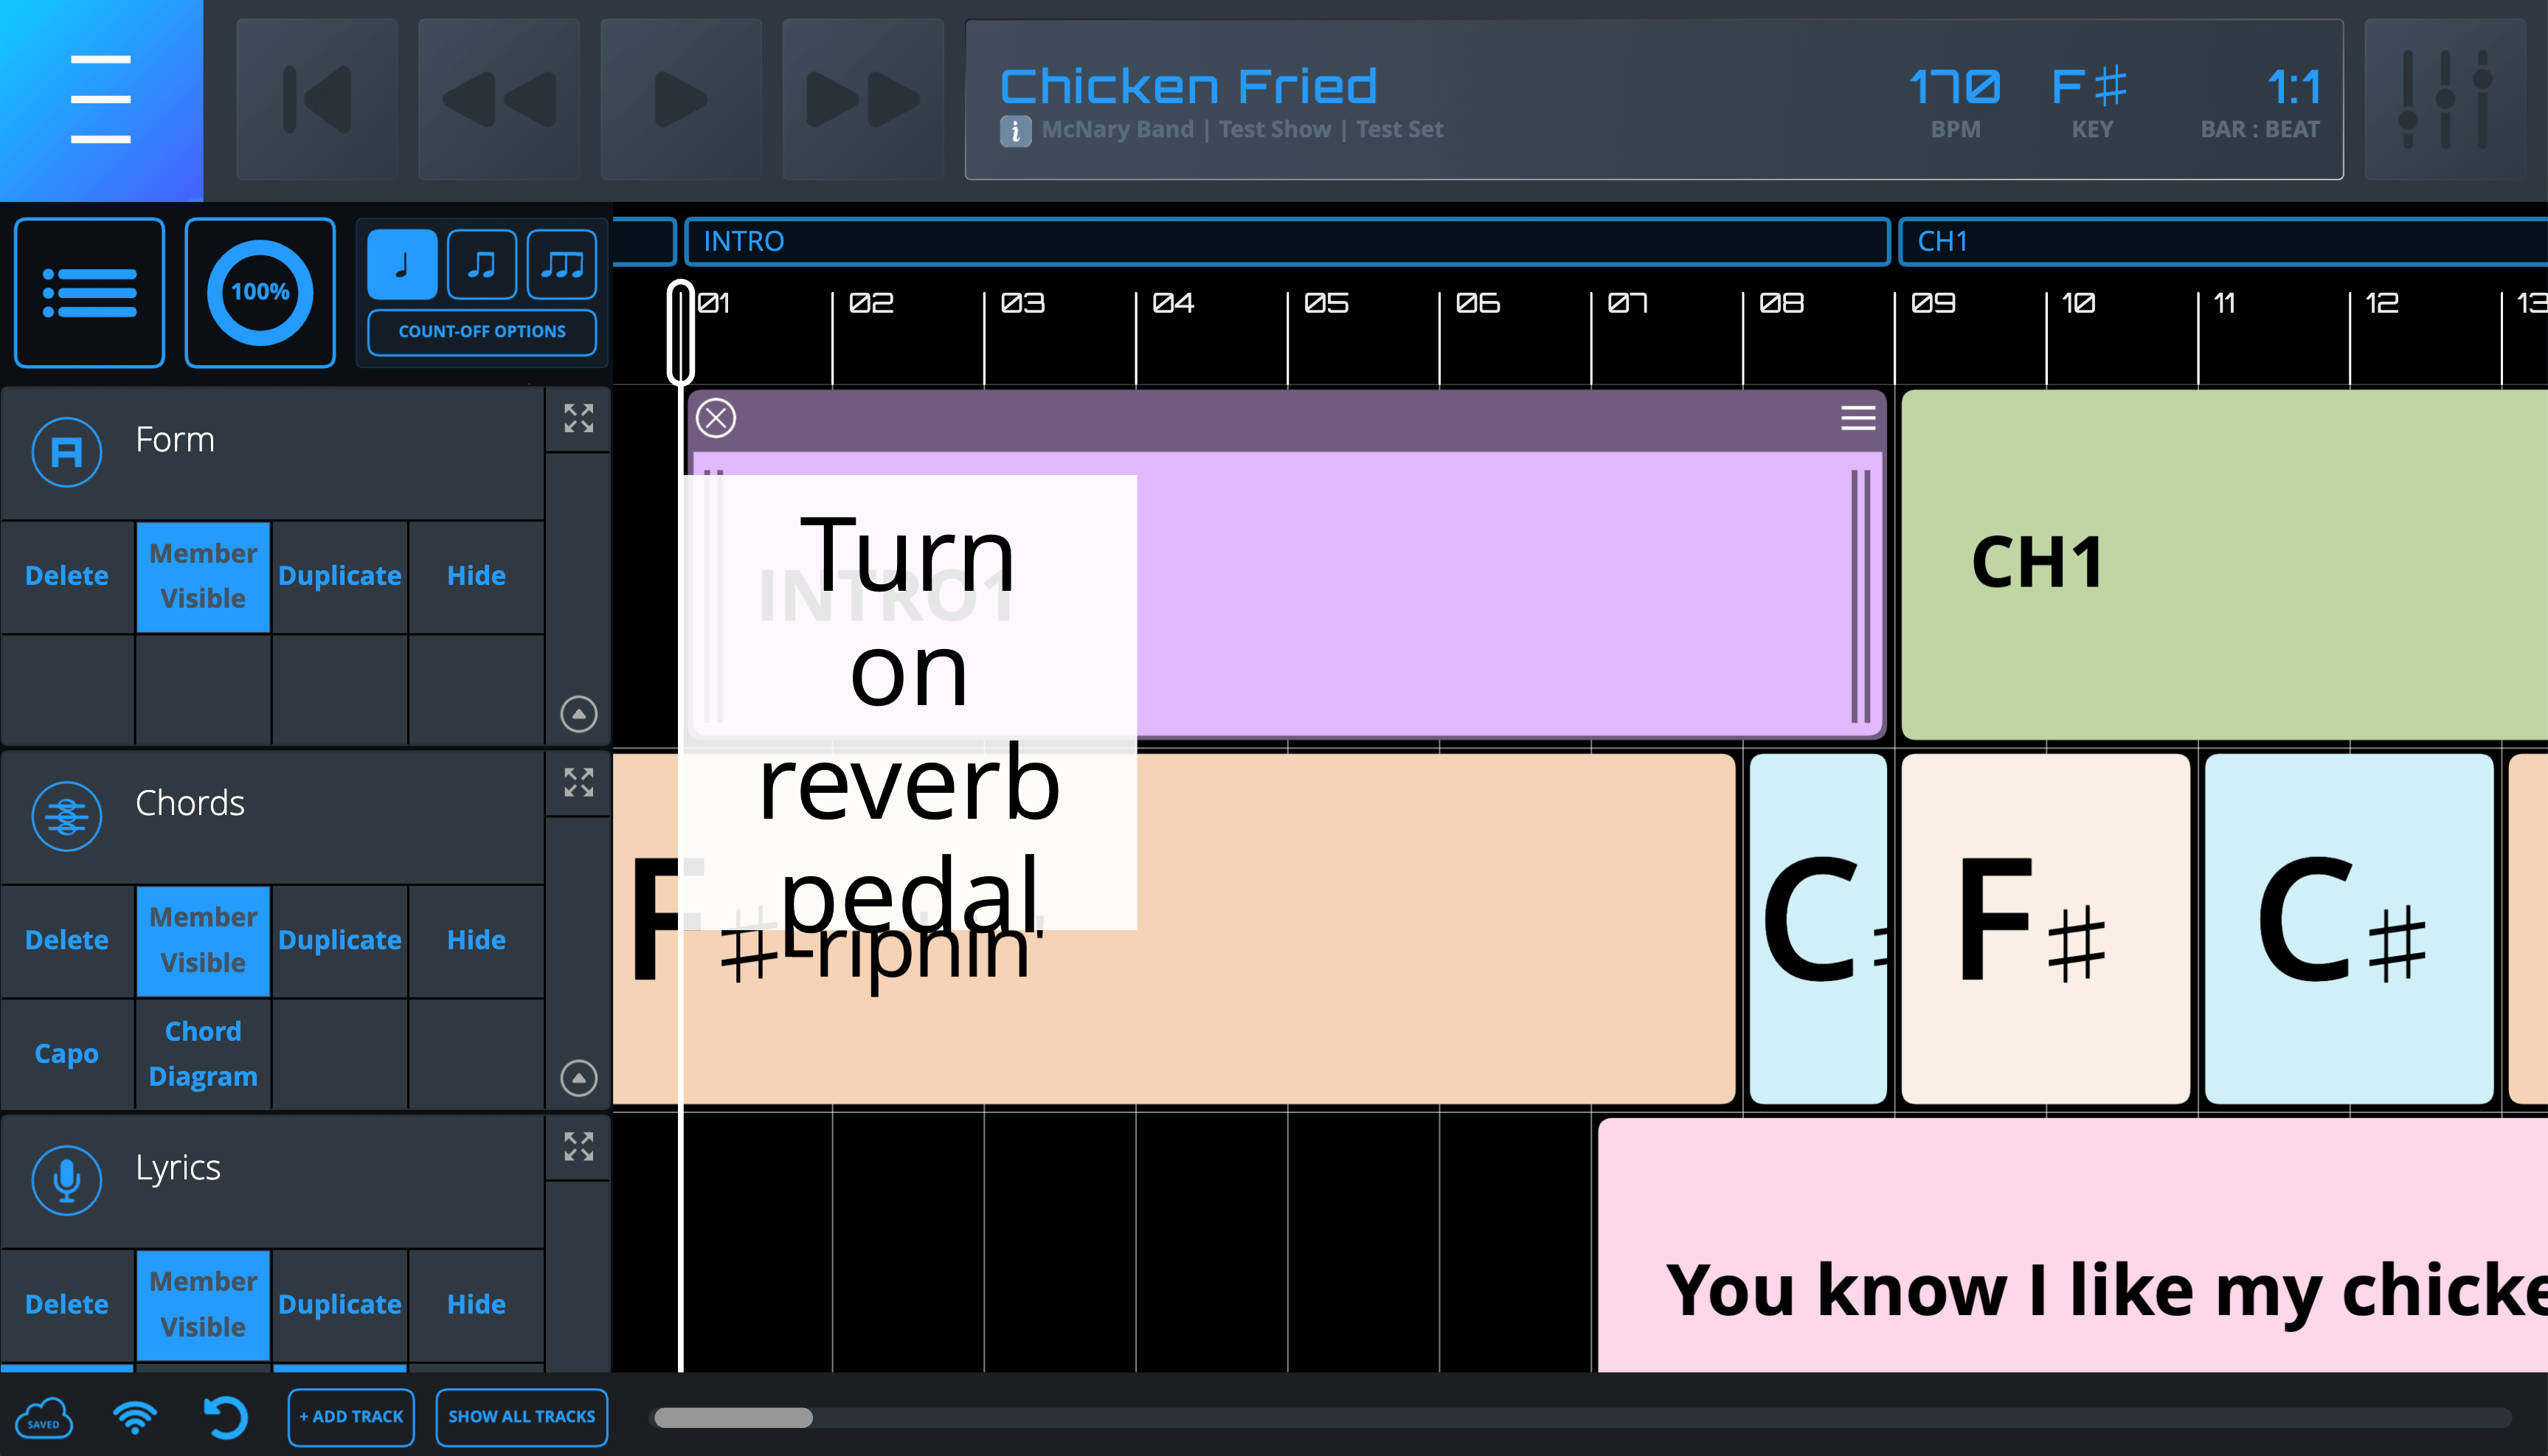
Anatomy of a Block
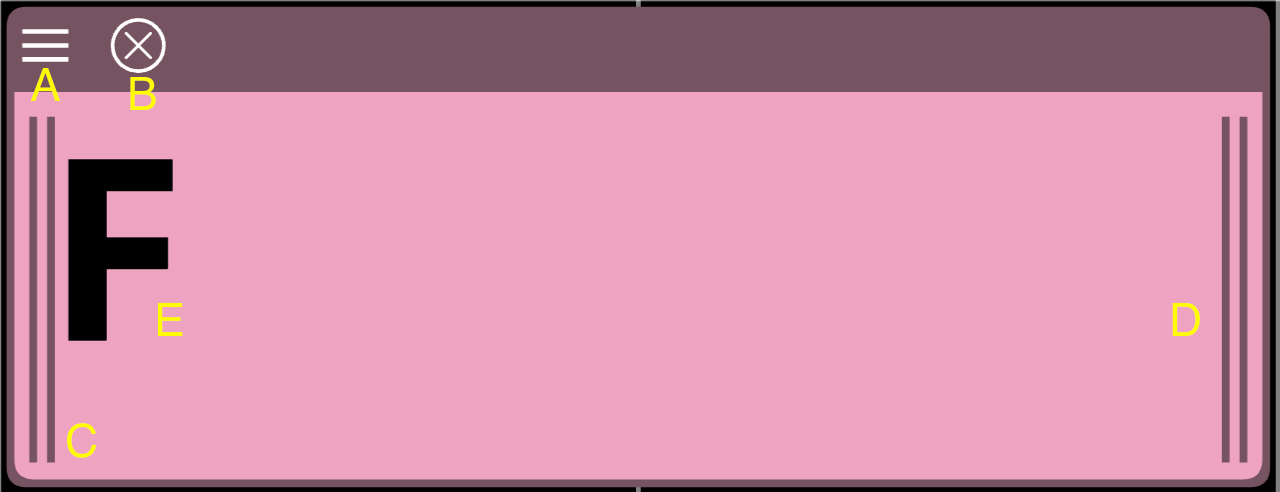
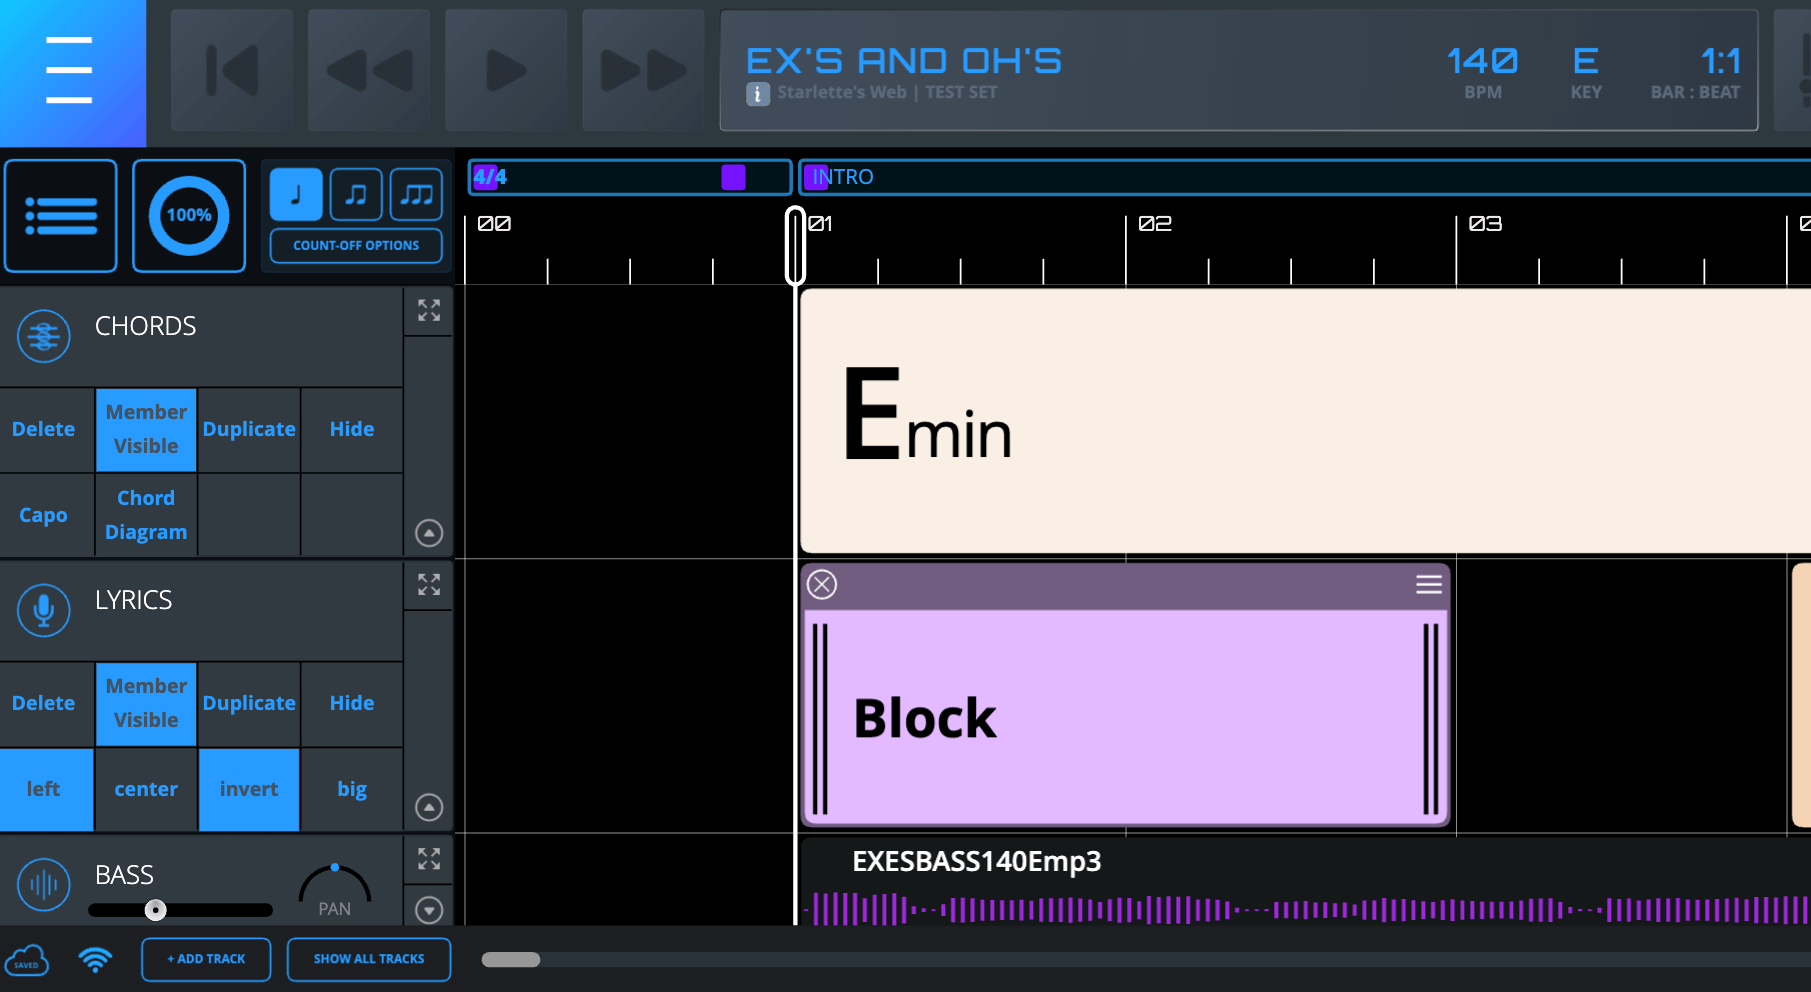
When a Block is selected, it becomes outlined in a darker color, and certain graphic elements will become visible depending on zoom level. Blocks that contain files will also show the file name.
A. Delete Button – Deletes that Block. Note – If multiple Blocks are selected, the Delete Button will delete only the specific Block that was hit. To delete multiple Blocks at once, use the Delete key.
B. Block Settings Icon – Opens the Block Settings dialog. Here, Song Owners and Band Members with appropriate Permission can change the Block color (except on Audio and MIDI Blocks). All Band Members can also add Private Notes.
C. Left Trim Handle – Trims (increases OR decreases) Block size from the left
D. Right Trim Handle – Trims (increases OR decreases) Block size from the right
E. Block Content – Will vary depending on the Block Type. This content is also visible even when the Block is not selected.
Block Actions
With the exception of creating Private Notes, the actions below can only be performed by Song Owners and Band Members with appropriate Track Permission.
Creating a Block
Double-click in the empty space in the Grid to the right of the bar line on a particular Track to create a one-bar Block. Note – You cannot create, trim, or move Blocks on top of one another.
Adding & Editing Block Content
Double-click in the middle of the Block to bring up the content entry dialog. Blocks on different Track Types have different content entry processes. Blocks in Text, Chord, and Lyrics Tracks ask for text input. Blocks in Audio, PDF, MIDI, Image, and Video Tracks prompt file uploads. Note – Blocks in Audio and MIDI Tracks automatically size to the correct length according to the file length and Song tempo. As a reminder, Blocks in Audio and MIDI Tracks CANNOT be trimmed.
Trimming Blocks
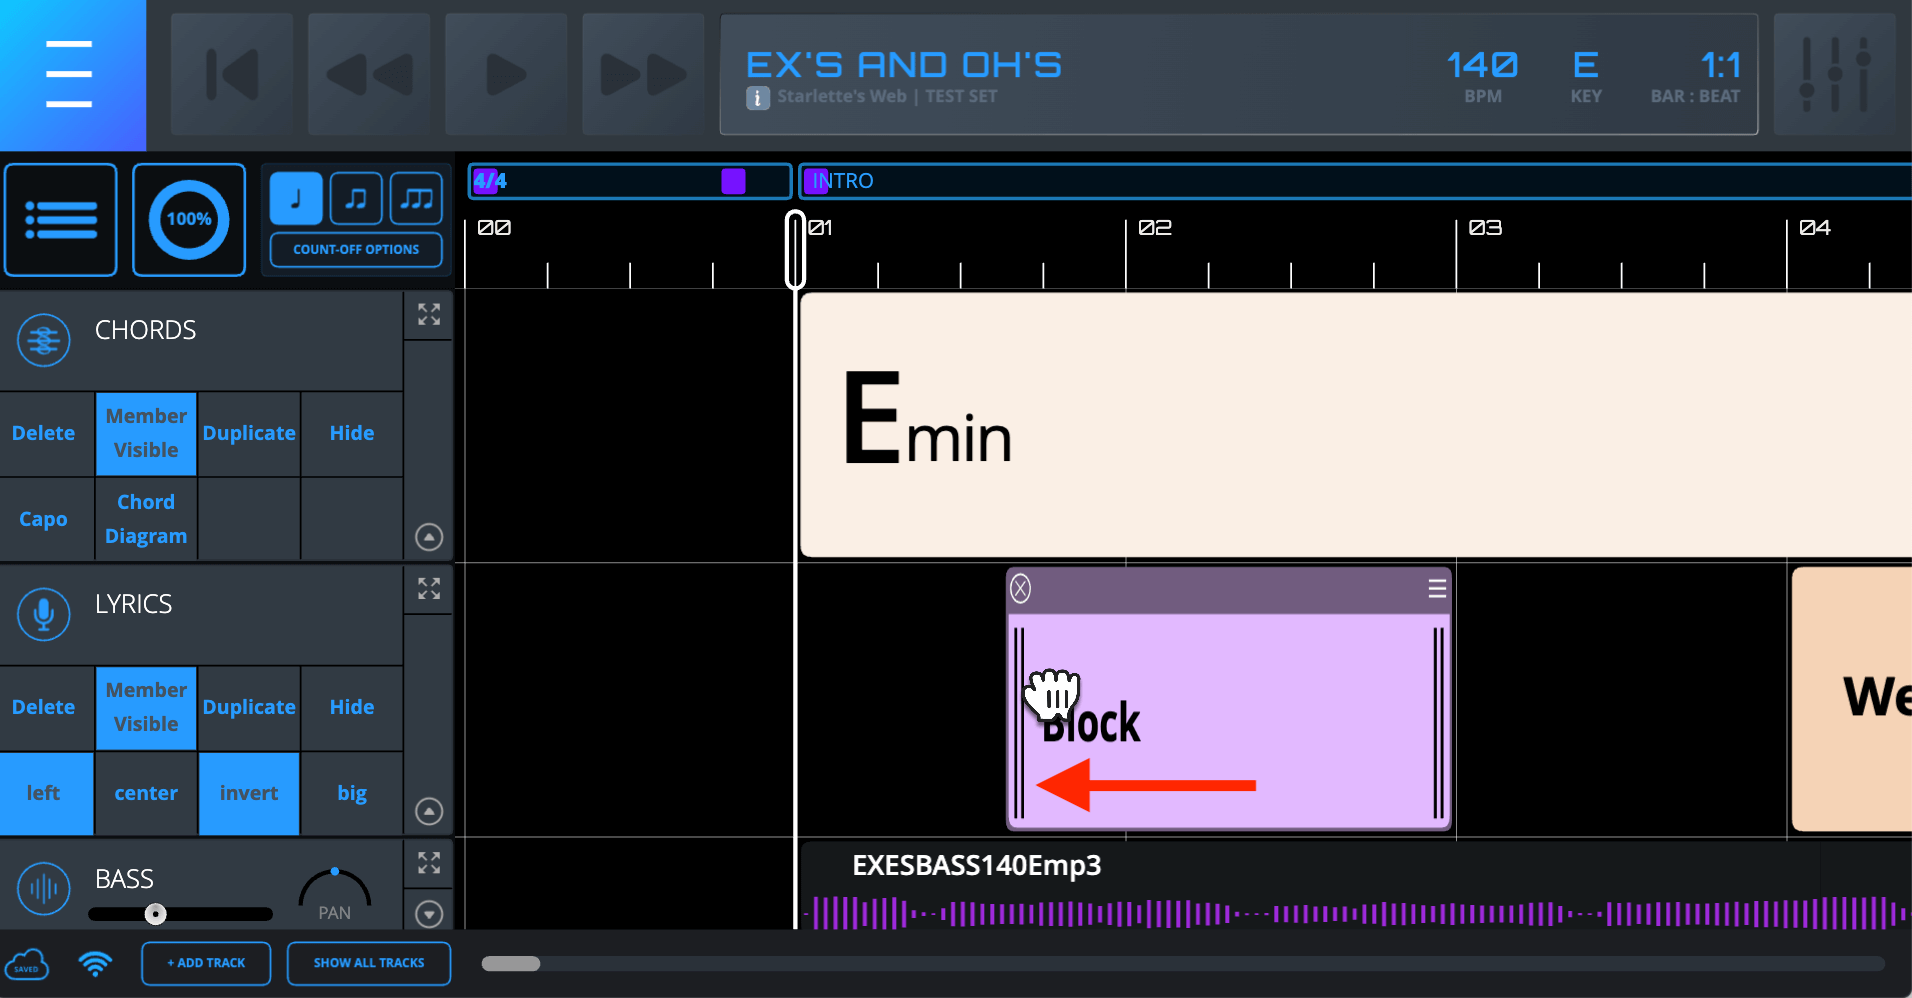
Single-click on either one of the Block’s Trim Handles and drag to increase or decrease the Block’s length. Note – Block lengths are snapped in eighth-note increments.
Selecting Blocks
There are several ways to select one or more Blocks:
1. Single-click on a Block.
2. Single-click on an empty space in the Grid and drag over one or multiple Blocks. Note – you can drag vertically across different Tracks to select Blocks on multiple Tracks.
3. Alternatively, to select a multiple Blocks, first select a single Block by single-clicking, and then hit [shift + ↑/↓/→/←] to expand the selection to other Blocks/Tracks.
4. Single-click on an empty space in the Grid on a Track and hit [command/control + A] to select all Blocks on that Track
5. To unselect the current selection, simply single-click on any empty space in the Grid.
Copying Blocks
With one or more Blocks selected, hit [command/control + C].
Cutting Blocks
With one or more Blocks selected, hit [command/control + X].
Pasting Blocks
After copying or cutting a selection, move the Playhead to the desired eighth-note on the Timeline and hit [Command + V].
Pasting Blocks
With one or more Blocks selected, hit [command/control + V].
Duplicating Blocks
With one or more Blocks selected, hit [command/control + D]. This will create a duplicate selection on the Track(s) in the next empty area to the right that’s large enough to contain the entire selection.
Changing Block Color
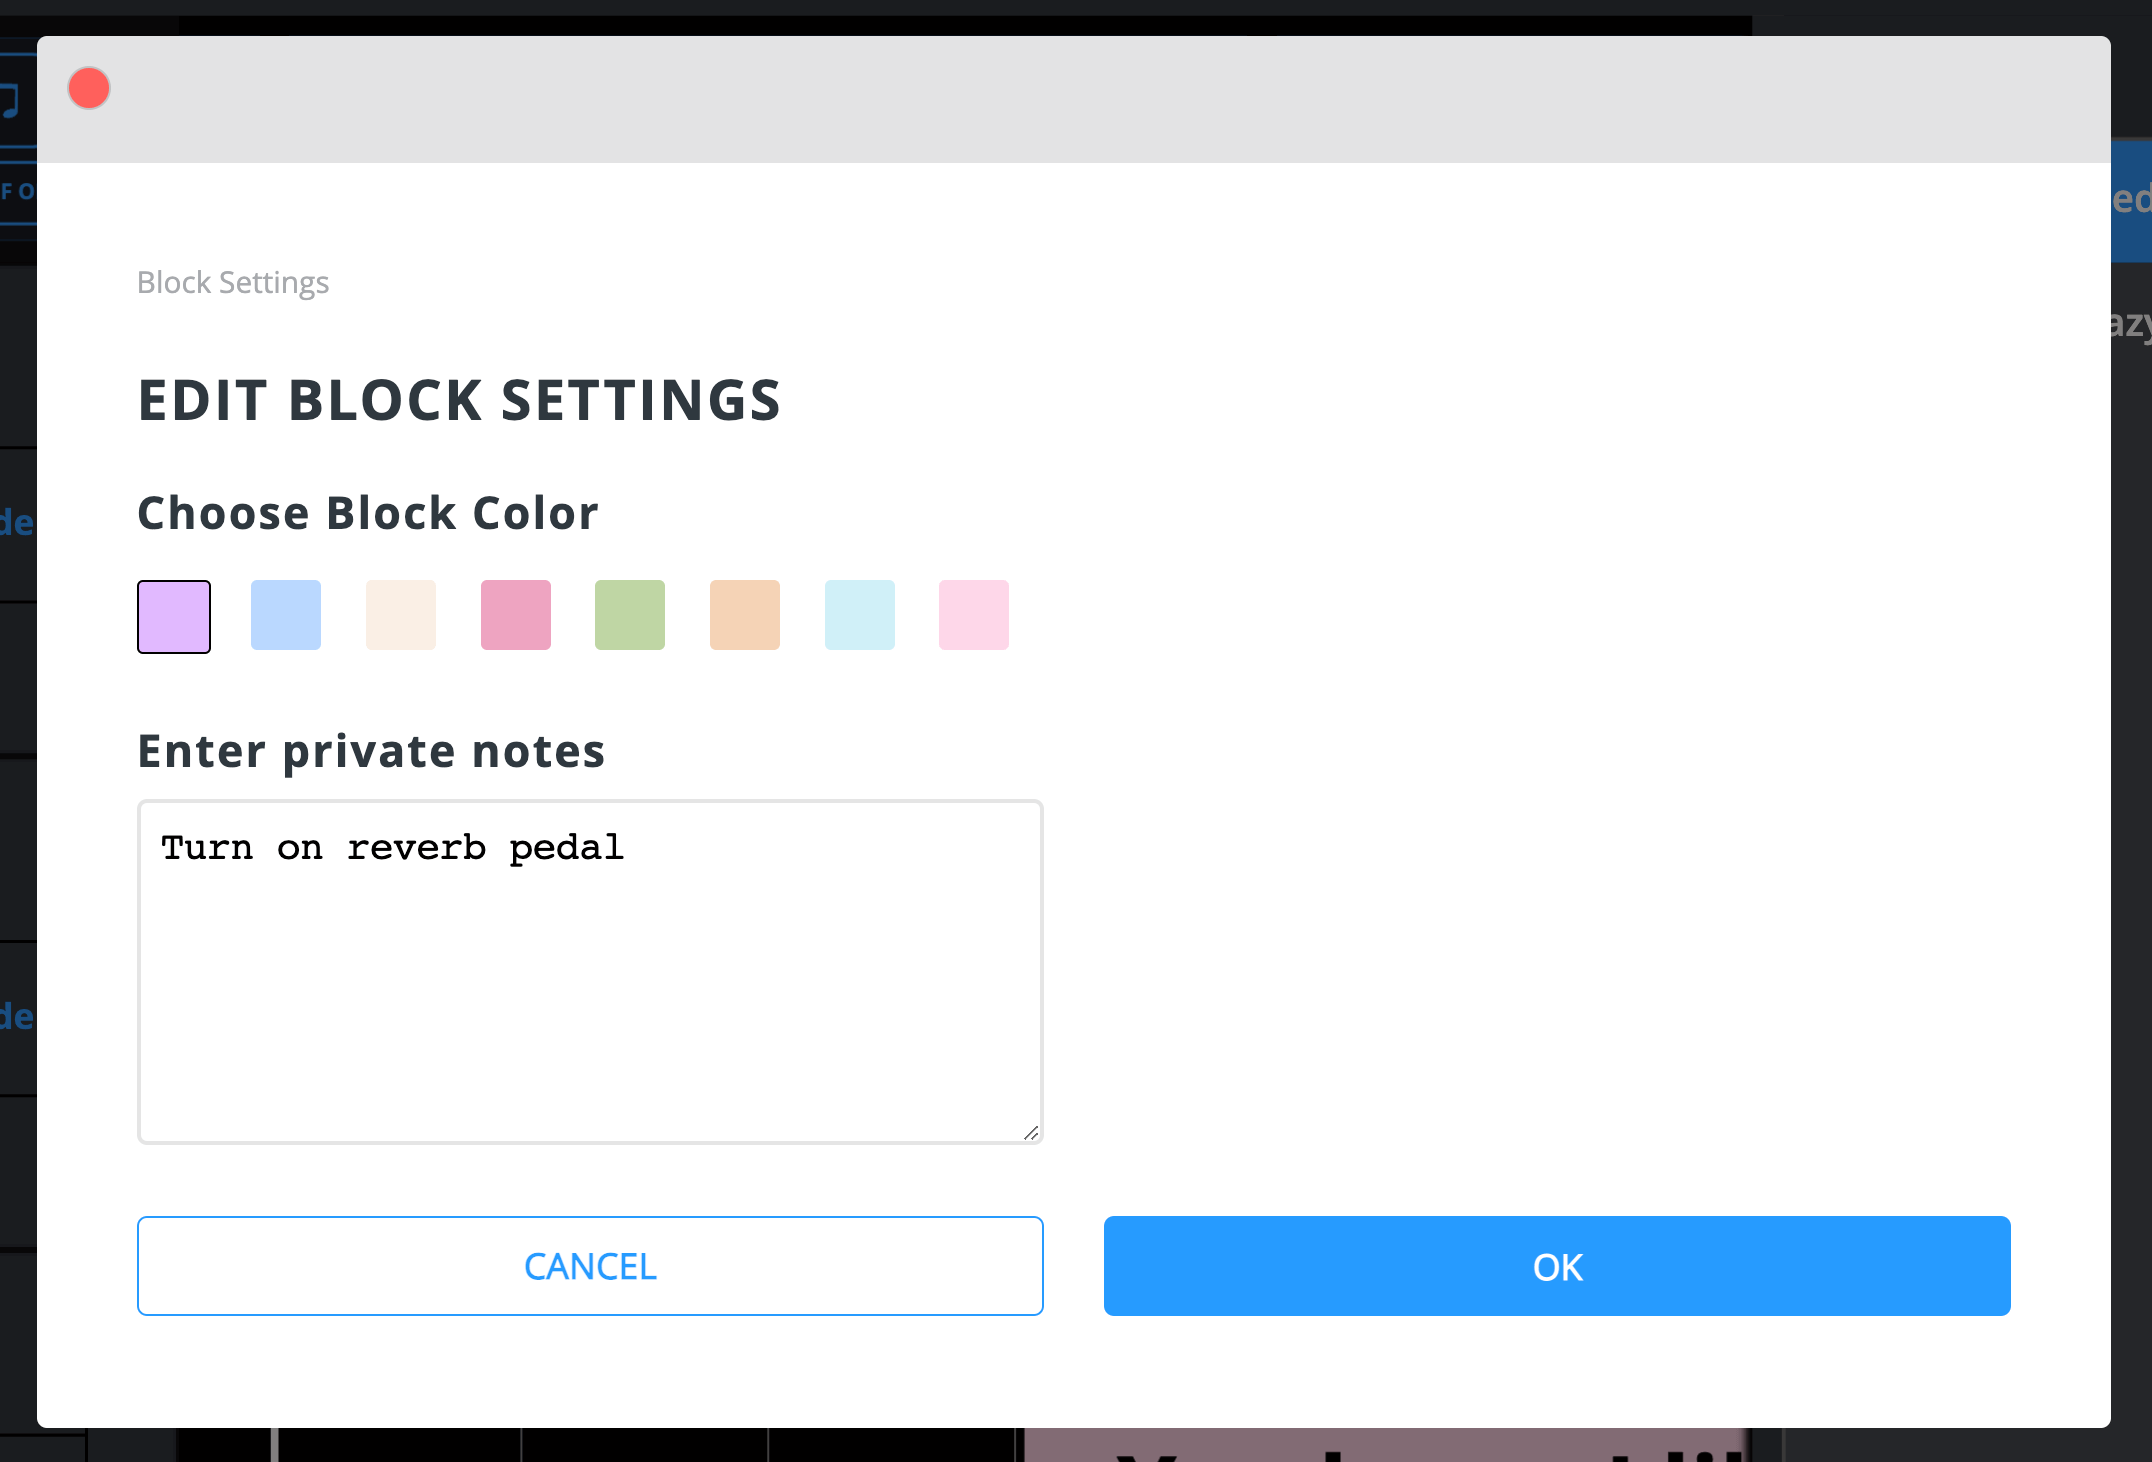
Select a Block and click on the Block Settings Icon. A dialog will open where you can change the color. Note – Audio and MIDI blocks cannot have their colors changed.
Uploading Files
Double-click on the body of the Block and complete the file upload dialog. Applies to Audio, PDF, MIDI, Image, and Video Tracks/Blocks only. Only Song Owners and Band Members with Permission can upload files.
Moving Blocks
Select one or more Blocks and drag left or right.
Deleting Blocks
With a single Block selected, hit the “Delete” key on your keyboard or click the Delete Button. To delete two or more Blocks simultaneously, hit the “Delete” key on your keyboard.
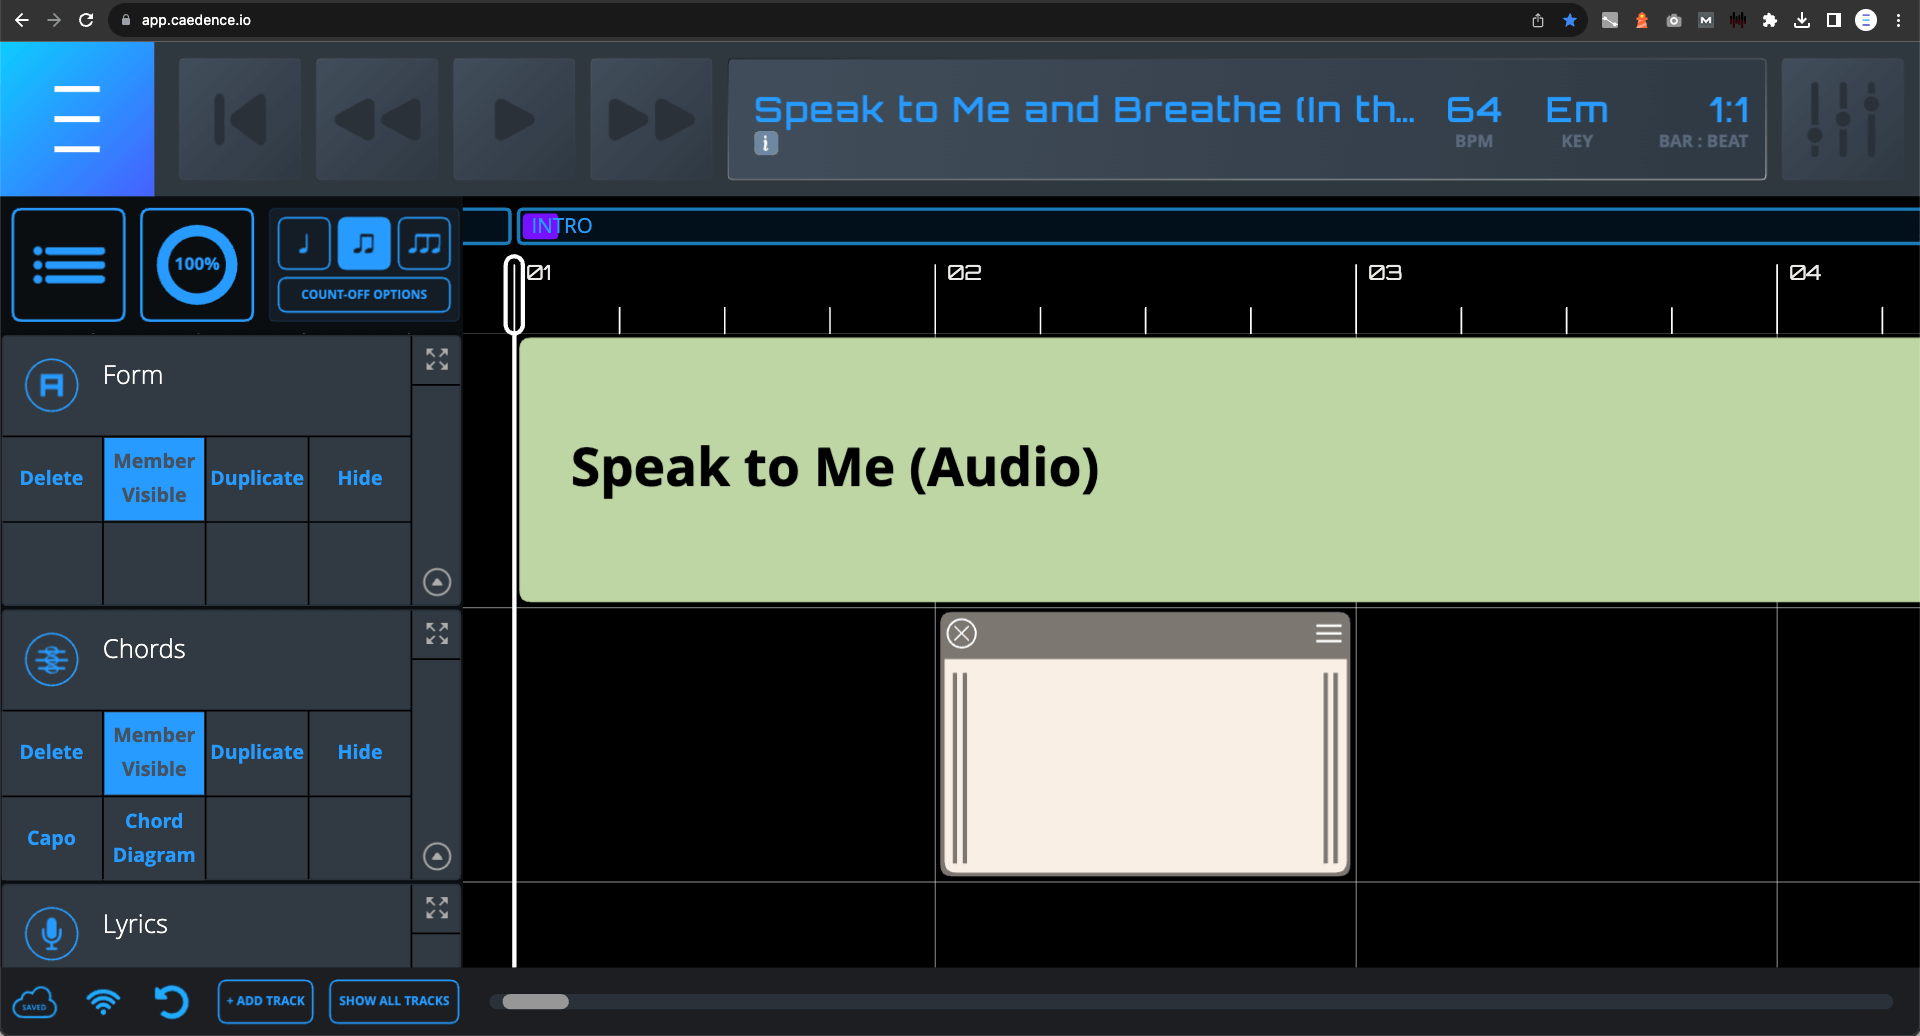
Adding Private Notes
All Band Members can add their own Private Notes on top of a Block. As the name implies, Private Notes can only be seen by the Band Member who creates them. Furthermore, Private Notes are saved at the Caedence user level, and as such, they will persist across devices. However, if the Block that the Private Notes are attached to is deleted, the Private Notes will also be deleted.
To add Private Notes:
1. Click on the Block Settings Icon of the Block you want to attach your Private Notes to. Note – The Private Note will be attached to the beginning of the chosen Block.
2. Enter the Private Notes in the text area provided and click “OK”
3. The Private Notes will appear similar to a “sticky note” on top of the beginning of the Block.
3. The Timeline
The Timeline is the display of Bars & Beats, Markers, Timeline Commands, and Time Signatures. The Timeline is only visible on the Main Interface, and only Song Owners can edit the Timeline. Markers and Timeline Commands can be inserted on any eighth-note on the Timeline. Time Signature changes can only be inserted on the first eighth-note of a bar.
Timeline Actions
1. Moving the Playhead. Note – Band Members with Transport Permission can also move the Playhead in a Performance. All Band Members can move the Playhead during Individual Practice
2. Inserting Markers to divide Songs into different sections and provide other information (performed in the Timeline Editor)
3. Changing Time Signature (performed in the Timeline Editor)
4. Inserting Timeline Commands to perform various Caedence system and MIDI functions (performed in the Timeline Editor)
Moving the Playhead
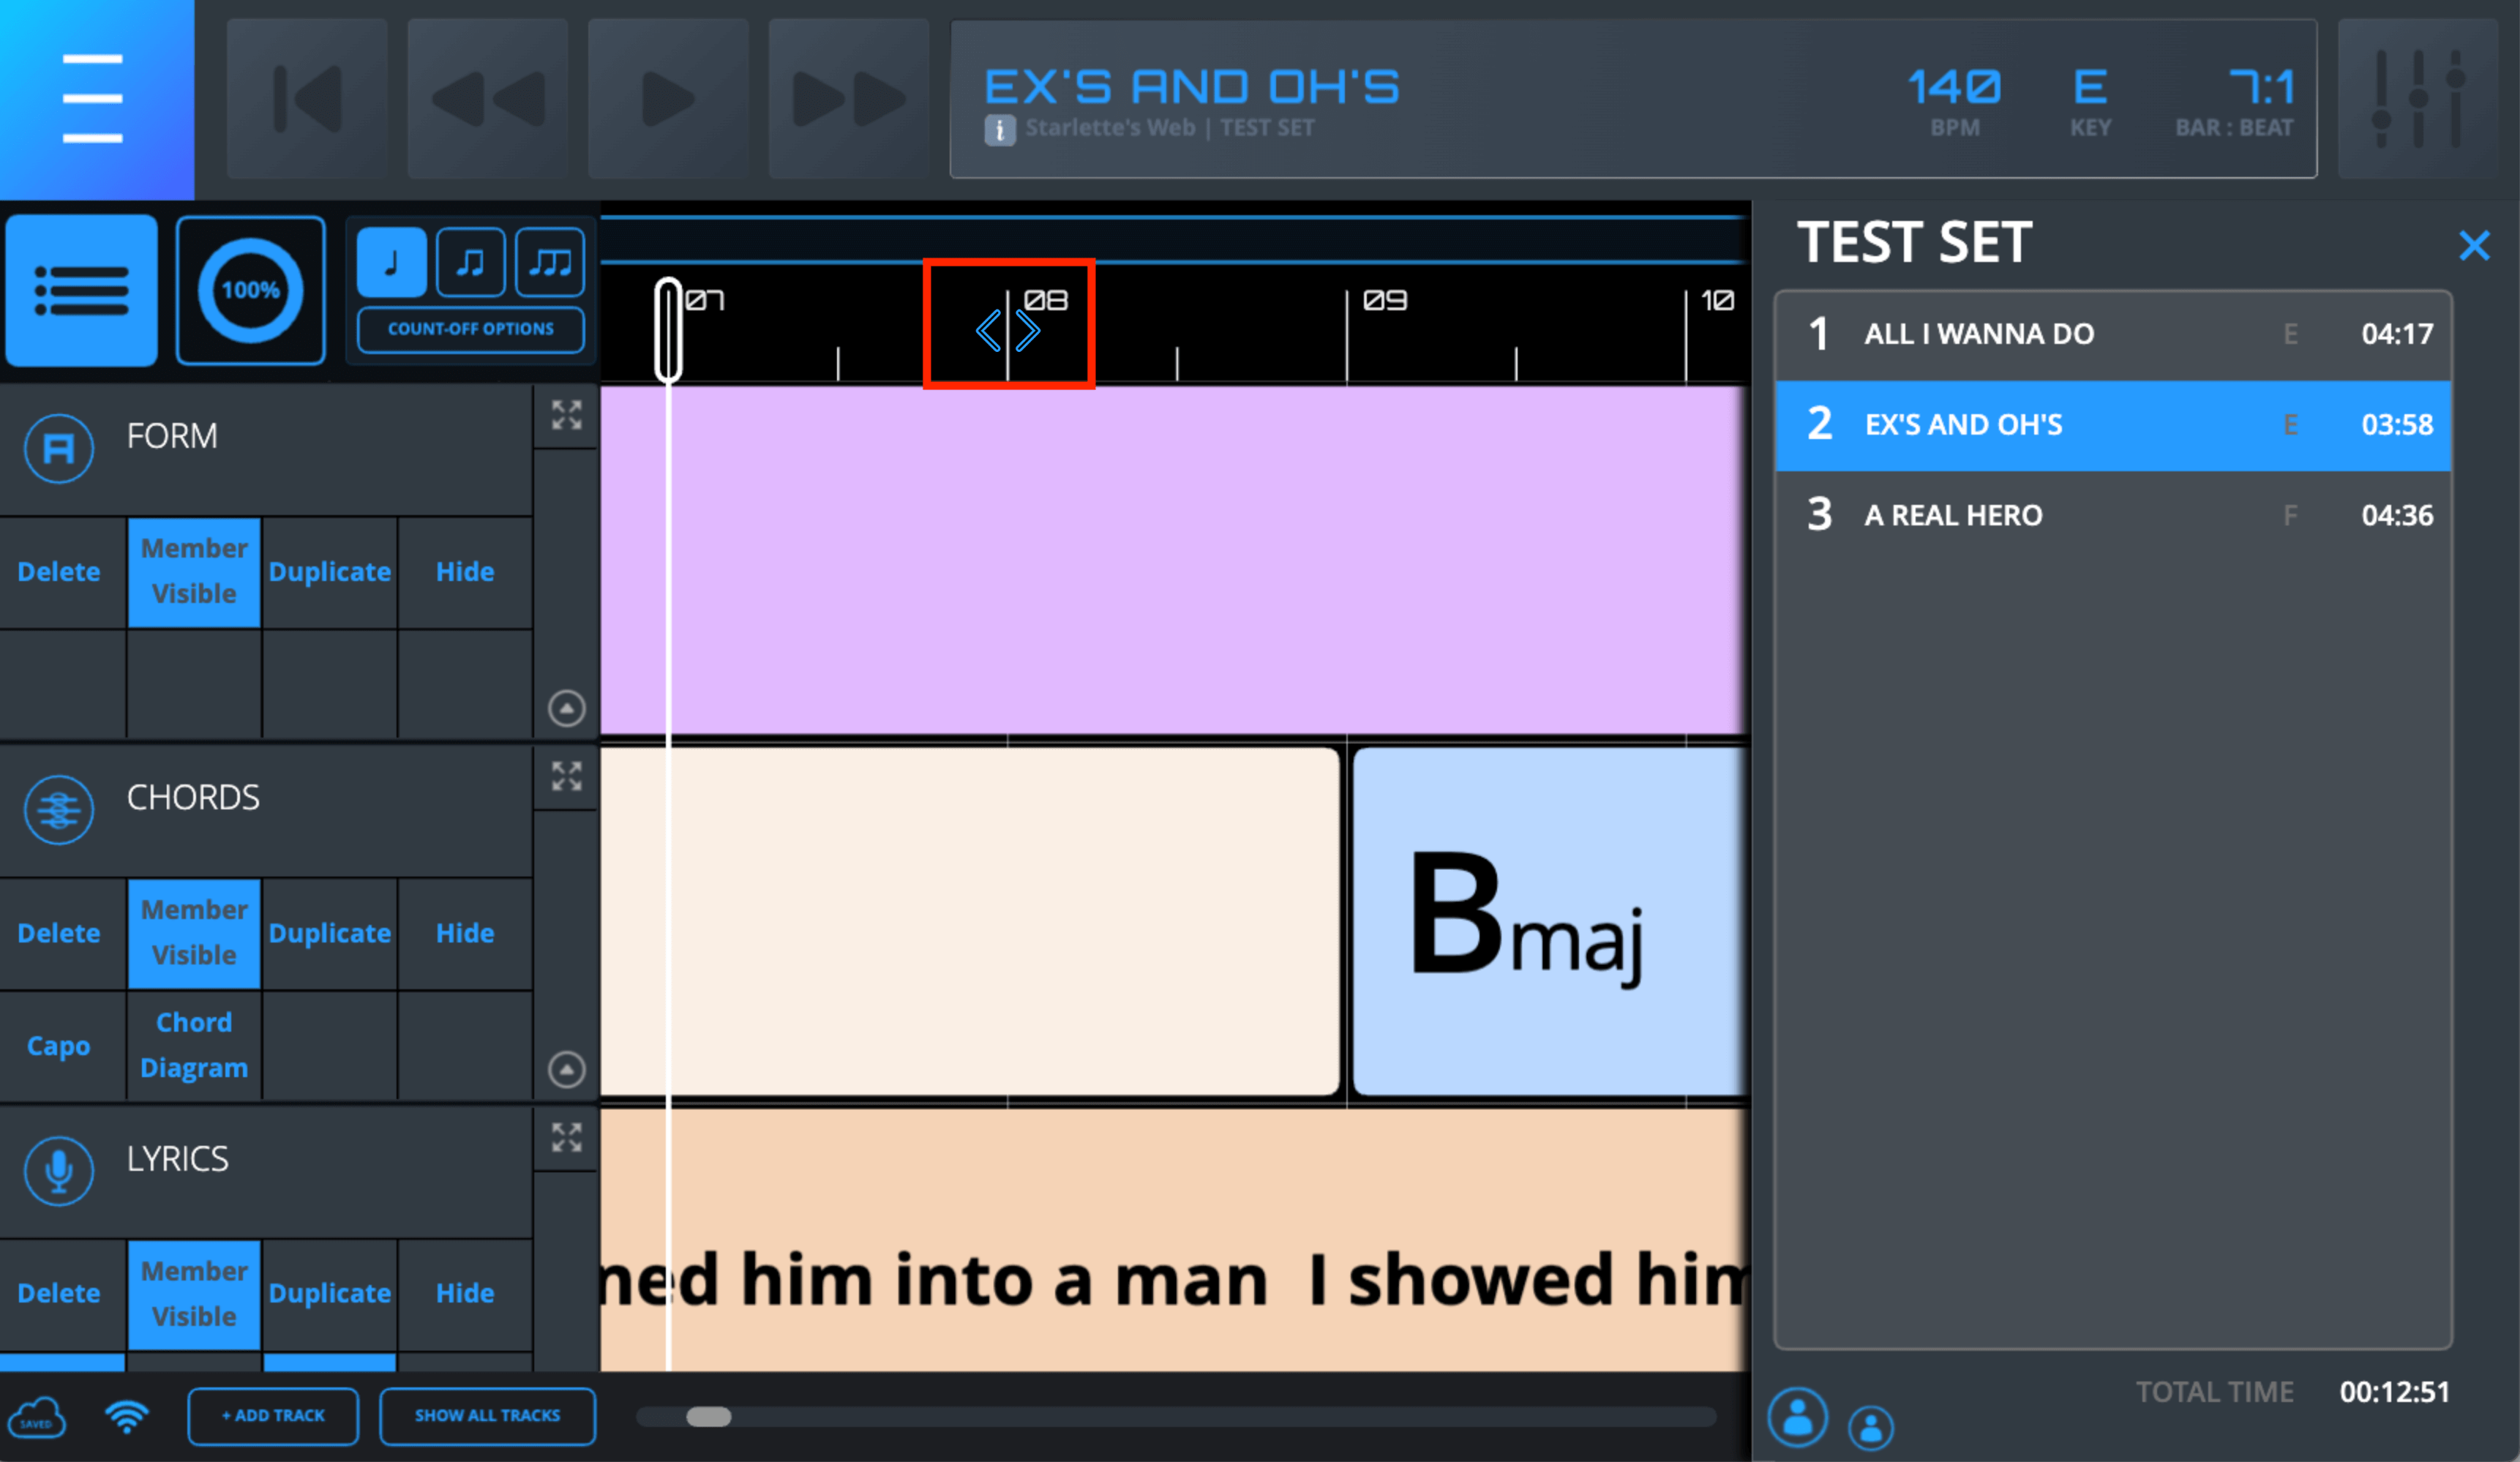
Hover over the Timeline until you see the blue Playhead Mover Cursor and then single-click. This will move the Playhead to the specific eighth-note you chose. Note – the Playhead Mover Cursor “jumps” out of the way of the Playhead. Also, as a reminder, the closer you zoom in, the more Subdivision Tick Lines you will see.
Accessing the Timeline Editor (Song Owners only)
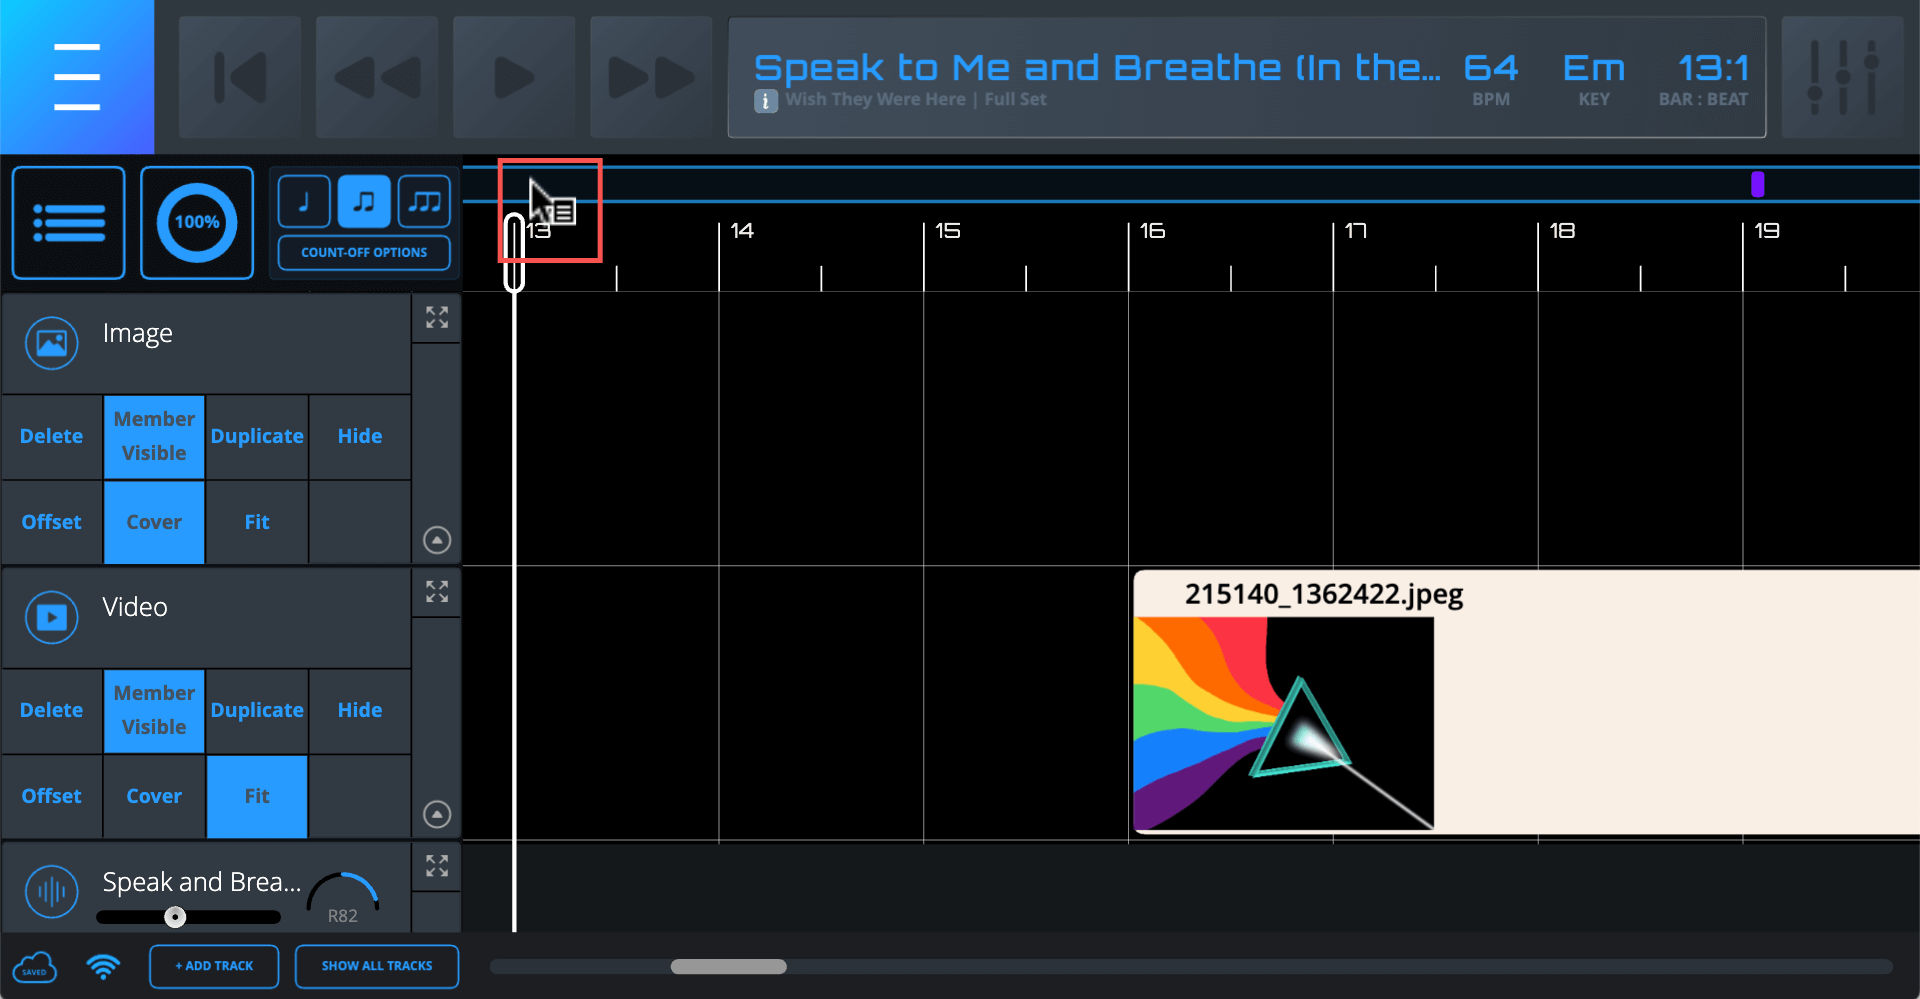
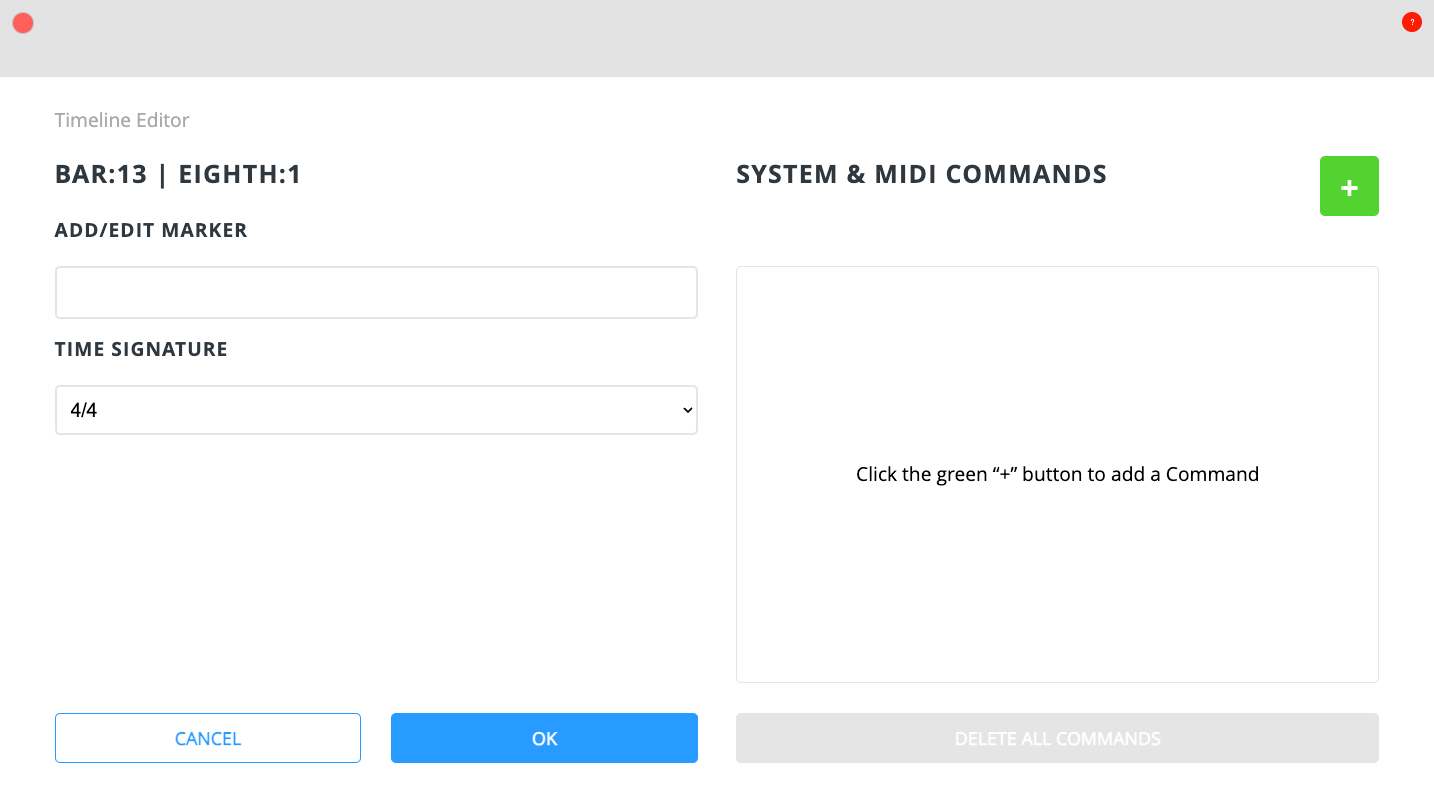
Hover over the area above the Bar and Subdivision Tick Lines until the Contextual Menu Cursor appears and single-click. This will open up the Timeline Editor for that specific eighth note. In the Timeline Editor you will be able to:
Inserting Markers
Add/edit Markers in the text field provided and click “OK”. Markers are very useful for marking different Song sections and/or other performance notes.
Changing Time Signatures
You can change the time signature of each bar of a Song – if necessary. Time signature changes can only occur on the first eighth-note of a bar. Since most Songs have just one time signature, you will only need to set it once on the very first eighth-note. The default time signature for new Songs is 4/4. To change subsequent bars/sections:
- Open the Timeline Editor on the eighth-note where you want the change to occur
- Click on the Time Signature dropdown field
- Choose the Time Signature.
Note – A single change will set all subsequent bars of the Song to the new time signature. If you need to change subsequent bars/sections again, repeat the process above.
Inserting Timeline Commands
Timeline Commands perform useful functions and act as an “extra set of hands”. From changing Songs in a Set – to triggering MIDI program changes – there are many things you can do with Timeline Commands:
Command Name: Start Click
Command Type: System
What Does It Do: Starts the click. Songs have this command built in by default.
Additional Information Needed: None
Command Name: Stop Click
Command Type: System
What Does It Do: Stops the click
Additional Information Needed: None
Command Name: Cue Next
Command Type: System
What Does It Do: Loads the next Song in the Set to be started by a subsequent command.
Additional Information Needed: None
Command Name: Play Next
Command Type: System
What Does It Do: Automatically plays the next Song in the Set with no count-off
Additional Information Needed: None
Command Name: Count Next
Command Type: System
What Does It Do: Plays the next Song in the Set with a count-off
Additional Information Needed: None
Command Name: Start Clock
Command Type: MIDI
What Does It Do: Starts MIDI Clock. Songs have this command built in by default.
Additional Information Needed: MIDI Output(s)*
Command Name: Stop Clock
Command Type: MIDI
What Does It Do: Stops MIDI Clock
Additional Information Needed: MIDI Output(s)*
Command Name: All Notes Off
Command Type: MIDI
What Does It Do: Stops all MIDI notes from playing
Additional Information Needed: MIDI Output(s)*, MIDI Channel
Command Name: All Notes Off
Command Type: MIDI
What Does It Do: Stops all MIDI notes from playing
Additional Information Needed: MIDI Output(s)*, MIDI Channel
Command Name: Note Off
Command Type: MIDI
What Does It Do: Stops a specific MIDI note from playing
Additional Information Needed: MIDI Output(s)*, MIDI Channel, Note Number
Command Name: Note On
Command Type: MIDI
What Does It Do: Plays a specific MIDI note
Additional Information Needed: MIDI Output(s)*, MIDI Channel, Note Number, Velocity
Command Name: Program Change
Command Type: MIDI
What Does It Do: Changes a MIDI program
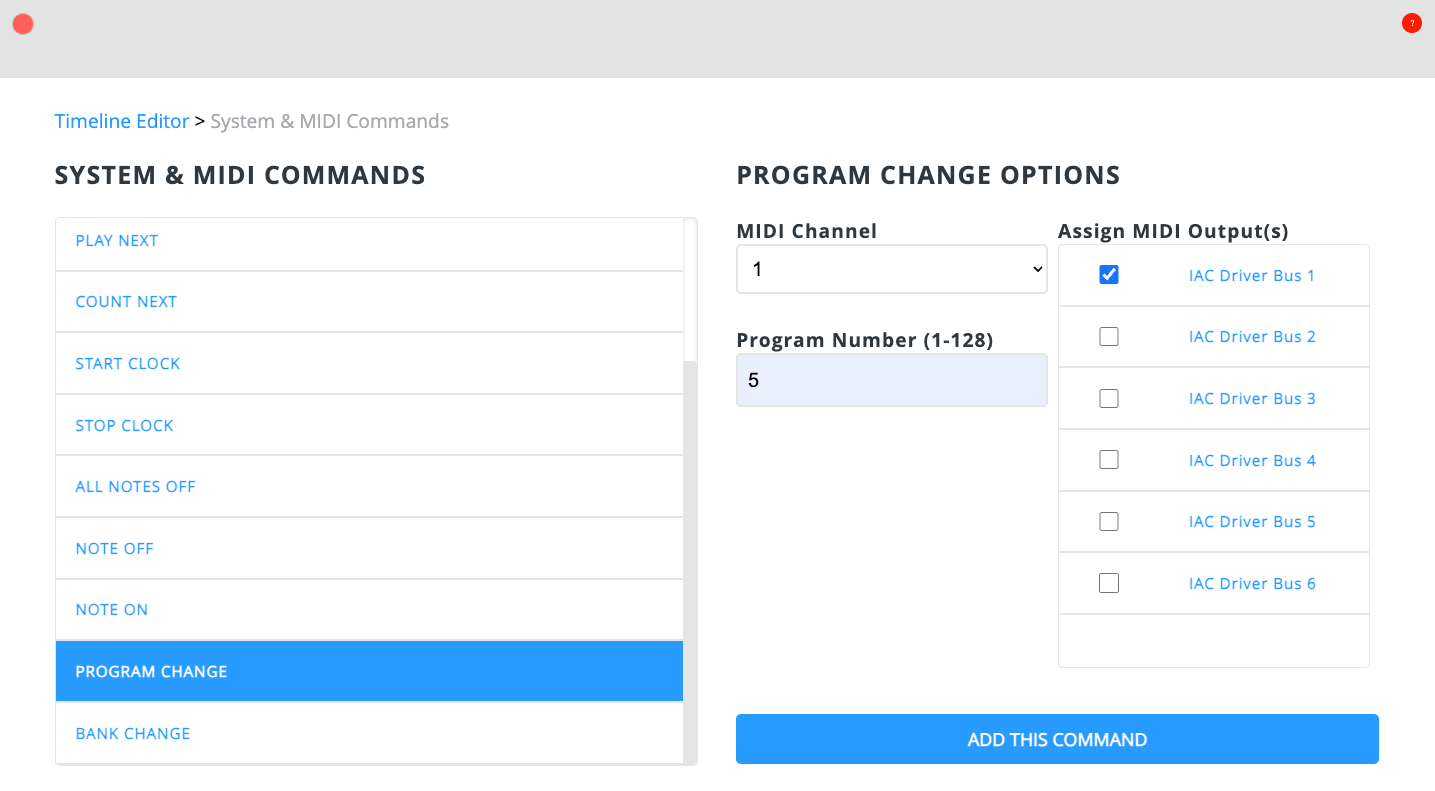
Additional Information Needed: MIDI Output(s)*, MIDI Channel, Program Number
Command Name: Bank Change
Command Type: MIDI
What Does It Do: Changes a MIDI bank
Additional Information Needed: MIDI Output(s)*, MIDI Channel, MSB, LSB
Command Name: Continuous Controller
Command Type: MIDI
What Does It Do: Sends a specific Continuous Controller command
Additional Information Needed: MIDI Output(s)*, MIDI Channel, CC Number, CC Value
*If you don’t select a particular MIDI Output(s), the command will be sent to all MIDI Outputs.
The Timeline Command Builder
To add commands, use the Timeline Command Builder once you’re in the Timeline Editor. Note – You can add more than one command on a particular eighth-note. To access the Timeline Command Builder:
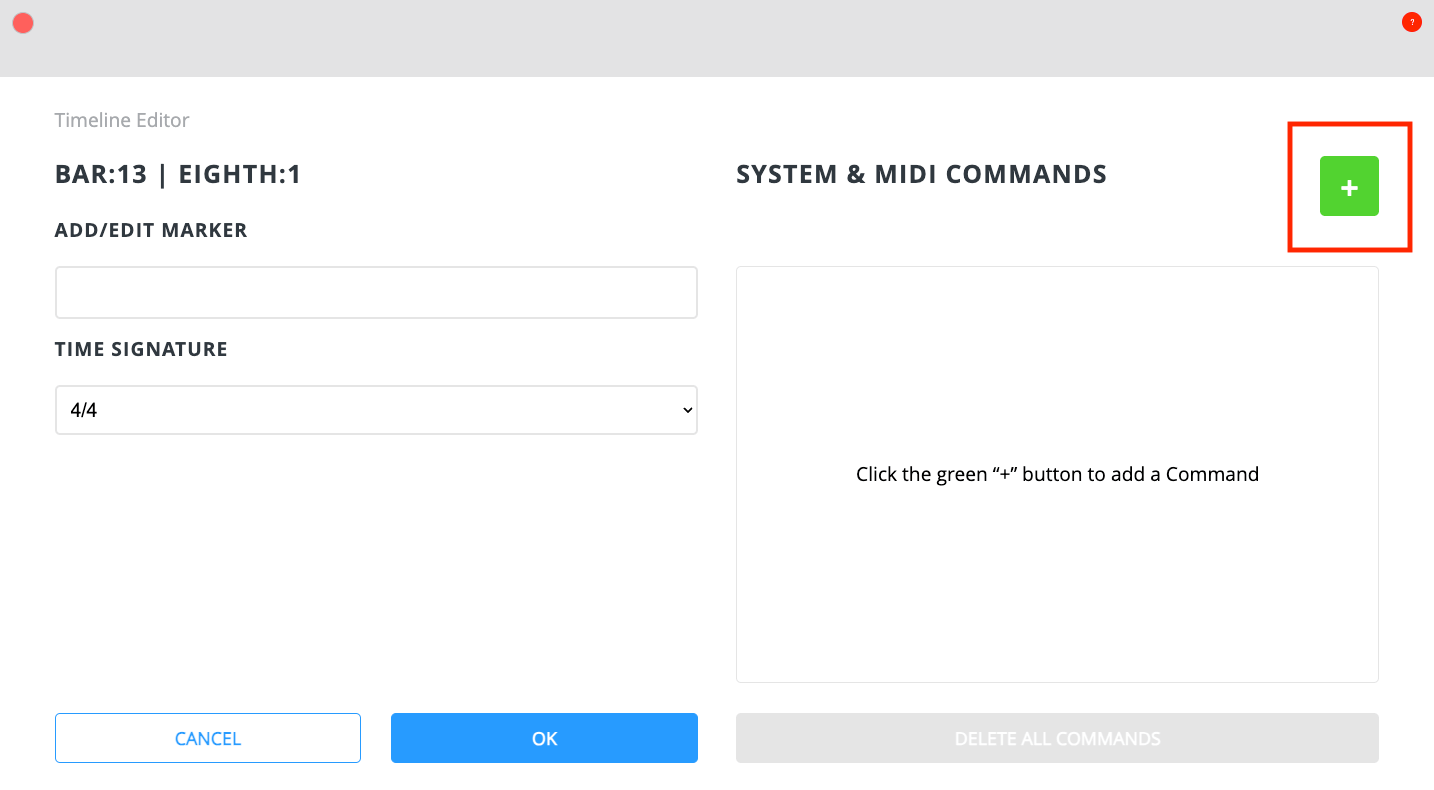
1. In the Timeline Editor, click the green plus button.
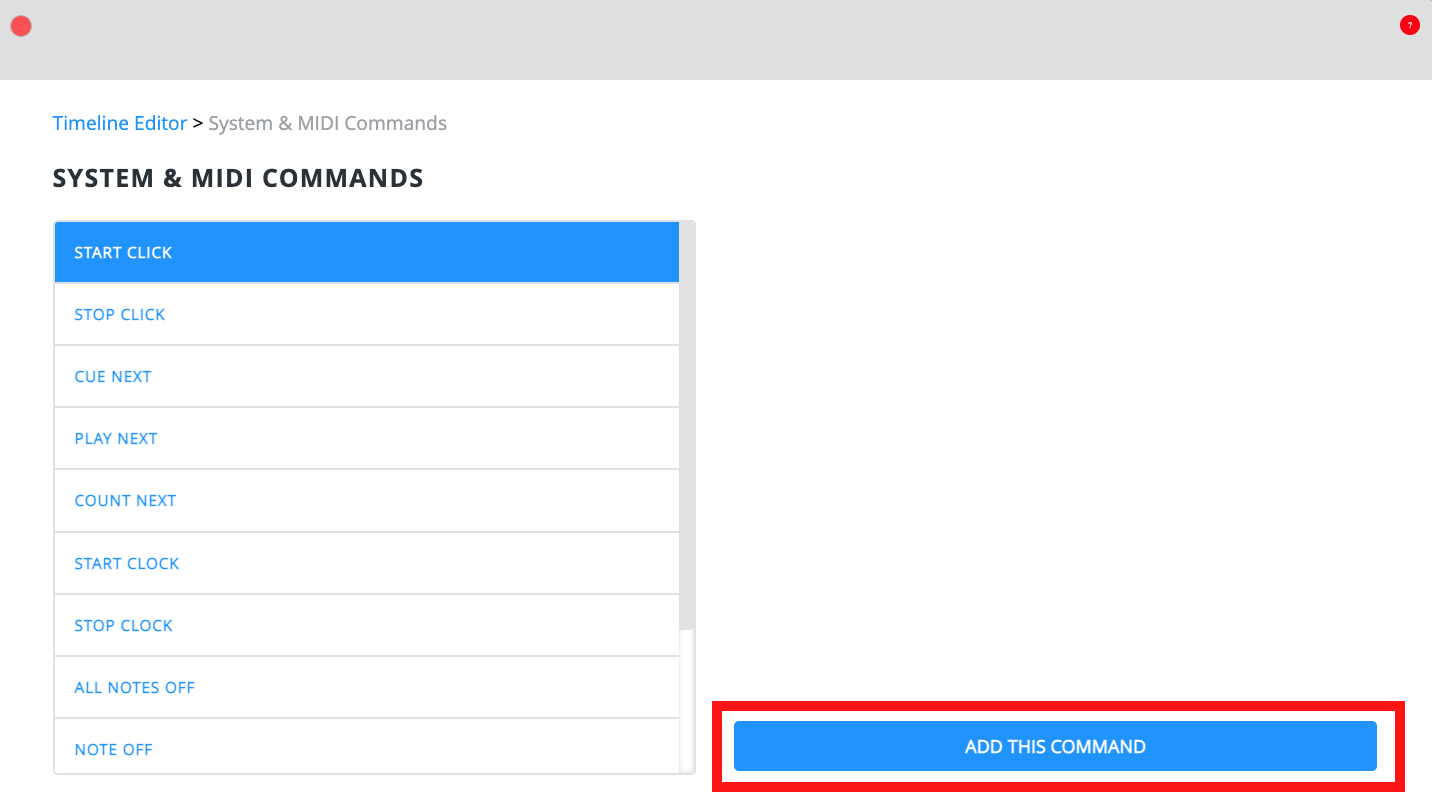
Click a Command from the left column and then click “Add This Command”.
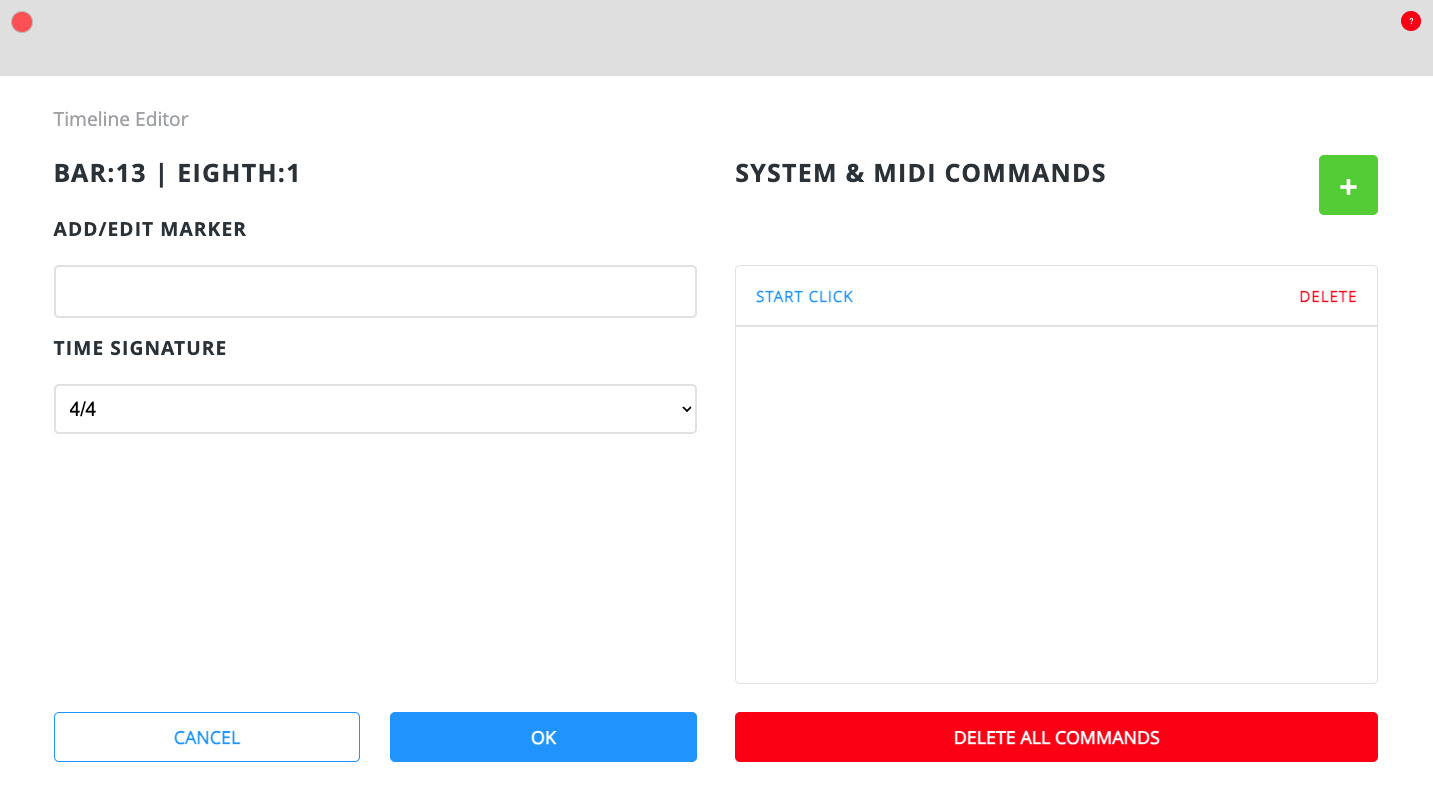
The Timeline Command will then show up in the System & MIDI Commands pane in the Timeline Editor.
MIDI Timeline Commands require additional information such as MIDI Channel, MIDI Output(s), and other variables depending on the specific MIDI Command. Here is an example of a program change:
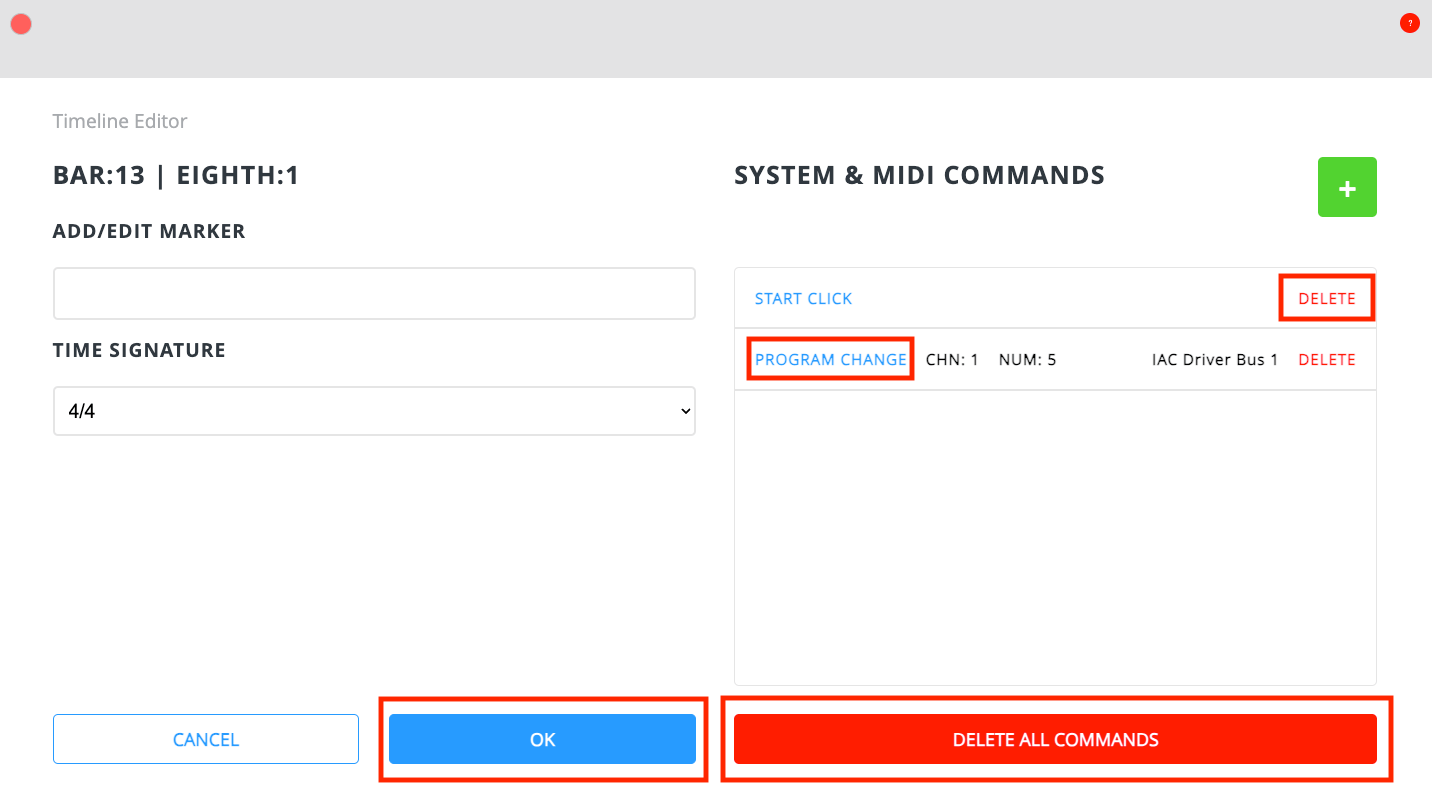
From the System & MIDI Commands pane you can delete one or all Timeline Commands on that eighth-note. MIDI Timeline Commands will display additional information. If you need to edit to a MIDI Timeline Command, simply click on it and you will be taken back to the options screen.
Once you have added the Timeline Command(s) you want for a particular eighth-note, click “OK”.
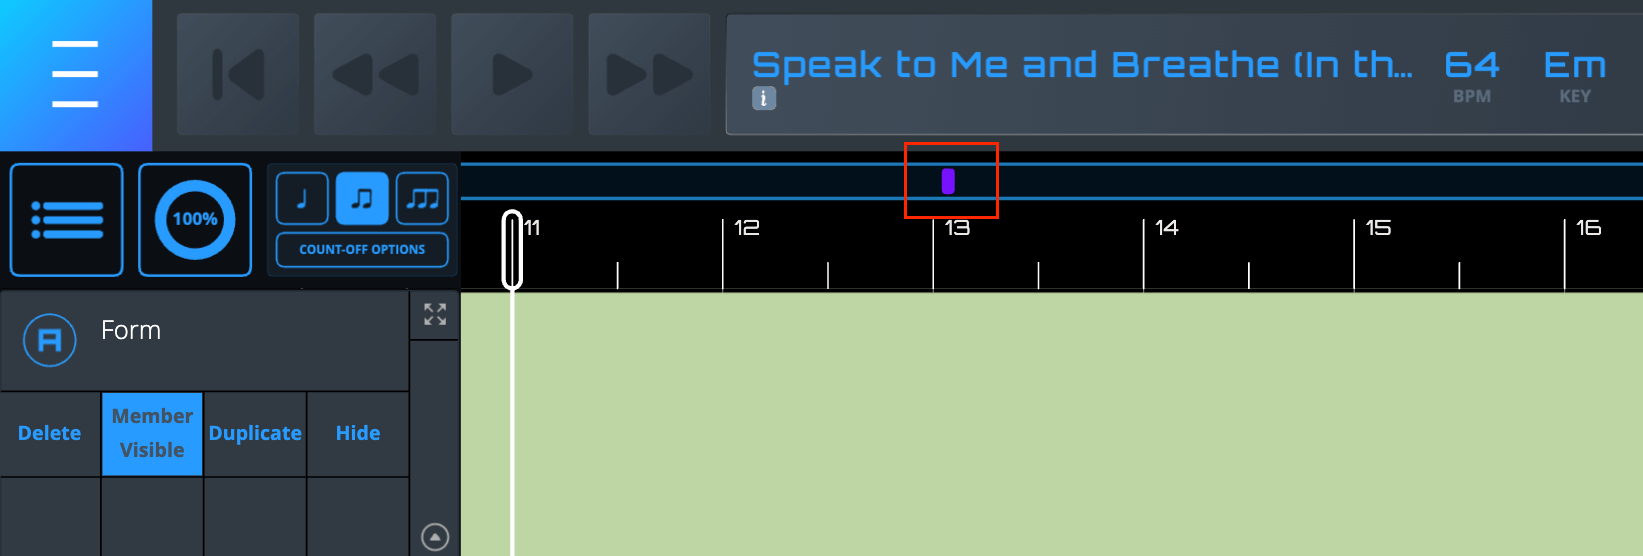
A small purple Timeline Command Indicator will appear on the Timeline to show that one or more Timeline Commands have been added to that eighth-note.

