Getting Started
1. Logging in to Caedence
- Go to app.caedence.io (or the URL provided by your organization), enter your email address and password, and click “LOG IN”.
- Read the Terms and Conditions and Privacy Notice and confirm that you are 13 years or older, and then click “AGREE”.
- Click “LAUNCH”.
3. User Profile
You Caedence User Profile displays your name, email address, current subscription, and current data usage. It also contains links to manage your subscription, sign out, and save any edits that you make to your name.
Note – Certain group/organization account types may lack some functionality in User Profiles.
4. General Settings
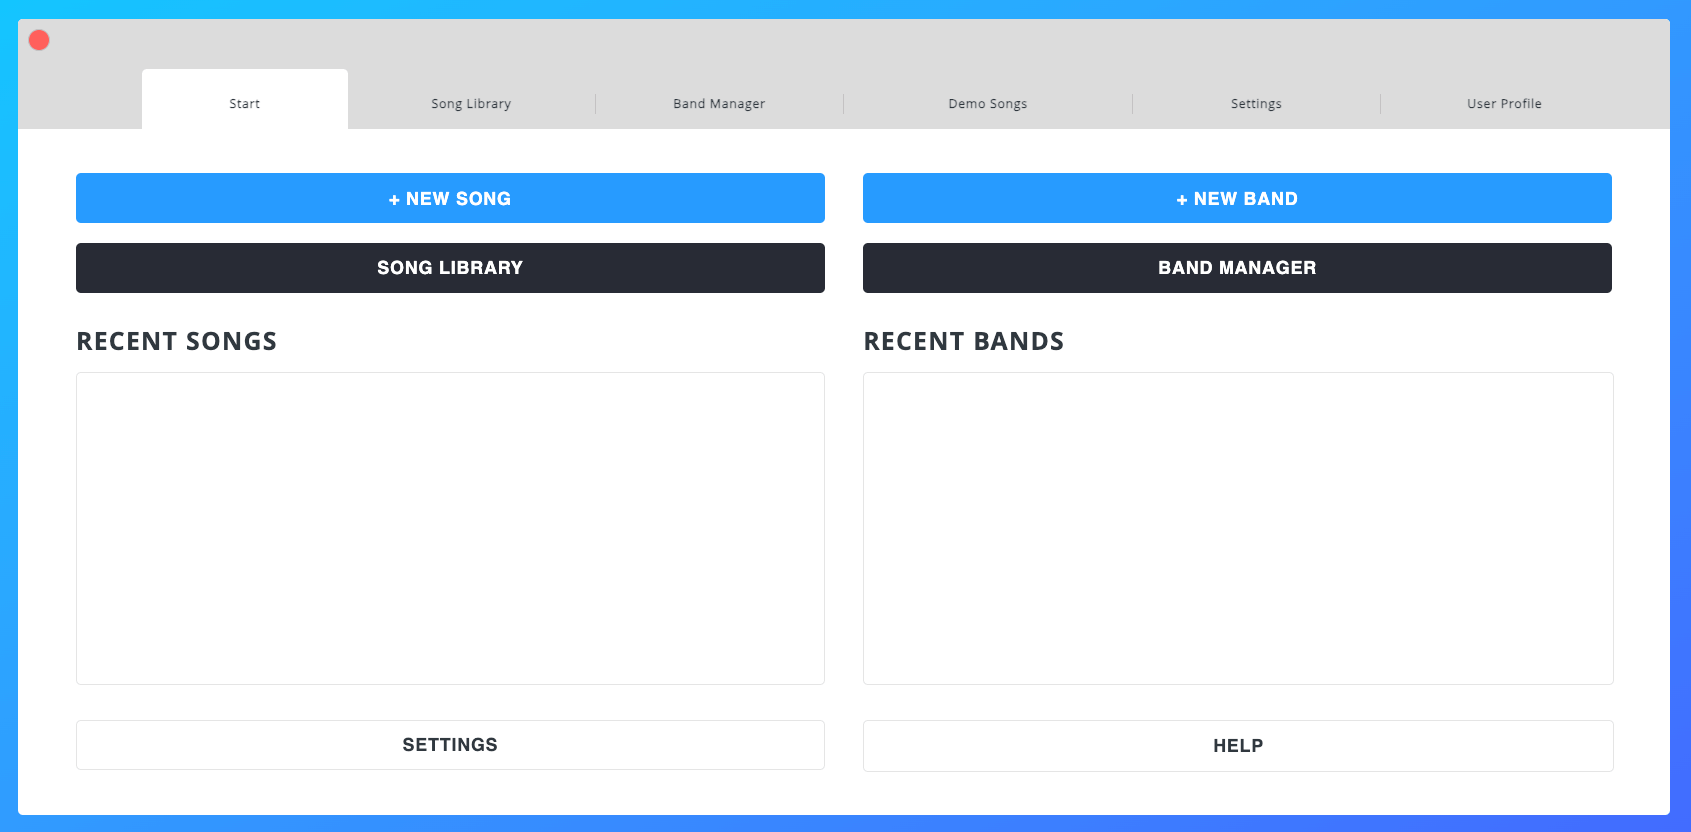
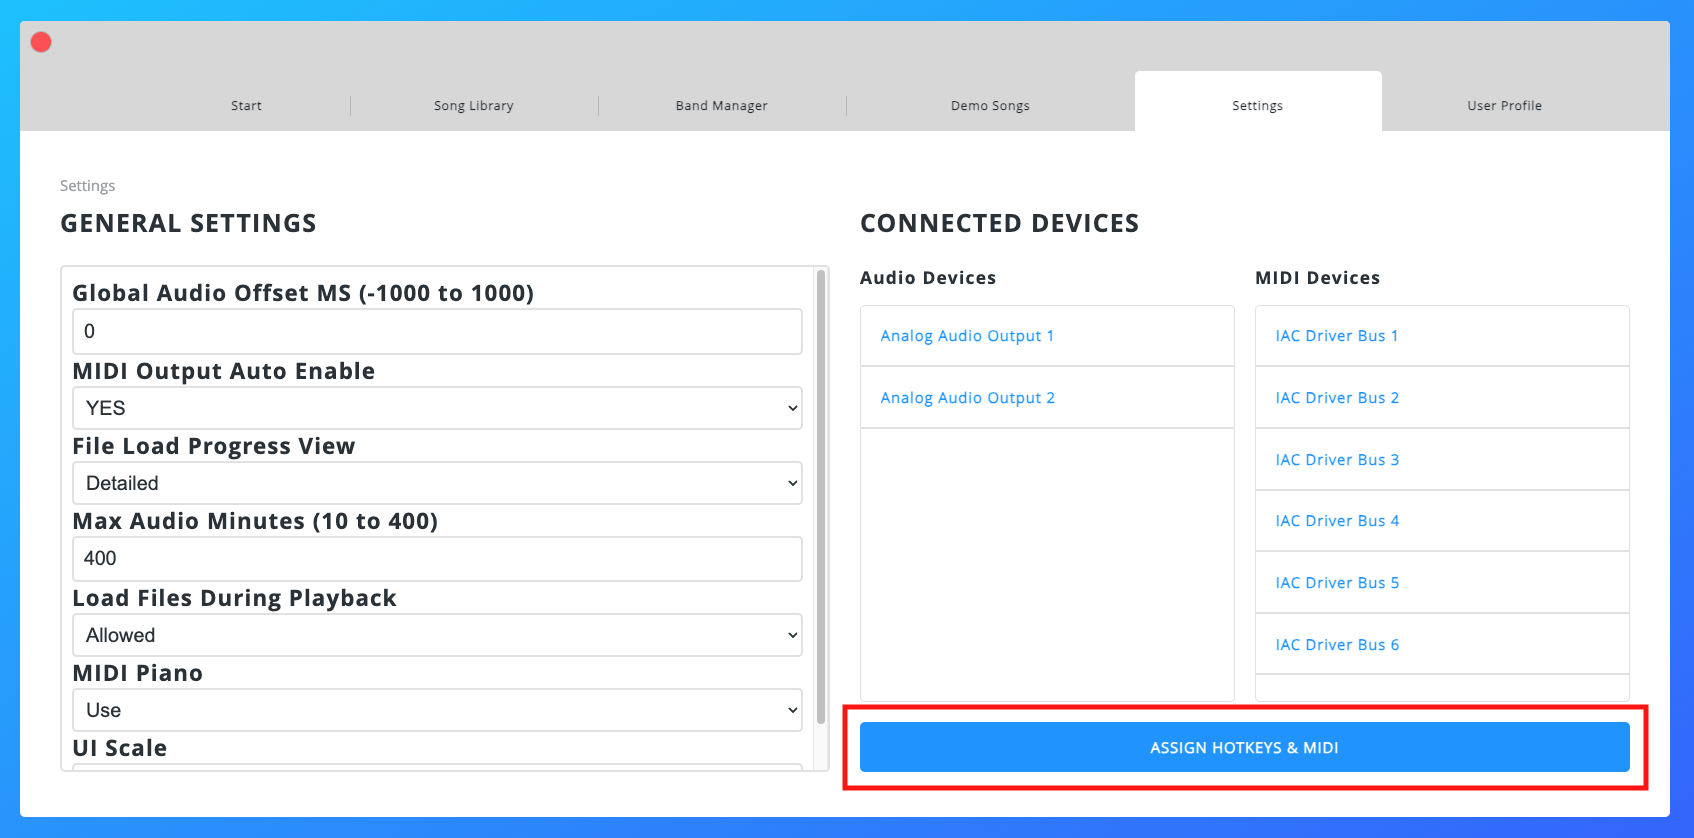
General Settings allow you to shape your overall Caedence experience and optimize for specific devices. As such, General Settings are device-specific. You can navigate to the General Settings either from the Settings tab, or by clicking the button in the bottom left of the Start tab.
Global Audio Offset MS
Global Audio Offset MS (milliseconds) causes audio playback to be scheduled ahead or behind the normal timing. Computers and audio devices can introduce latency in different amounts, and this setting can help mitigate the effects.
MIDI Output Auto-Enable
To newly connected MIDI devices, meaning a device where no selection has yet been made. This means MIDI ‘just works’ when you are getting started and have a single interface or instrument. Using channel assignment can be adequate to target multiple MIDI devices connected to a single output.
Set MIDI Output Auto-Enable to “no” if you want to select specific destinations for each command and track. When you have a complex setup with multiple MIDI outputs or virtual instruments you may not want every command or track routed to every destination.
In both cases, you can select or deselect specific devices and your preference will persist when the device is reconnected. Be aware some interfaces and software instruments will report a changing device ID or duplicate names. This can cause preferences to not apply reliably.
File Load Progress View
The File Load Progress View setting lets you determine the level of detail of the downloading progress of files you see after clicking the File Load Progress icon in the Main Interface. You can choose between “Slim” and “Detailed”.
Max Audio Minutes
Caedence attempts to preload all the media needed to play through an entire set so you know a temporary network interruption won’t disrupt playback. System RAM determines how much memory is available to the browser. If the browser uses too much memory files could fail to load or the browser may crash.
In cases where a set has more audio than can be reliably stored in memory, the Max Audio Minutes setting limits the amount of audio that is loaded at any given time. Caedence prioritizes any audio needed for the current song, then loads audio for subsequent songs. When a song is over and later audio is waiting to be loaded, more memory is freed up by automatically removing previously played audio.
Choosing a Max Audio Minutes Setting
In the loading panel under ‘MEM’ you can see how much memory the browser is using and the maximum available, in Megabytes. Audio is stored in buffers which use 10Mb per minute. MP3 encoding or mono wavs will save cloud storage and download time, but doesn’t reduce buffer size.
We recommend setting Max Audio Minutes so that half of the available memory can be allocated to audio. For example a MacBook Air with 4Gb RAM provides ~2GB to the browser. Half of that is 1000 Mb of so 100 would be the recommended Max Audio Minutes.
Caution: If a song has more audio minutes than the Max Audio Minutes will allow, the song will not load completely and playback will be unpredictable.
Load Files During Playback
This setting lets you allow or disallow the loading of media files during playback. File loading can cause temporary memory or CPU peaks. Visual and/or audio “stuttering” in playback may be prevented if file loading during playback is disallowed.
MIDI Piano
There are three options for routing MIDI note data to a system piano sound.
- Always – This option ALWAYS routes MIDI note information to the system piano sound.
- Auto (default) – This option routes MIDI note data to the system piano sound if there are no other MIDI ports available.
- Never – This option NEVER routes MIDI note data to the system piano sound.
Display MIDI Bend, CC, PC
This setting lets you choose if you want to see MIDI Bend, Continuous Controller, and Program Change messages in MIDI files.
UI Scale
The UI (user interface) Scale setting lets you choose the size of the Caedence interface. We recommend “Normal” for larger screen sizes, and “Big” for smaller screen sizes.
Max Cache GB
Cache database storage helps files load faster and save bandwidth. The default setting is chosen based on your available system resources.
Band Leader Stage Syncing (experimental)
There are two options for syncing devices to a Band Leader’s Stage. This setting only applies when you are hosting a Stage.
- Safe Mode (default) – This option uses Caedence’s standard device syncing method.
- Fast Mode (advanced users only) – Fast Mode may let devices sync tighter and respond faster. This mode should only be used by advanced users.
Preload Images and PDFs
This setting lets you choose how you want to preload any images and PDFs in a set on your device.
- Current Song – This option will download ONLY the images and PDFs of the current song and download additional files when a new song is chosen. This option is useful and recommended for devices with limited memory resources.
- Full Set – This option will download ALL the images and PDFs of the entire set on your device. This option is useful for devices with greater memory resources.
Sticky Tracks Settings
Choosing “Yes” allows you to apply track settings to all of the songs in a set. For example, if you choose Full-Screen lyrics on the first song of the set, all subsequent songs will be in Full-Screen lyrics view. To revert to normal view-saving functionality, choose “No”.
Note – We do not recommend setting Sticky Tracks Settings to “Yes” when building or editing songs.
Connected Devices
This is a read-only display of the connected audio and MIDI devices that Caedence is currently connected to. This display will change in real time as devices are connected and/or disconnected.
5. Hotkeys & MIDI
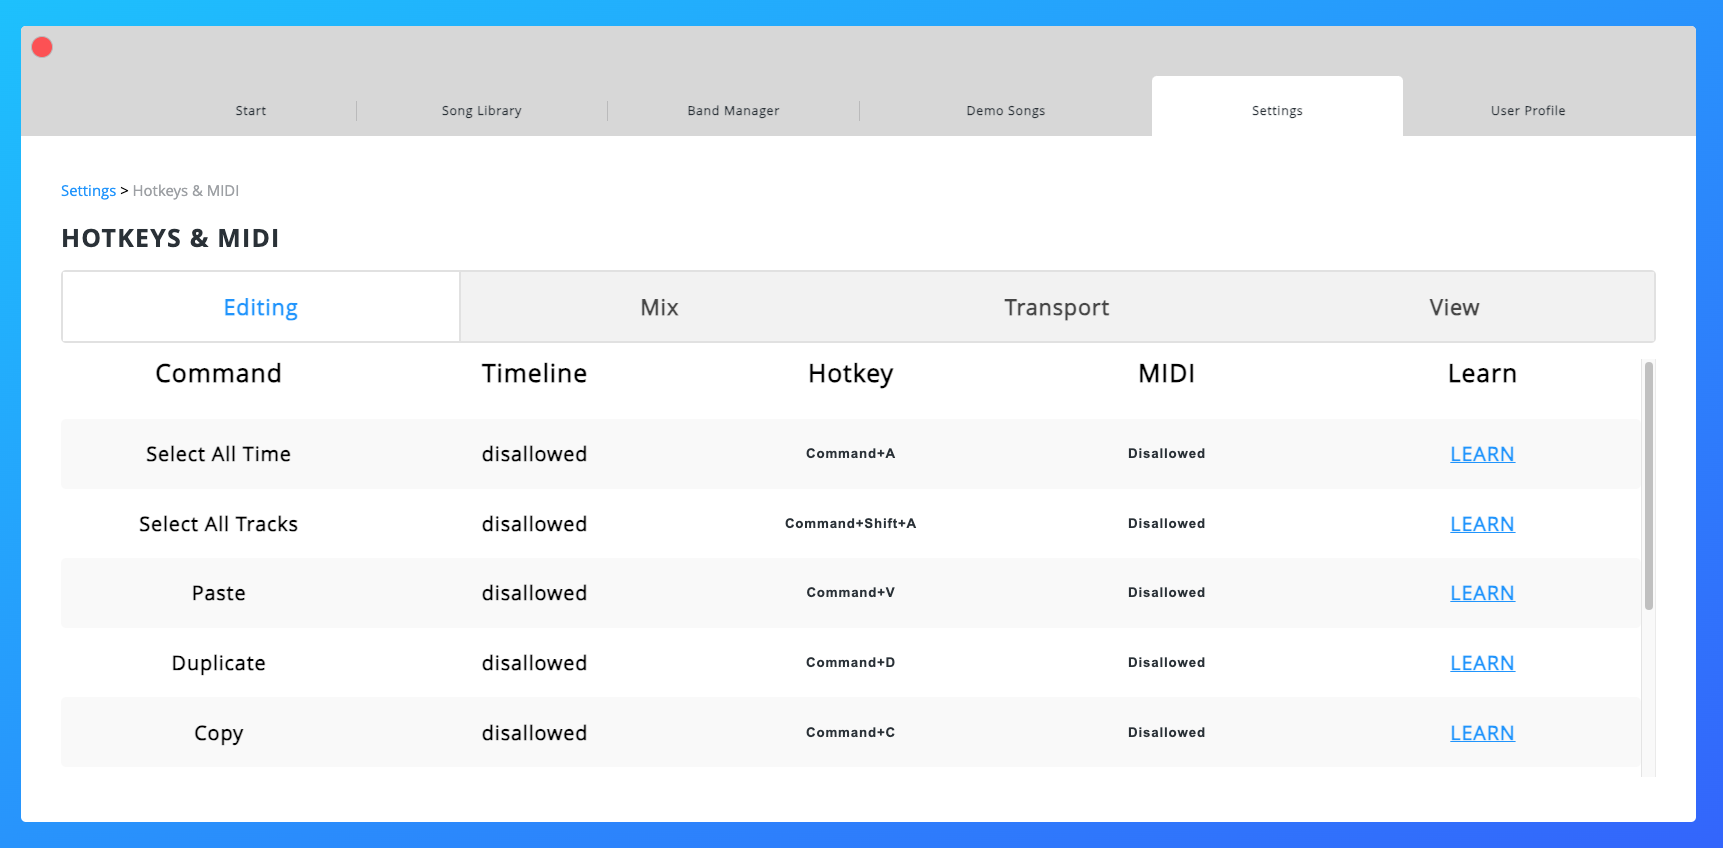
There are many commands in Caedence that can be controlled by Hotkeys and/or MIDI (like note data and program changes). In order to change the default Hotkeys and/or assign certain functions to MIDI, click “ASSIGN HOTKEYS & MIDI”.
Note – MIDI Assignment is available only on the PROFESSIONAL plan or higher.
The Commands are grouped into four tabs: Editing, Mix, Transport, and View. From left to right, the top row of the table shows:
- Command name
- The Command’s default Hotkey
- Whether the Command can be assigned to MIDI
- A “LEARN” link to enter “Learn Mode” for both Hotkeys and MIDI (when allowed)
To edit/create an assignment, go to the Command you want to assign to a new Hotkey or MIDI and click “LEARN”. (For MIDI assignments, make sure your MIDI device is connected). While in Learn Mode, the “LEARN” link will say “LEARNING” until you hit a key on your keyboard or send a MIDI command. Once you do one of these actions, the assignment will display in the Hotkey and/or MIDI columns.
6. Basic Terms & Concepts
Although Caedence’s design, features, and workflow are reminiscent of other applications, there are several unique terms and concepts to become familiar with before you begin.
Terms
- Caedence User – Anyone with a Caedence account. Each Caedence User has a unique email address and user name.
- Band – A group of one or more Caedence Users. Each Band is created by one – and only one – Band Leader. Each Band also has one – and only one – Stage.
- Stage – An online meeting that syncs device playback – as well as certain edits – between the Band Leader and all present Band Members. Whenever the Band Leader selects a Band to edit, manage, or play one of its Sets, that Stage is said to be “Live”. Any Band Members who click on that Band will be synced up with the Band Leader and any other present Band Members. The Stage stops being Live if the Band Leader selects another Band or a single Song from their Song Library – or if Internet connection is lost.
- Song – A single Caedence session. A Song has one – and only one – Song Owner, but a single Song can be used in multiple Sets and Shows of Bands that the Song Owner leads. Band Leaders can grant Band Members certain Permissions to edit a Song.
- Set – A collection of one or more Songs
- Show – A collection of one more Sets
Roles – Band Leaders & Band Members
Each Caedence User can be both a Band Leader of one or more of their own Bands – and a Band Member in one or more Bands led by other Caedence Users. A Caedence User does not have to be a Band Leader or Band Member.
Here are some actions that only Band Leaders can do with Bands they own:
- Edit the Band’s name
- Create, edit, and delete Shows and Sets
- Invite and remove Band Members
- Grant and remove Permissions to Band Members
- Put the Band’s Stage in Live status
- Delete the Band
Here are the actions that Band Members can perform in Bands they do not own:
- Practice any Songs that occur in that Band’s Shows/Sets
- Edit and save certain information in Songs owned by the Band Leader if Permissions have been granted
- Add Private Notes
- Customize their Song views
- Control Transport, Click, Mix, and/or MIDI playback during a Performance if Permissions have been granted by Band Leader
Practice vs. Performance
Band Members are in Practice mode when they play a Band’s Set when the Band Leader is NOT managing that Band or playing any of that Band’s Sets. As soon as a Band Leader selects a Band to manage or play one of its Sets, that Band’s Stage is Live and is in Performance mode. Band Members who join the Stage will also be in Performance Mode and have their devices synced to the Band Leader’s – even if it’s only for a Band rehearsal.
Permissions
Similar to other collaboration platforms, Caedence lets Band Leaders grant and/or remove certain Permissions from Band Members. There are two main categories of Permissions: Playback and Editing. Playback Permissions allow Band Members to control Transport, Click, Mix, and/or MIDI playback when the Band’s Stage is Live. Editing Permissions allow Band Members to edit the different Track Types either during Practice or Performance modes.
7. Syncing Devices
Caedence’s syncing technology uses the Internet. The software does not create a local wifi network or use Bluetooth between the devices. As such, cross-device syncing does not currently work in the absence of Internet. To be clear, if you don’t need to sync with other devices, Caedence can function in the absence of Internet AFTER a Set has been loaded into your browser. However, any edits made after Internet connection has been removed will NOT be saved.
Both Band Leaders and Band Members can customize their views of a Band’s Songs while on Stage (in edit or playback mode) without affecting anyone else’s view or experience. These view customizations are per user and per Song; they will persist even if you change devices.
Note – The first time Band Members view a Song that belongs to a Band Leader, they will inherit the view settings of the Band Leader (except for Private Notes, and taking into account Permissions and Track visibility settings):
- Show & hide tracks
- Choose a full-screen view
- Set track height & zoom level
- Tailor other Track display options
- Add & edit private notes (only during edit mode)
How to Sync Devices
Band Leaders
- Log in to Caedence
- Select your Band from the Start Menu or the Band Manager tab
- Select a Show
- Select and play a Set
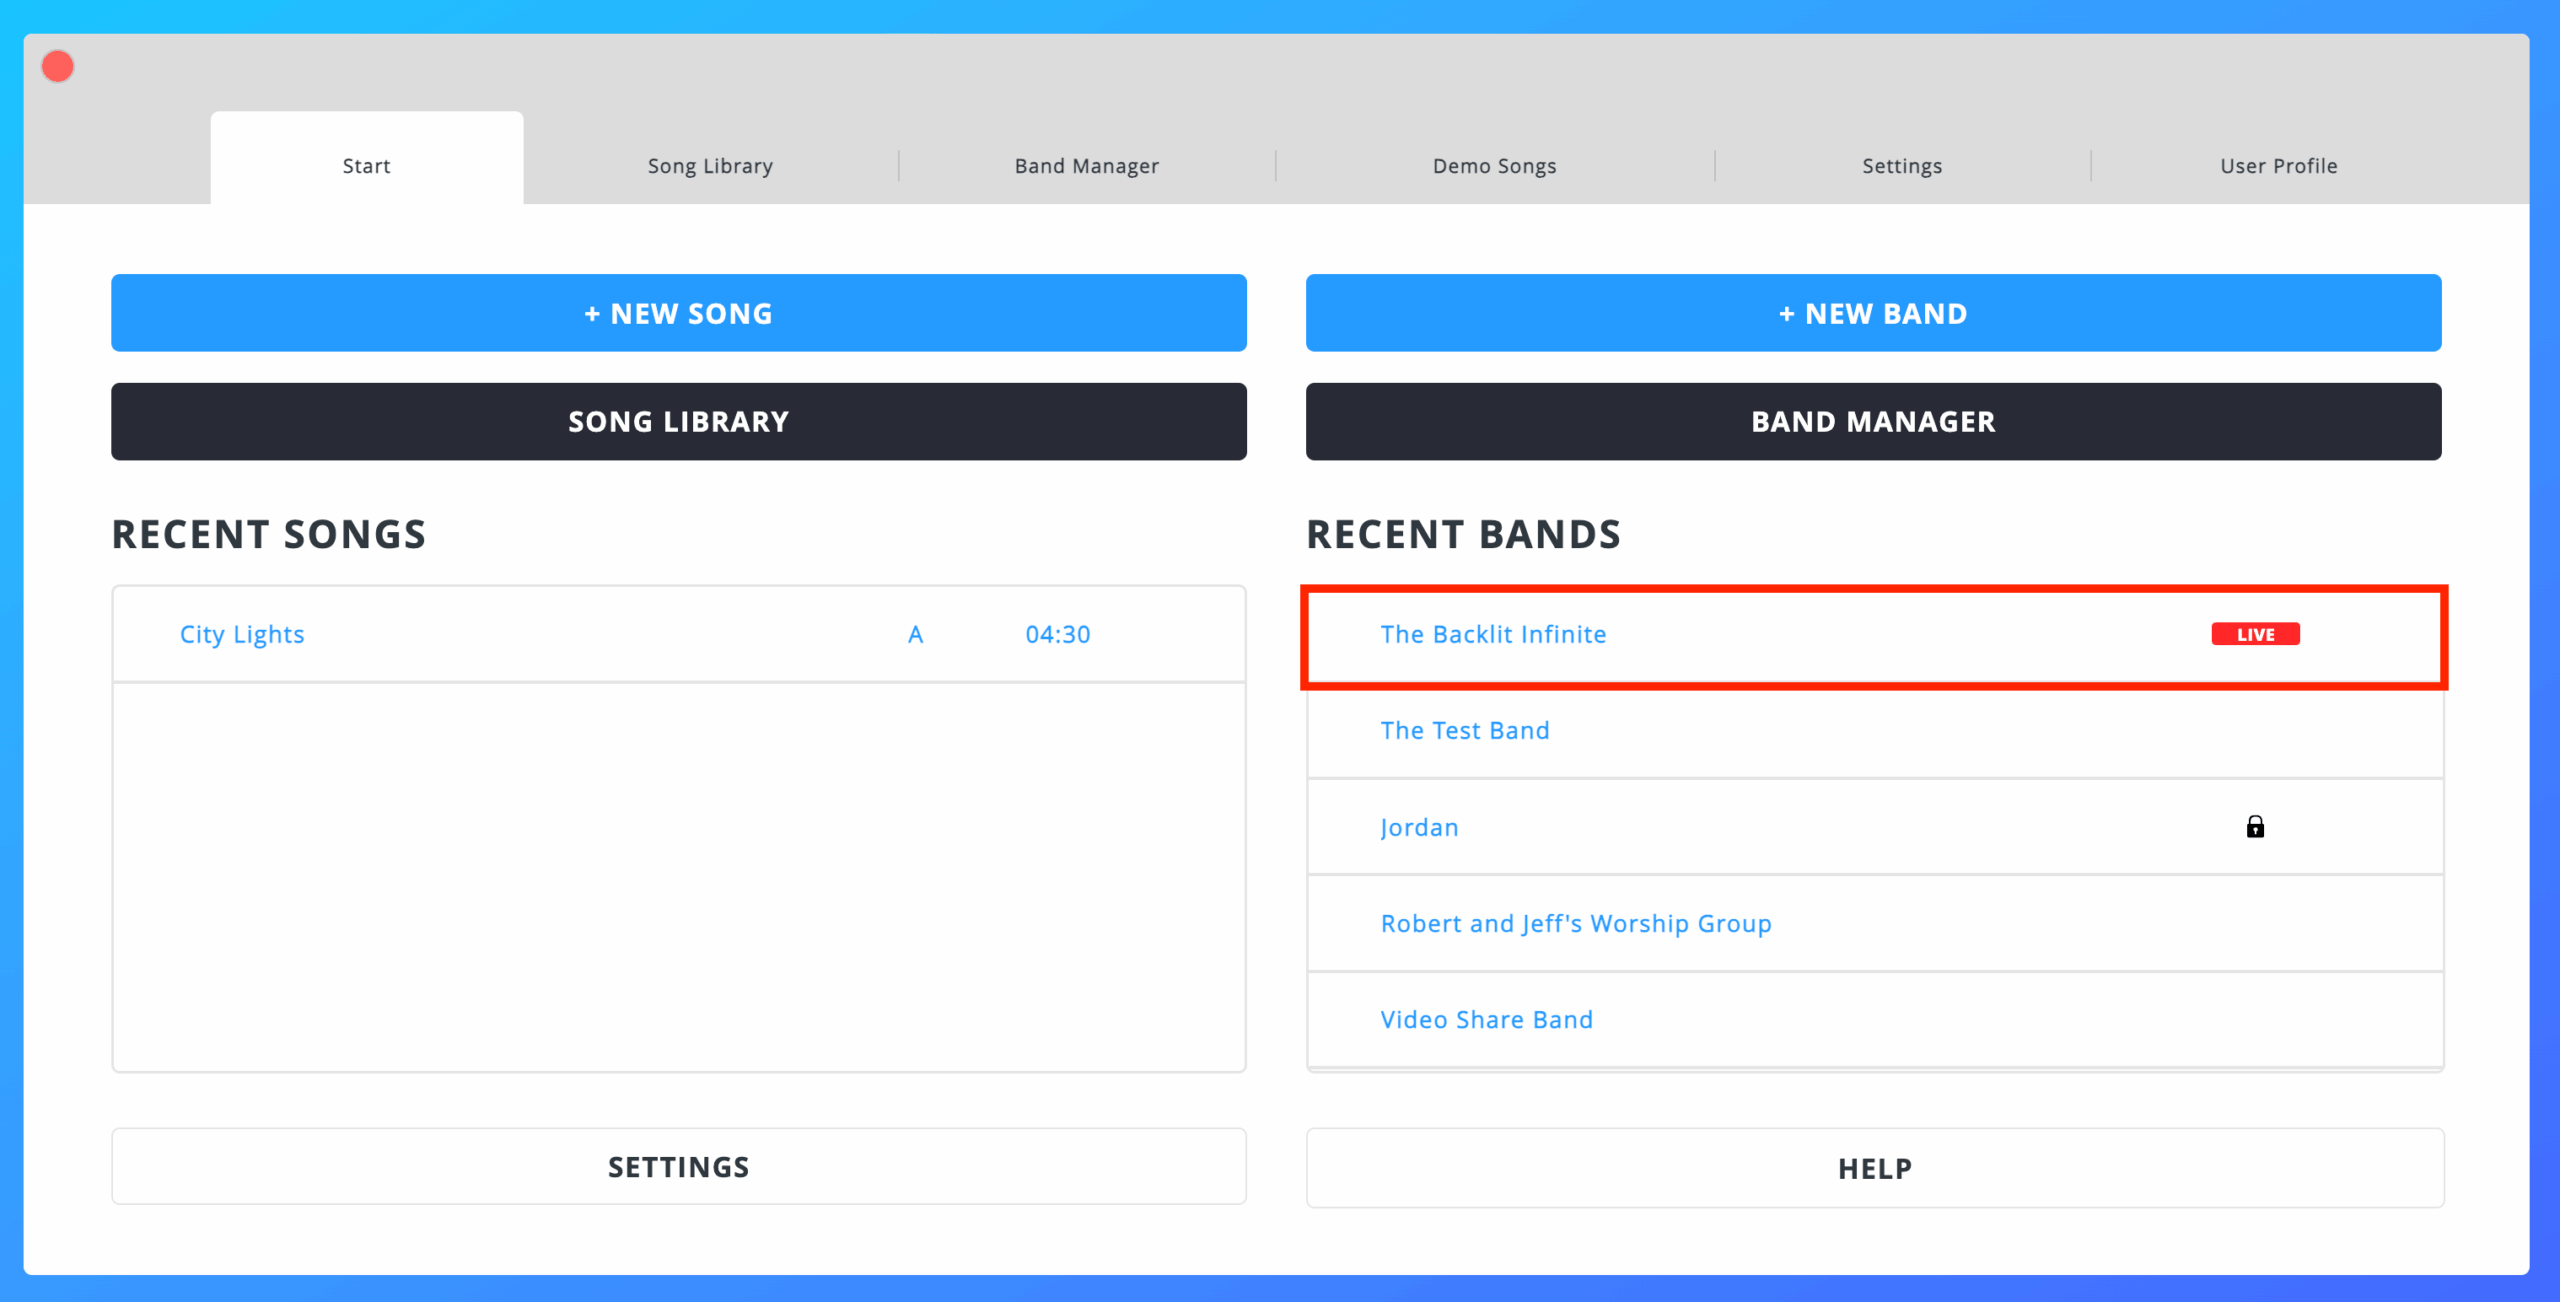
As soon you select this Band, Band Members will see your Band’s Stage as “Live” in their Recent Bands list. Once these Band Members click on your Band, they join the Stage, and their devices become “synced” to yours. Transport moves and certain edits will be reflected on their devices.
As Band Members join and leave the Stage, you will see their initials appear and disappear at the bottom of the Set List Flyout. Clicking on a Band Member’s initials allows you to quickly manage their Permissions.
Note – Choosing a single Song from the Song Library WILL NOT cause a Band’s Stage to be “Live”.
You can stop hosting the current Band’s Stage by playing a single Song from your Song Library or by playing another Band’s Set. Once you stop hosting the Stage, any Band Members still on the Stage will automatically be put into Practice Mode.
Band Members
- Log in to Caedence
- Click on the Band whose Stage you want to join from the list of Recent Bands (a red “Live” icon will appear next to the Band name).
Once you click on the Band, you will see “Joining Stage” at the top of the Main Interface where the Song title usually appears. It may take a few moments for your device to sync to the Band Leader’s device. Once your device is synced, it will be cued to the same Song (and bar/marker) as the Band Leader’s device. Any transport moves, Song selections, or eligible edits made by the Band Leader (or Band Members with sufficient Permissions) will show up on your device.
If you want to leave the Stage, just play another Band’s Set or a single Song from your own Song Library.
Note – You can still select another Caedence user’s Band as long as you’re a Band Member, even if the Band Leader is not hosting that Stage. This is known as Practice Mode.
Sync Best Practices & Troubleshooting
- Restart all devices before syncing.
- Make sure all devices are connected to the Internet – it is not necessary for all devices to be on the same wifi network.
- It is best for the Band Leader to begin hosting the Stage BEFORE Band Members join it.
- Whenever possible, Band Members should join the Stage when the Band Leader’s device is NOT in playback mode.
- If there are sync problems with playback, transport moves, or eligible edits, 99% of the time the best way to achieve sync is for Band Members to reload their page, re-launch Caedence, and then choose the live Band again.
8. Data Storage and Media Management
Caedence offers different Data Caps depending on your plan. The following types of media can be uploaded into your Songs and will count towards your Data Cap:
- Audio (.wav, .mp3, and .flac)
- Videos (.mp4)
- PDFs (.pdf)
- Images (.png, .jpg, and .gif)
- MIDI (.mid)
Other Data Storage Considerations
- Once your Data Cap has been met, additional files will no longer be anble to be uploaded to Songs that you own – by you, or Band Members with permission.
- You may decrease your data usage by removing Blocks containing files and/or deleting Songs.
- In order for a file to be removed from your Data Cap, EVERY Block containing that file in your account must be deleted.
- Unique files are only counted once. Duplicate Blocks with the same file do not count against your Data Cap.
Band Members with proper Track permissions will be able to upload files of that Track type (Video, Audio, etc.) to Songs in that Band, and the files will count toward YOUR Data Cap. - Conversely, if you have proper Track permissions in another Caedence user’s Band, you will be able to upload files to that Band’s Songs, and those files will count toward the Band Leader’s Data Cap.
- Media files in Songs you import count toward your Data Cap. Note that the imported data will not be reflected in your Current Data Usage until you have actually loaded the Song.
Best Practices For Video Uploads
As smartphone cameras continue to advance, they capture video at increasingly higher resolutions and frame rates, resulting in larger file sizes. While a 4K video at 60 frames per second might look stunning, these uncompressed files can quickly fill up storage space on your device. For professional video editing, maintaining this high-quality source material is important, but sharing these massive files online is often impractical and unnecessary.
Fortunately, most devices offer built-in options to reduce video file size while maintaining acceptable quality. Using your phone’s “share” or “export” feature typically applies compression automatically, often reducing file sizes by 50% or more without noticeable quality loss. Simple adjustments like trimming unnecessary footage from the beginning or end, or reducing the video dimensions from 4K to 1080p, can also dramatically decrease file size. Some apps even let you adjust the bitrate directly, giving you fine control over the quality-to-size ratio.
When compressing videos, choosing the right codec is crucial, and H.264 (also known as AVC) remains the gold standard for broad compatibility. While newer codecs like H.265 (HEVC) offer better compression, H.264 ensures your videos will play smoothly across virtually all devices and platforms, from smartphones to smart TVs. This widespread support makes H.264 the safest choice for sharing videos with friends, posting on social media, or uploading to video platforms.
